
An express checkout link takes a customer straight to Shopify checkout with the products, the subscription plan and a discount code already chosen — no product page, no cart. Each link also gets a QR code you can print on packaging or flyers. Creating one takes about 2 minutes.
Before you start: to sell a subscription through the link, you need an active subscription plan that includes the product — see Create a subscription plan. A one-time purchase link needs no plan.
Step 1: Open Express links
- In your Shopify admin, open Apps → RecurX Subscriptions → Growth.
- On the Express checkout links card, click Manage links (or Create your first link).
- Click Create checkout link in the top right.
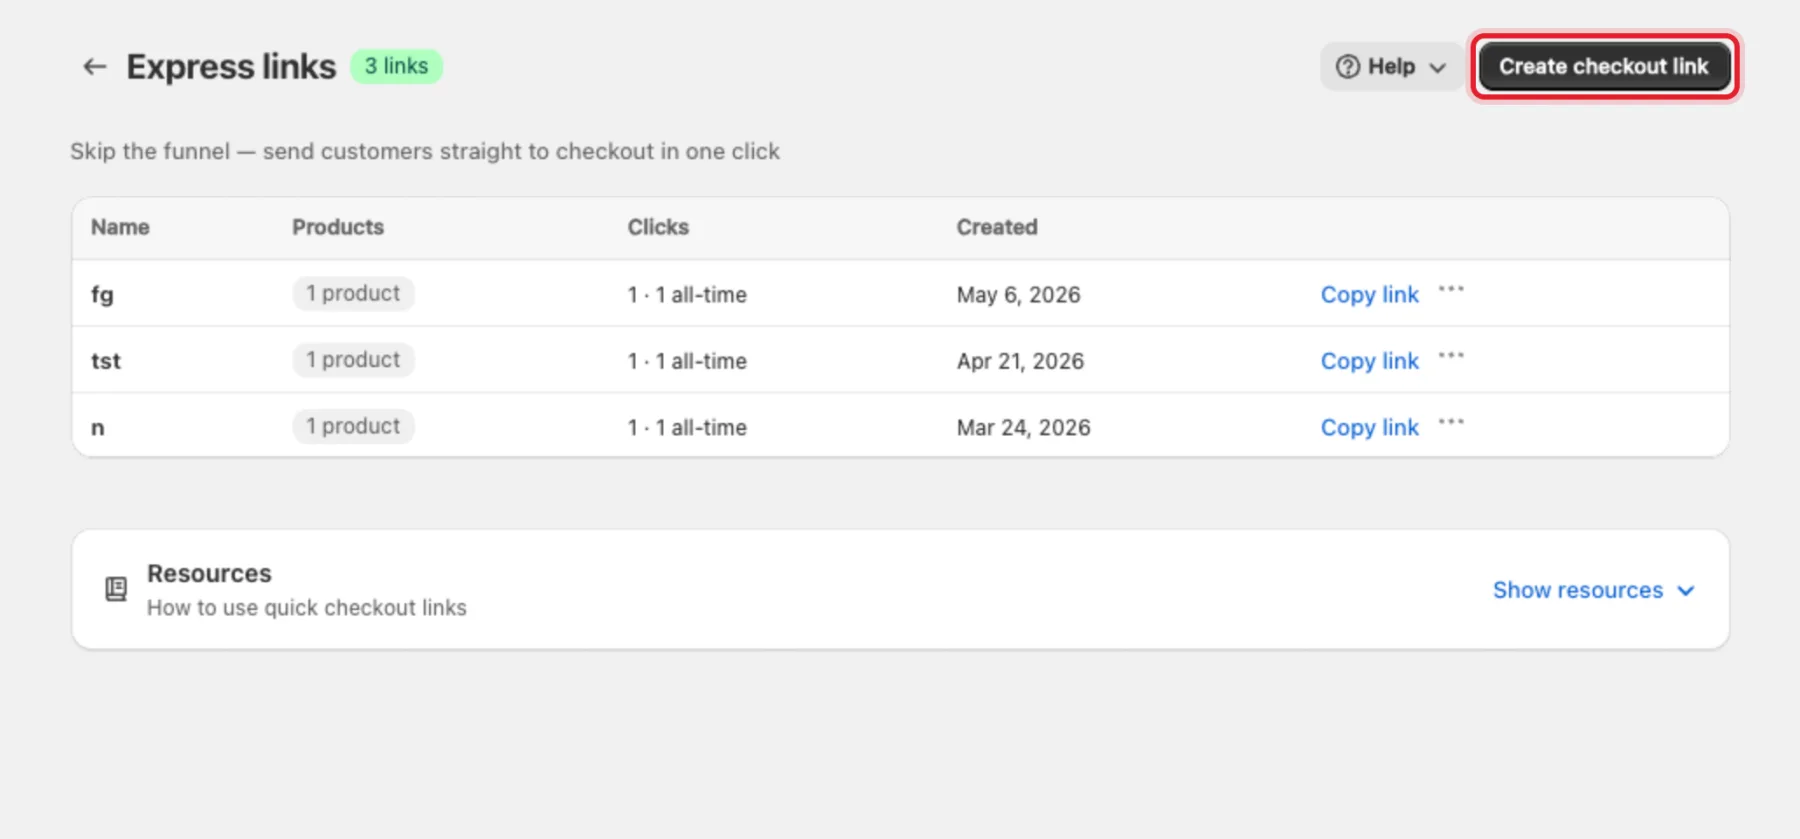
The list shows every link with its products, Clicks (last 30 days · all-time) and the date it was created.
Step 2: Name the link
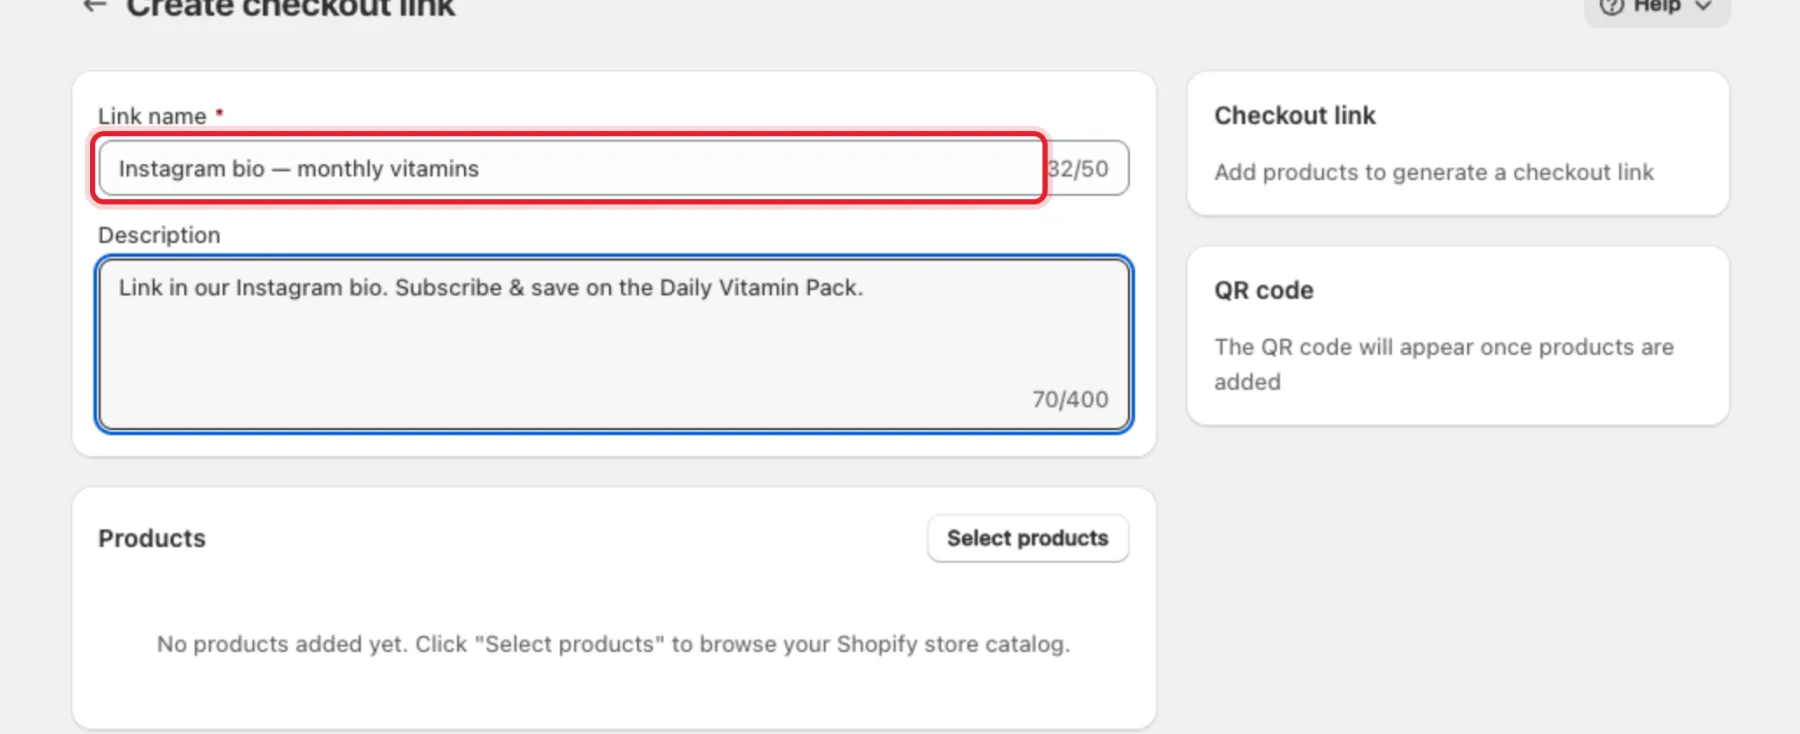
- Link name (required, up to 50 characters) — only you see it. Name it after where you'll share it, for example Instagram bio — monthly vitamins.
- Description (optional) — a note for your team.
Step 3: Add products
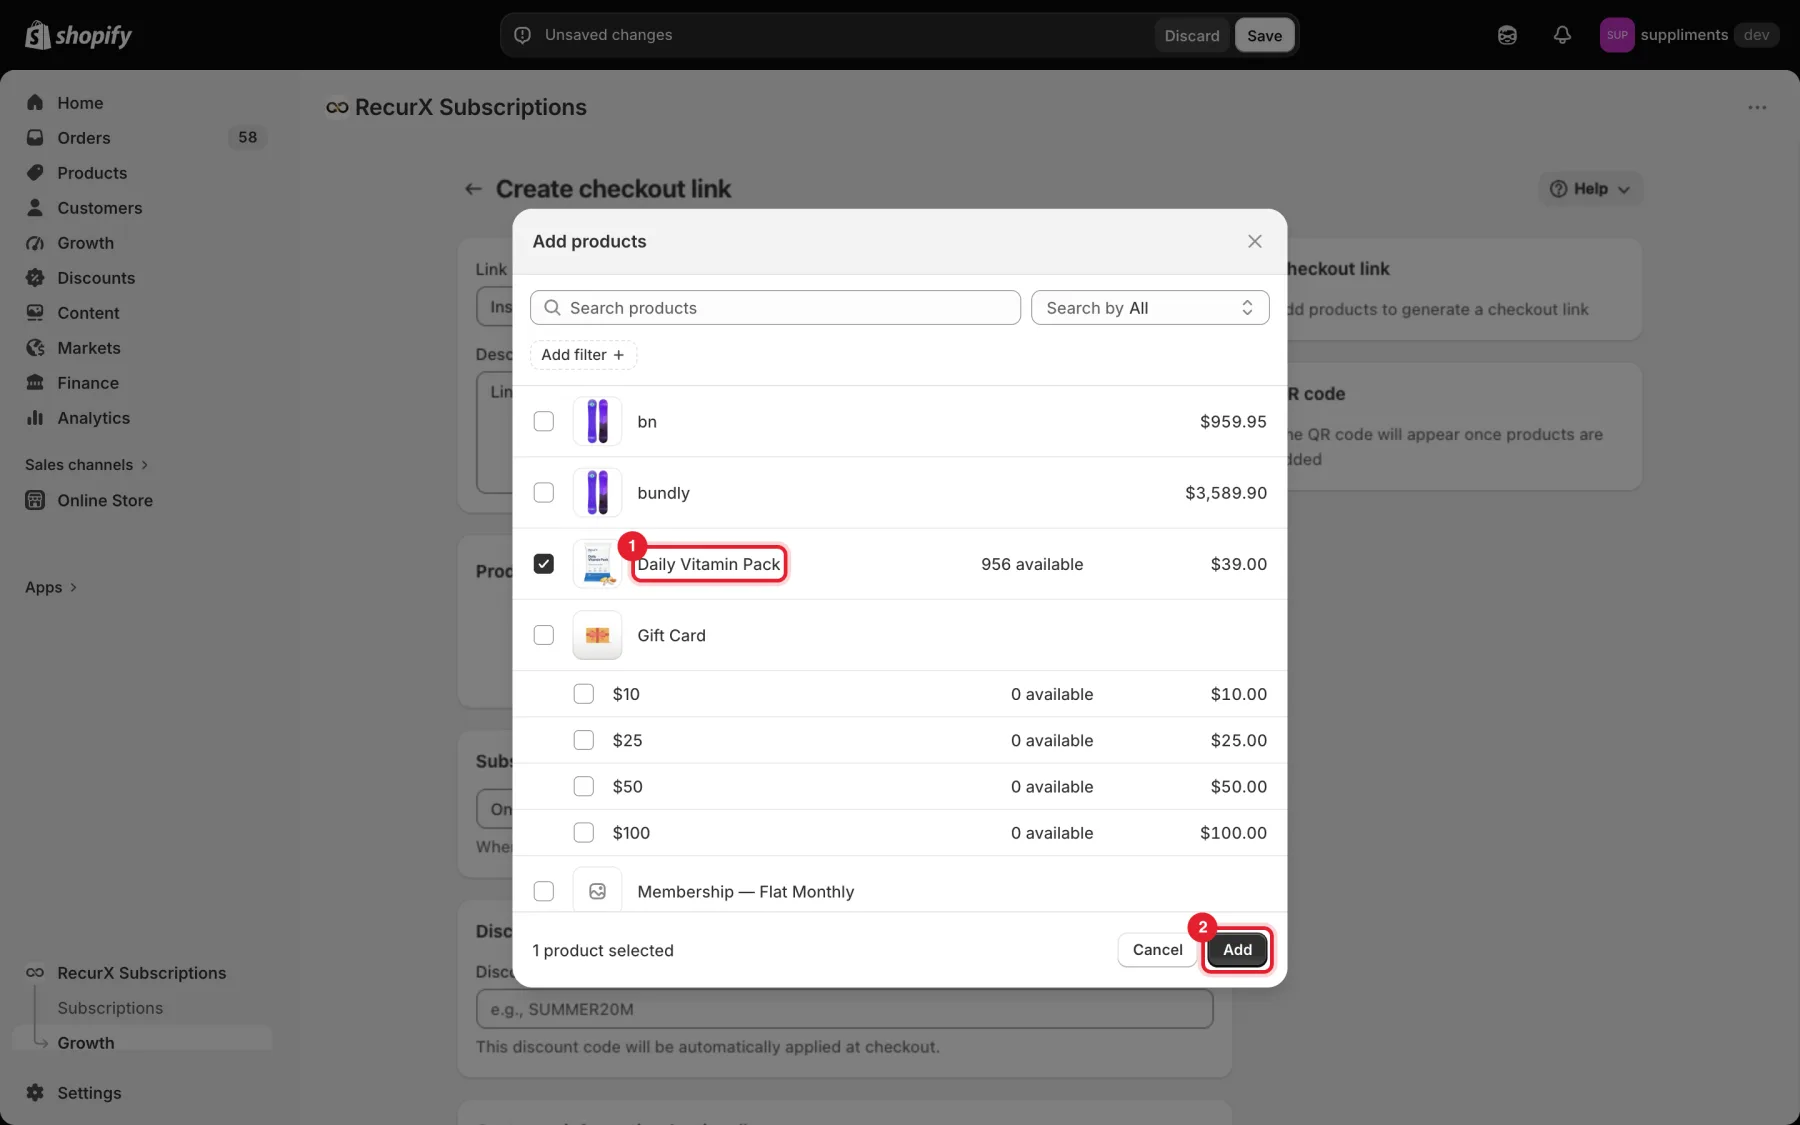
- In the Products card, click Select products.
- Shopify's product picker opens. Tick a product or variant.
- Click Add.
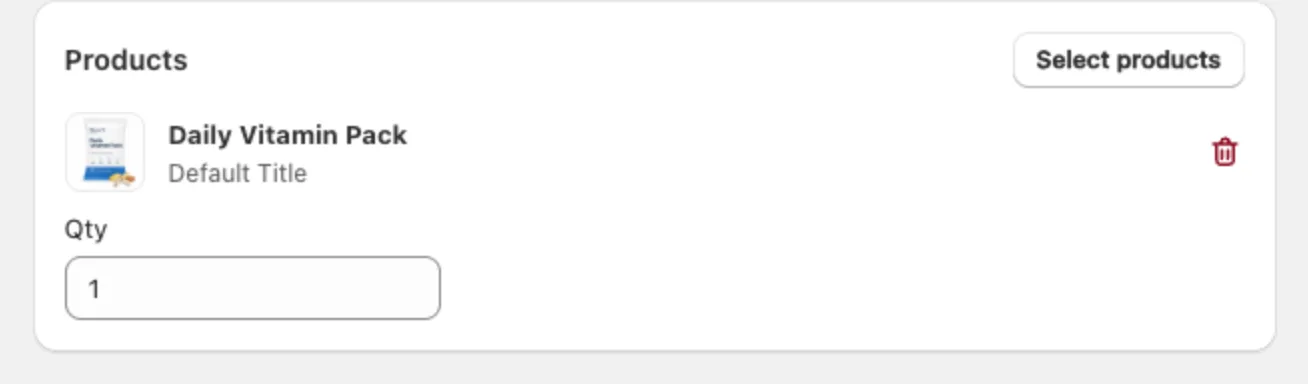
The product appears in the card. Change Qty to put more than one in the checkout, or click the trash icon to remove it.
Note: A link works best with up to 10 products. With more, RecurX asks you to remove some before saving.
Step 4: Choose the subscription (optional)
Under Subscription frequency (optional), pick one of your active plans. The list shows each plan's name, price and interval.
- Leave it on One-time purchase (no selling plan) for a normal one-time checkout.
- When you pick a plan, the link sends the customer through that plan at checkout, so the order becomes a subscription.
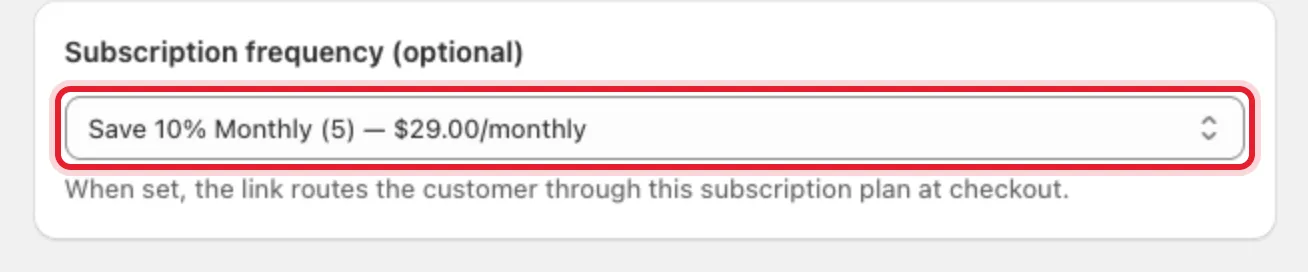
Important: Pick a plan that includes the product you added. If RecurX can't read the plan's subscription option from Shopify, it shows "Couldn't read this plan's subscription option from Shopify, so the link can't include it." and doesn't build a link — it never hands out a one-time link by mistake.
Step 5: Add a discount code (optional)
Type an existing Shopify discount code under Discount code (optional). Shopify applies it automatically at checkout.
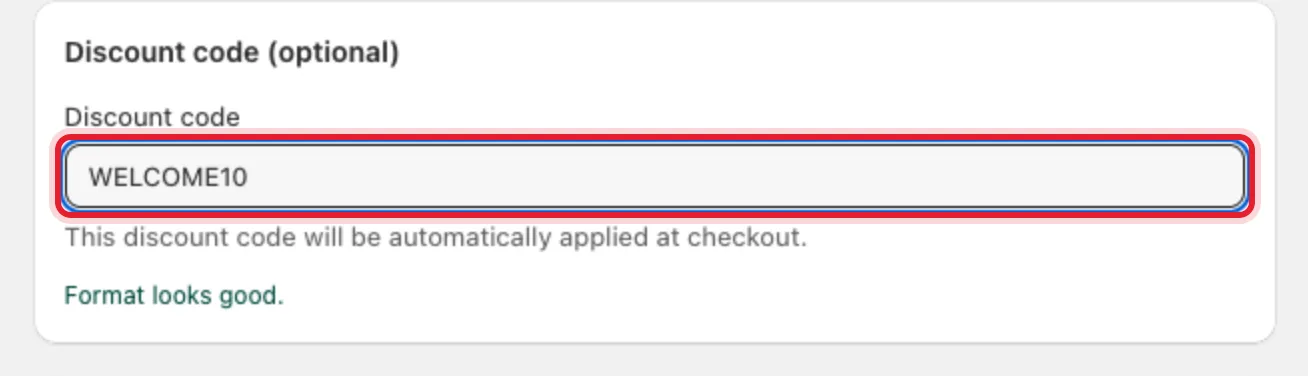
RecurX checks the format as you type (letters, numbers, dashes or underscores, up to 50 characters) and shows Format looks good. It doesn't create the code — create it first in Shopify admin → Discounts.
Step 6: Add tracking and prefilled details (optional)
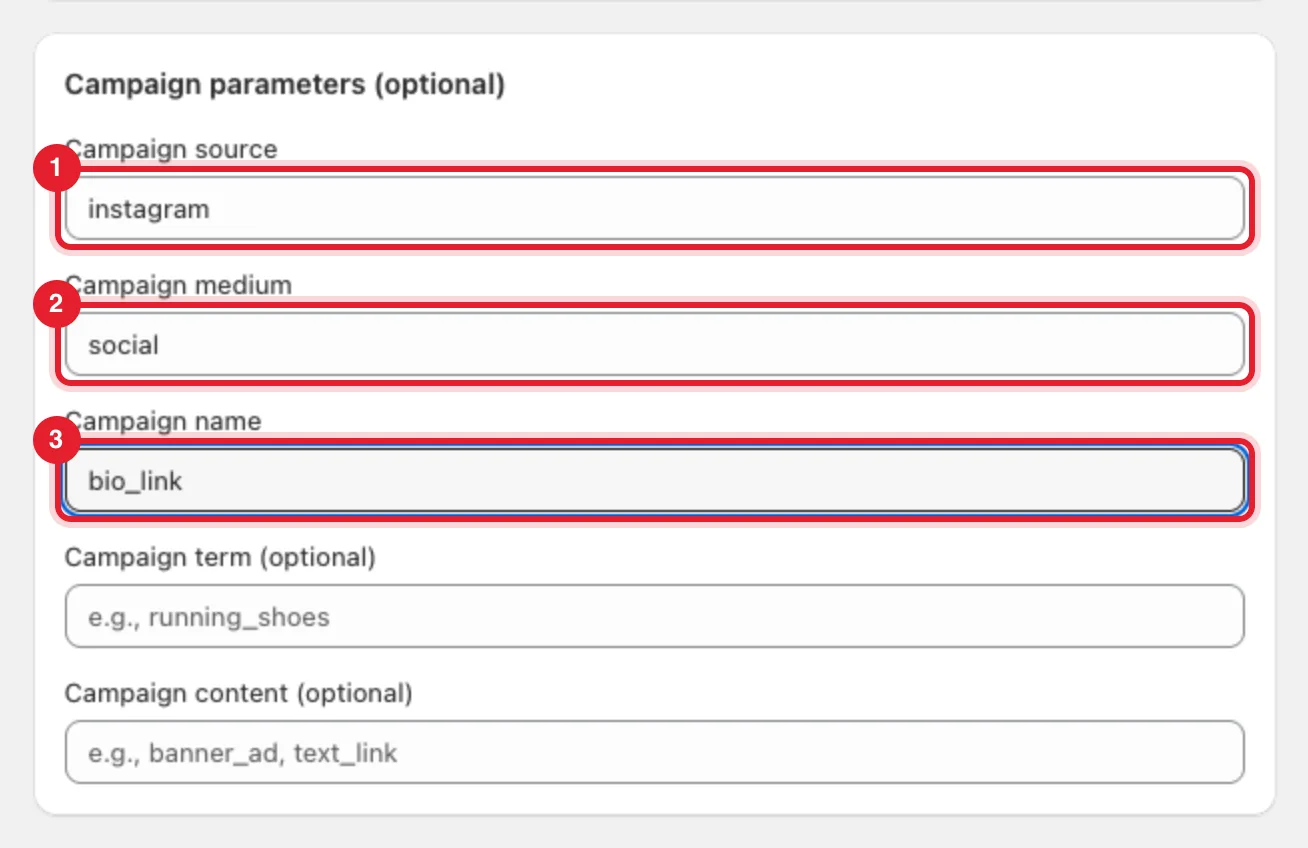
Campaign parameters (optional) — fill in Campaign source, Campaign medium and Campaign name (plus Campaign term and Campaign content if you use them). They're saved on the order as order attributes (utm_source, utm_medium, and so on), so you can see which campaign an order came from.
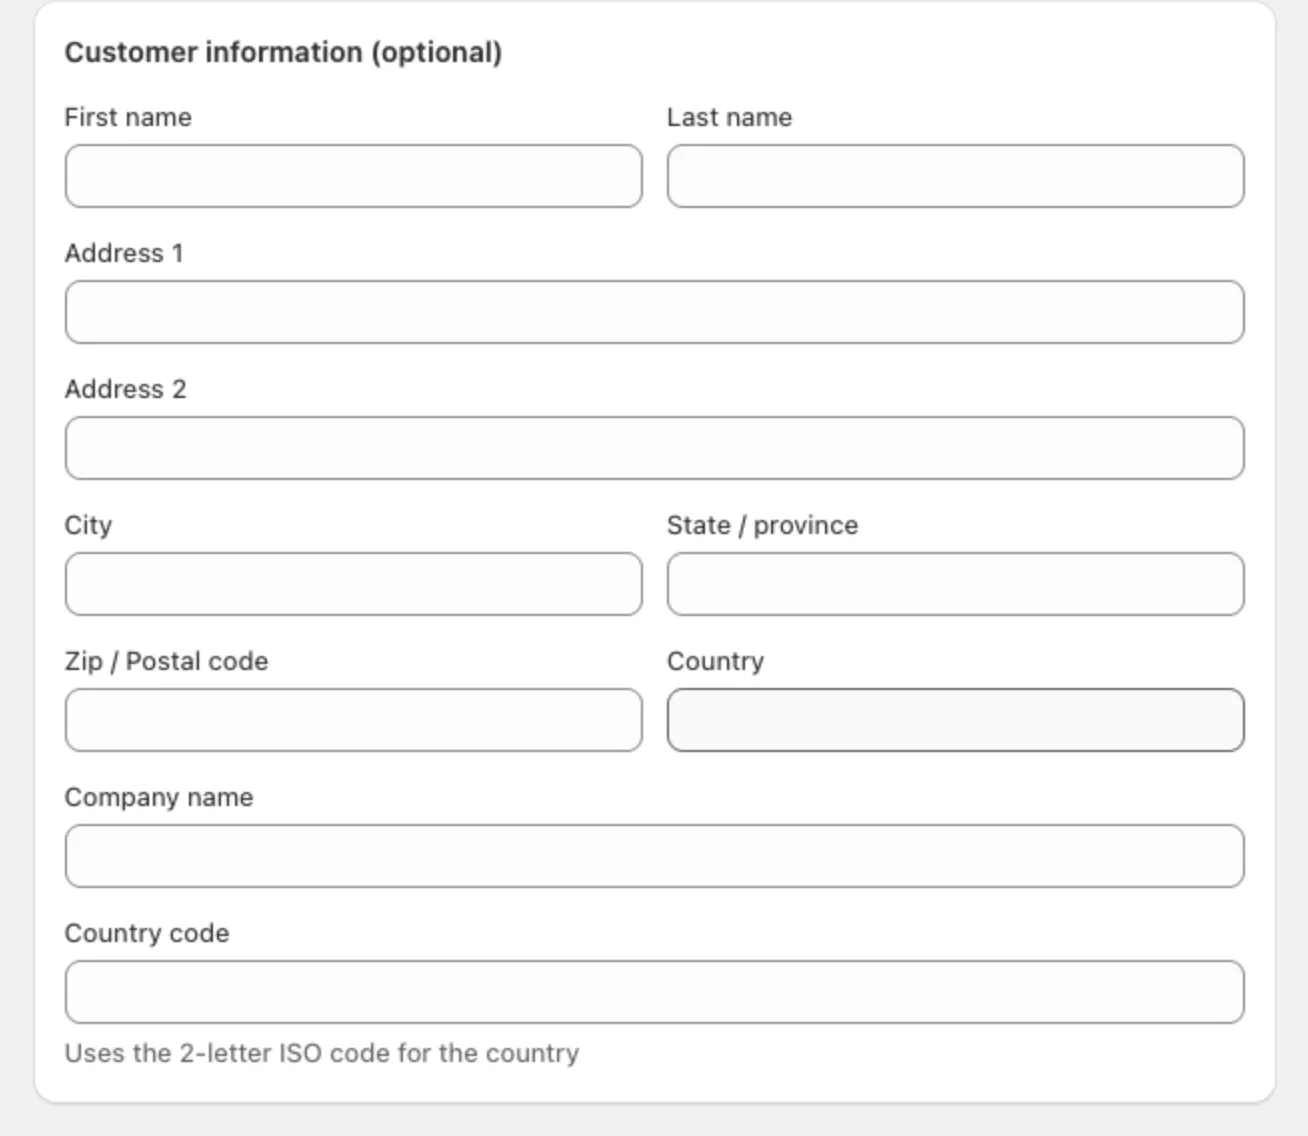
Customer information (optional) — prefill the shipping address at checkout (name, address, city, state / province, zip, country, company). Use it only for a link you send to one person. Order properties (optional) — click + Add property to add a key and value that are saved on the order.
Step 7: Check the link and the QR code
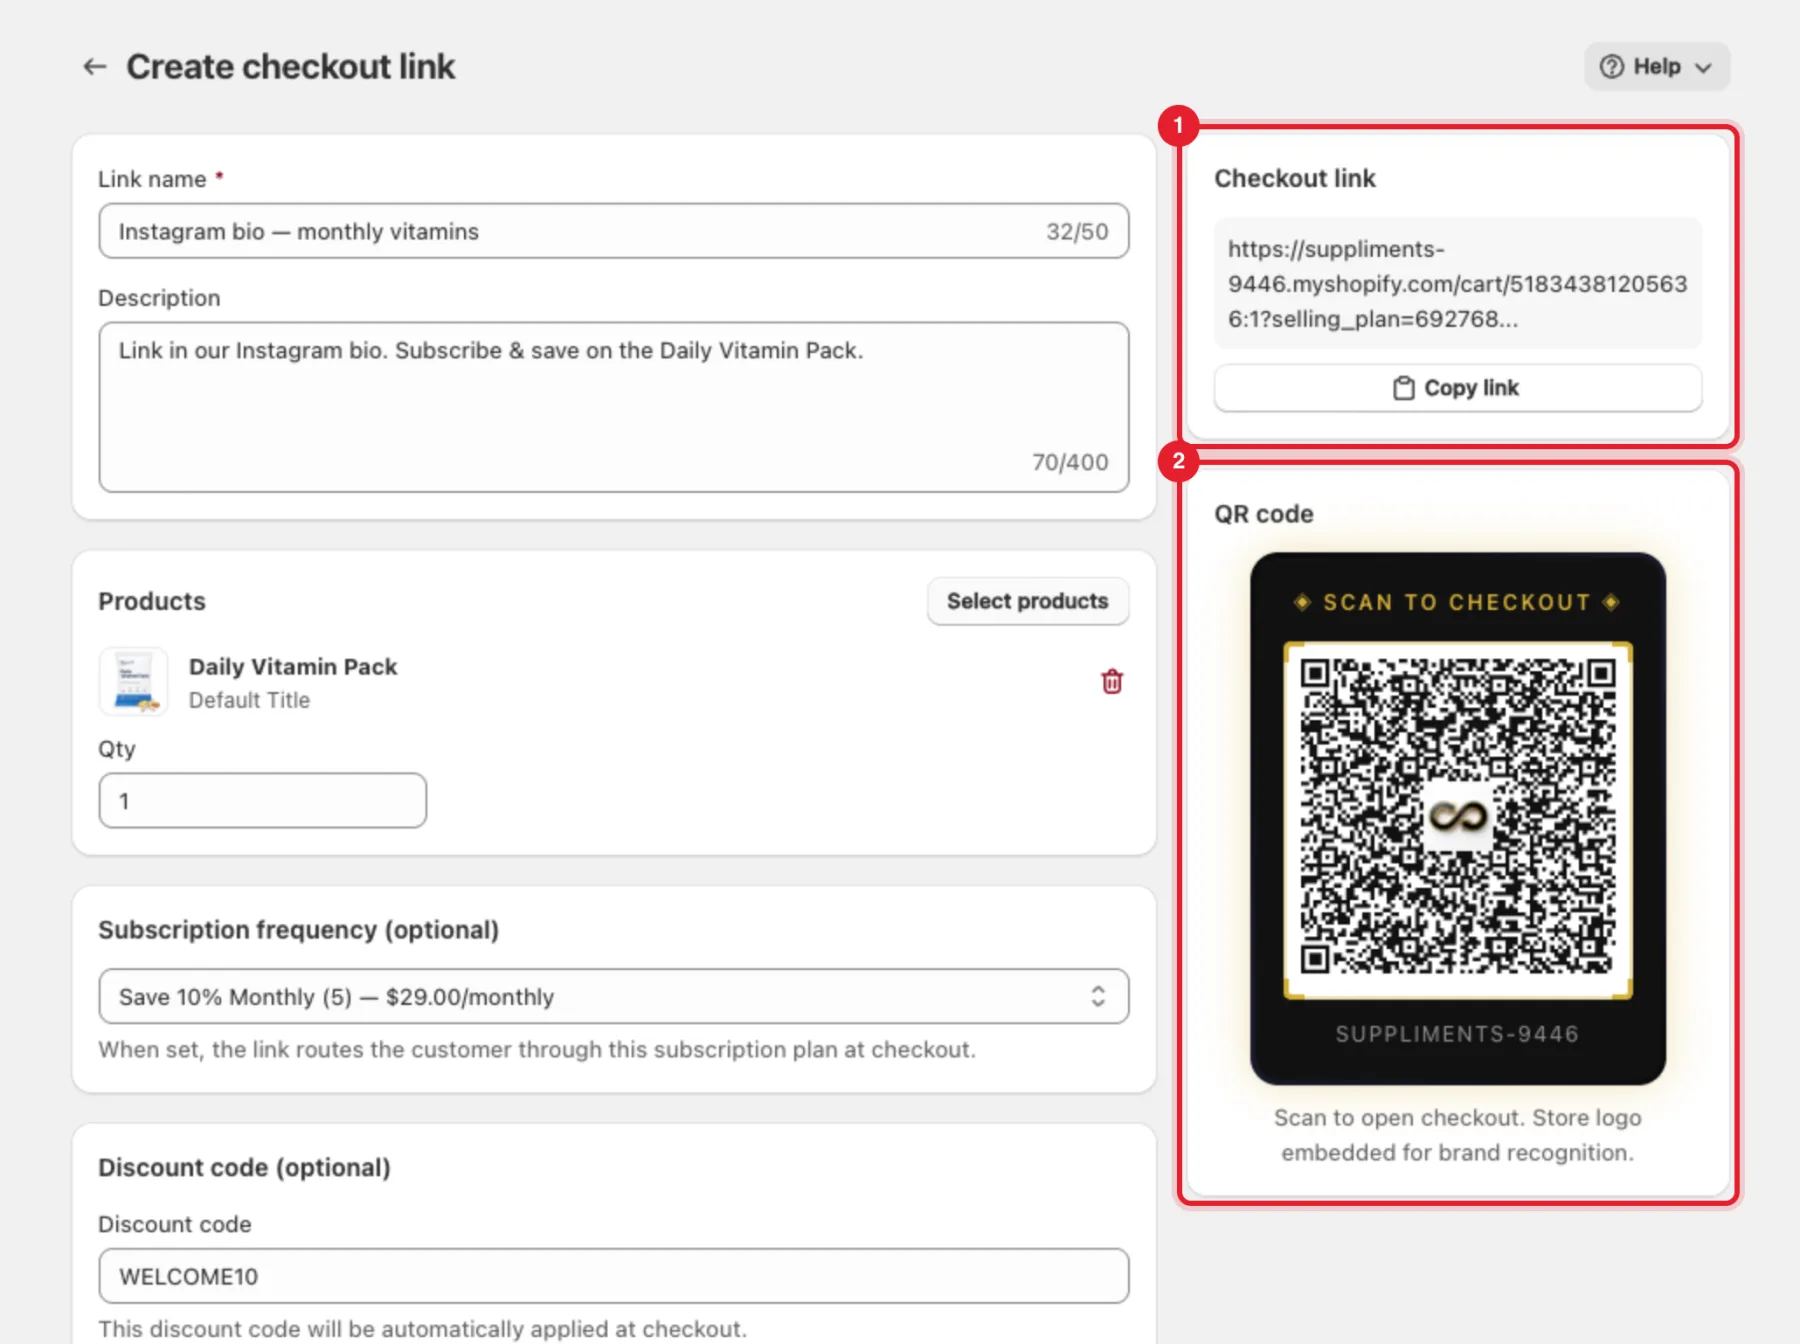
As soon as a product is added, the right-hand column shows:
- Checkout link — the generated URL, with a Copy link button.
- QR code — a scannable code for the same link, with your store name under it.
Step 8: Save the link
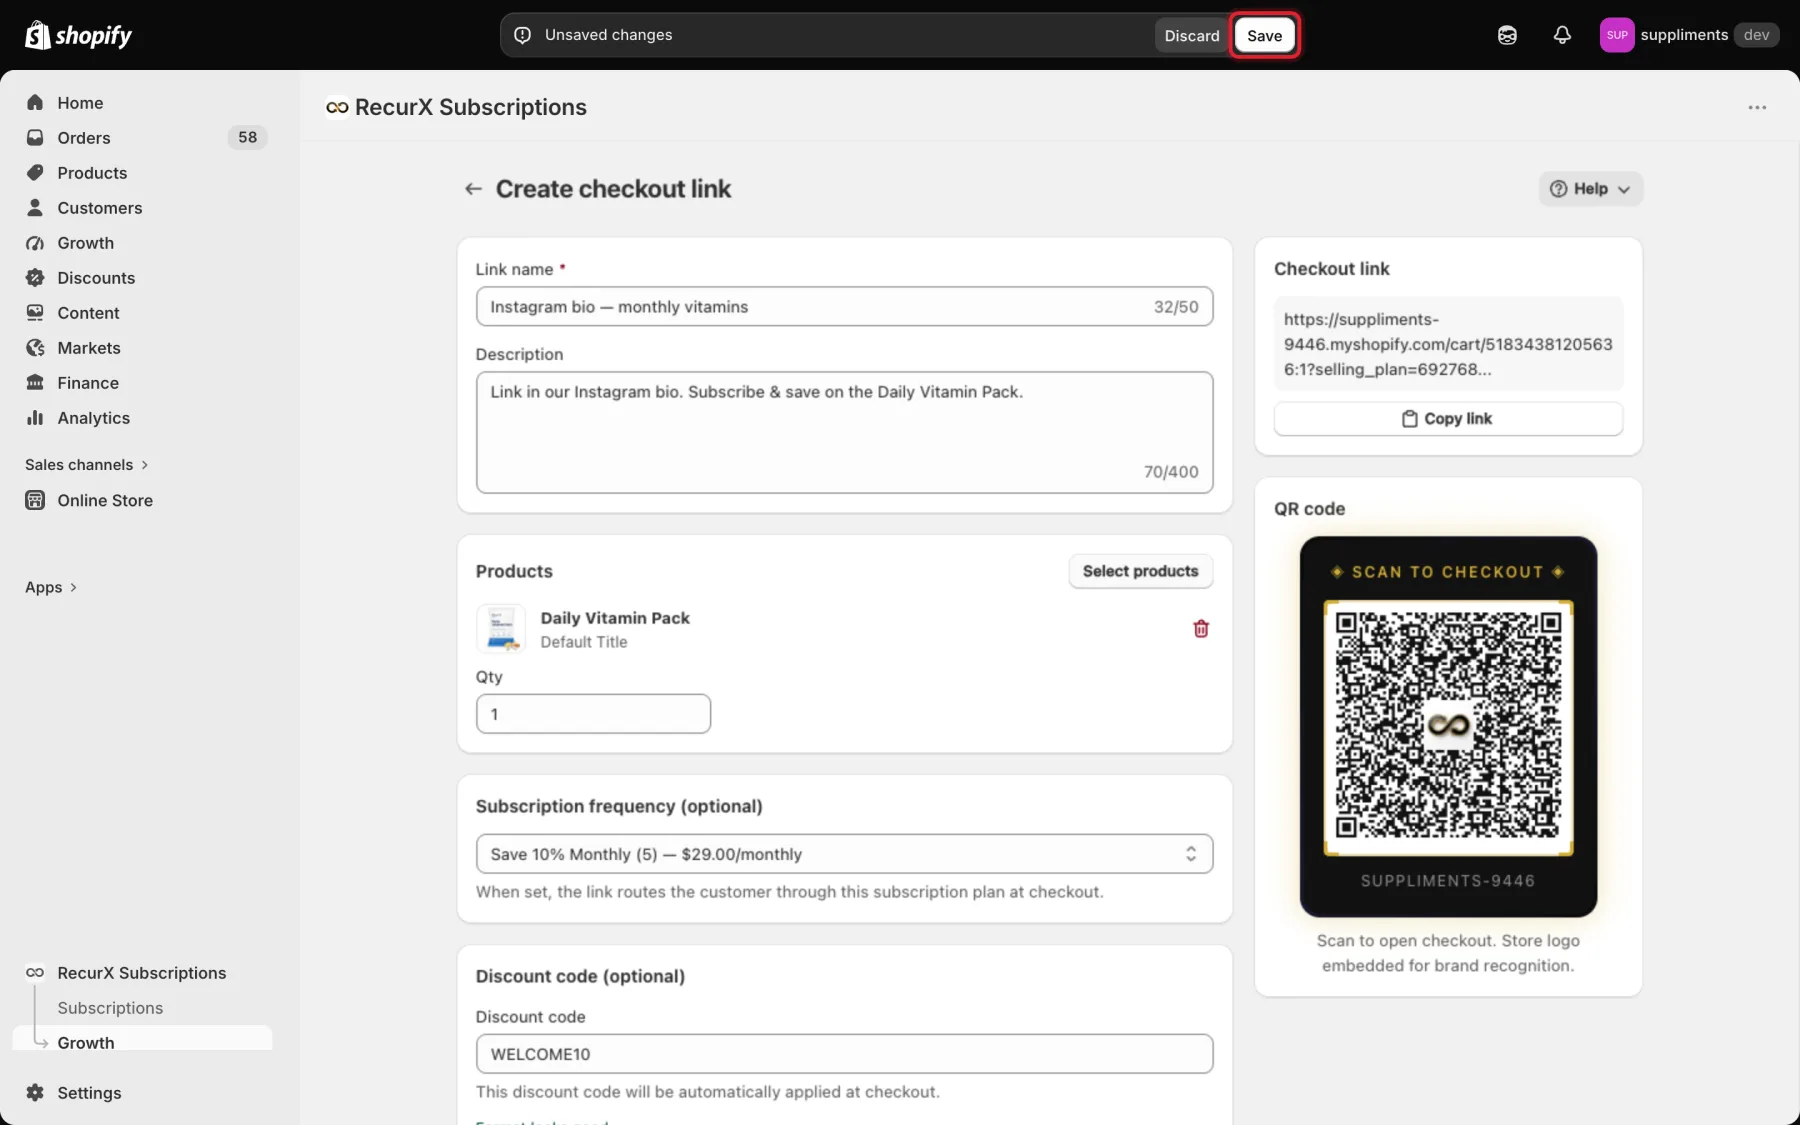
Click Save in the bar at the top of the page (or Discard to throw the draft away).
Step 9: Share it and get the QR code
Back on Express links:
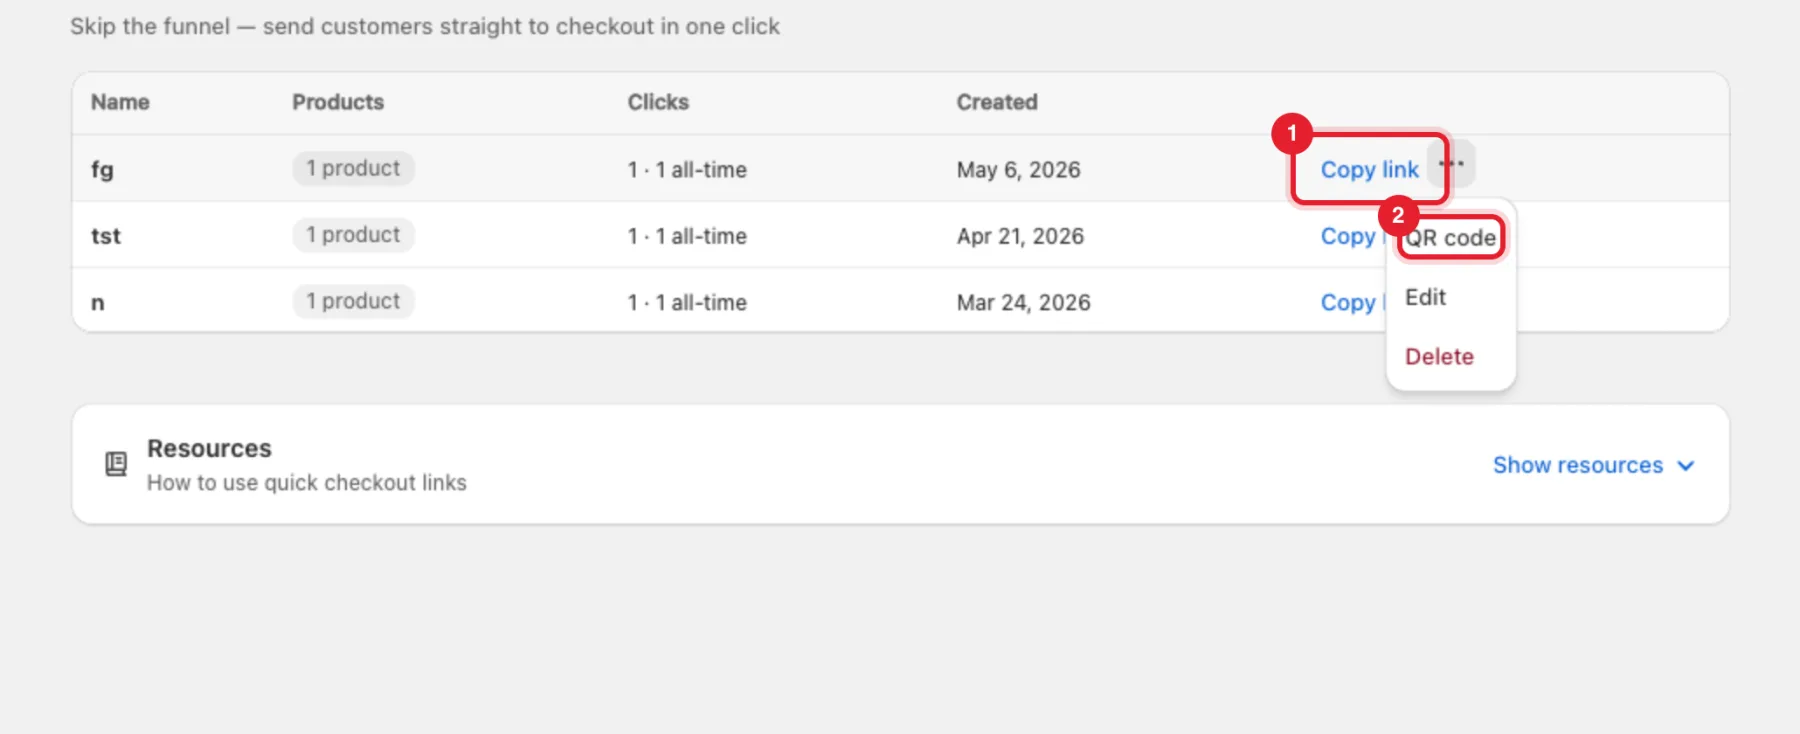
- Click Copy link on the link's row and paste it into your ad, email or bio.
- Click ••• → QR code to open the QR code. Edit and Delete are in the same menu.
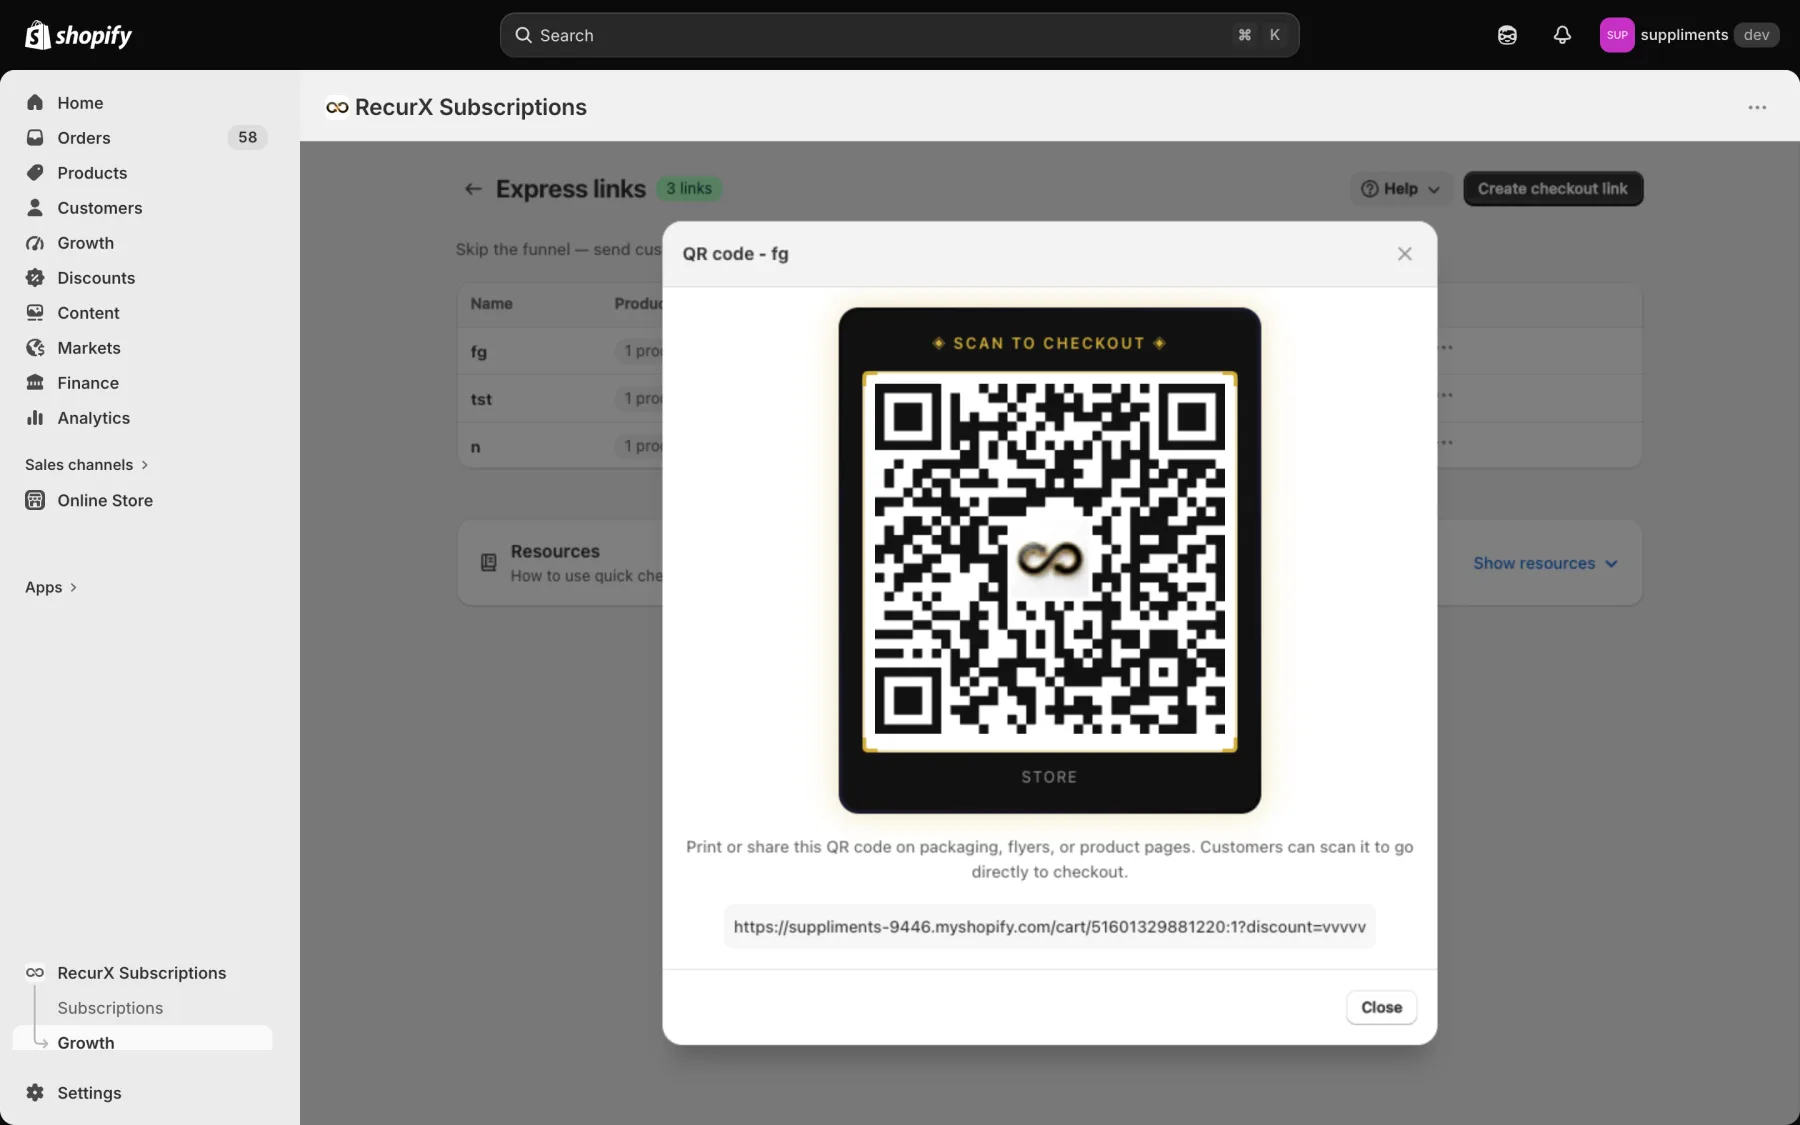
The QR code window shows the code and the link it opens. Print it or save it as an image for packaging, flyers or in-store displays.
Tip: Copy the link from the list, not from the builder. The list's Copy link gives you a click-tracked link, so the Clicks column counts every visit. The builder shows the plain checkout URL.
What happens next
- A customer who opens the link lands on Shopify checkout with the product, plan and discount already applied. Checkout itself looks and works like your normal Shopify checkout.
- Anyone with the link can buy — it never logs anyone in. That's what you want for ads and QR codes.
- Deleting a link stops every copy you already shared from working.
- For orders and revenue per campaign, use the campaign parameters in your Shopify reports; RecurX's click counts are in the Clicks column. See also Growth analytics.
Troubleshooting
- "Enter a name for this link." — fill in Link name before saving.
- "Add at least one product." — add a product in Step 3.
- "The product picker is only available inside the Shopify admin." — open RecurX from Apps in your Shopify admin, not in a separate tab.
- "Invalid format. Use letters, numbers, dashes, or underscores (≤50 chars)." — the discount code has spaces or other characters.