
An API key lets your own scripts, tools and AI assistants read and change your RecurX subscriptions. You create keys on the API keys page, choose what each one may do, and revoke them at any time. Creating a key takes about a minute. API keys are available on every plan.
Step 1: Open API keys
- In your Shopify admin, open Apps → RecurX Subscriptions.
- Click App settings in the sidebar.
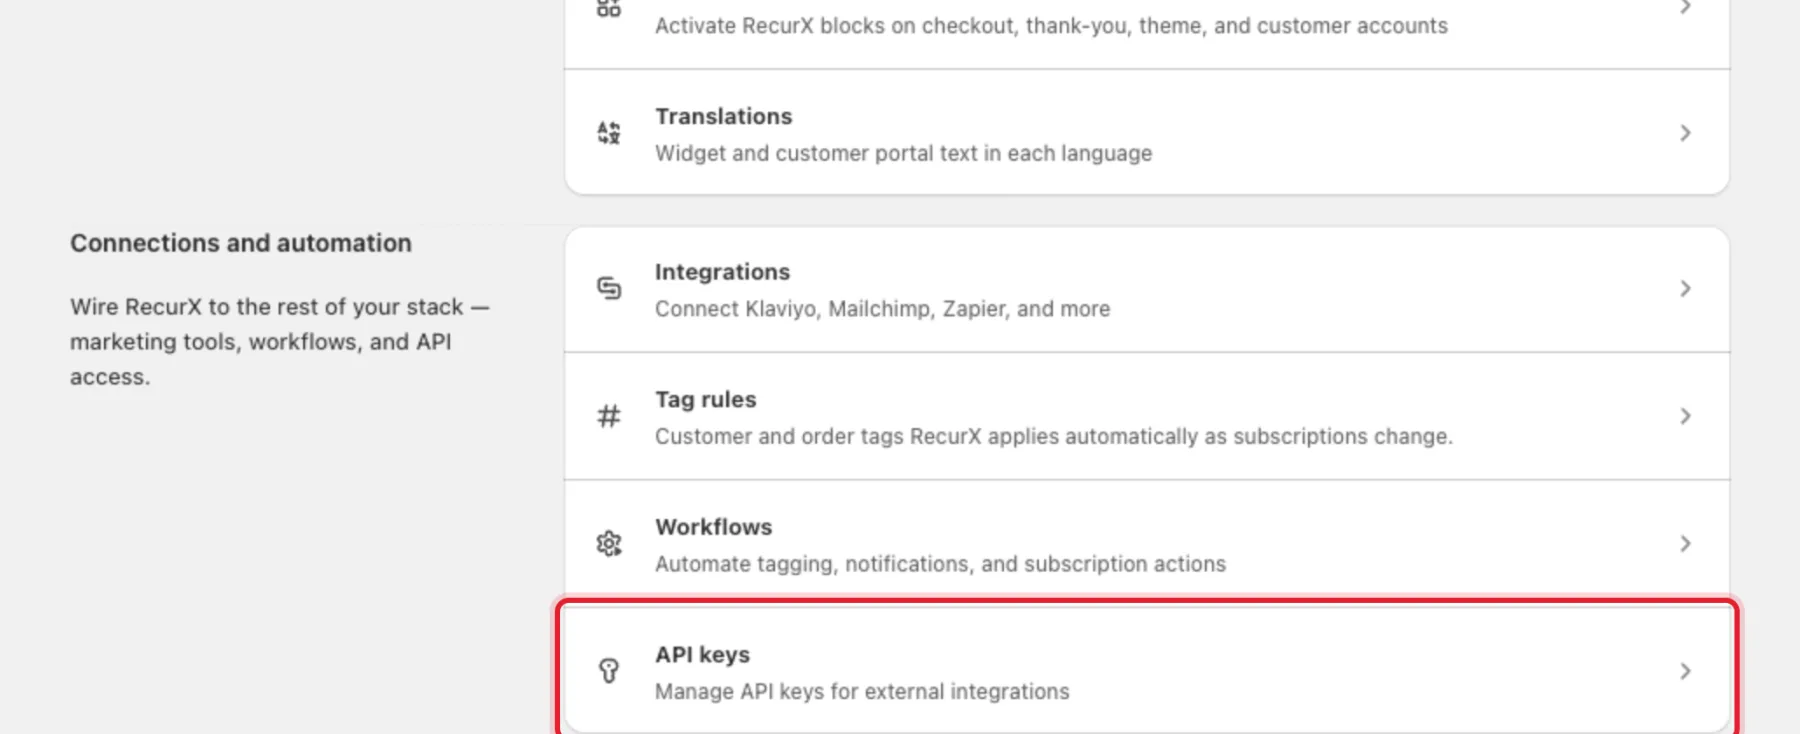
- Under Connections and automation, click API keys.
Step 2: Create a key
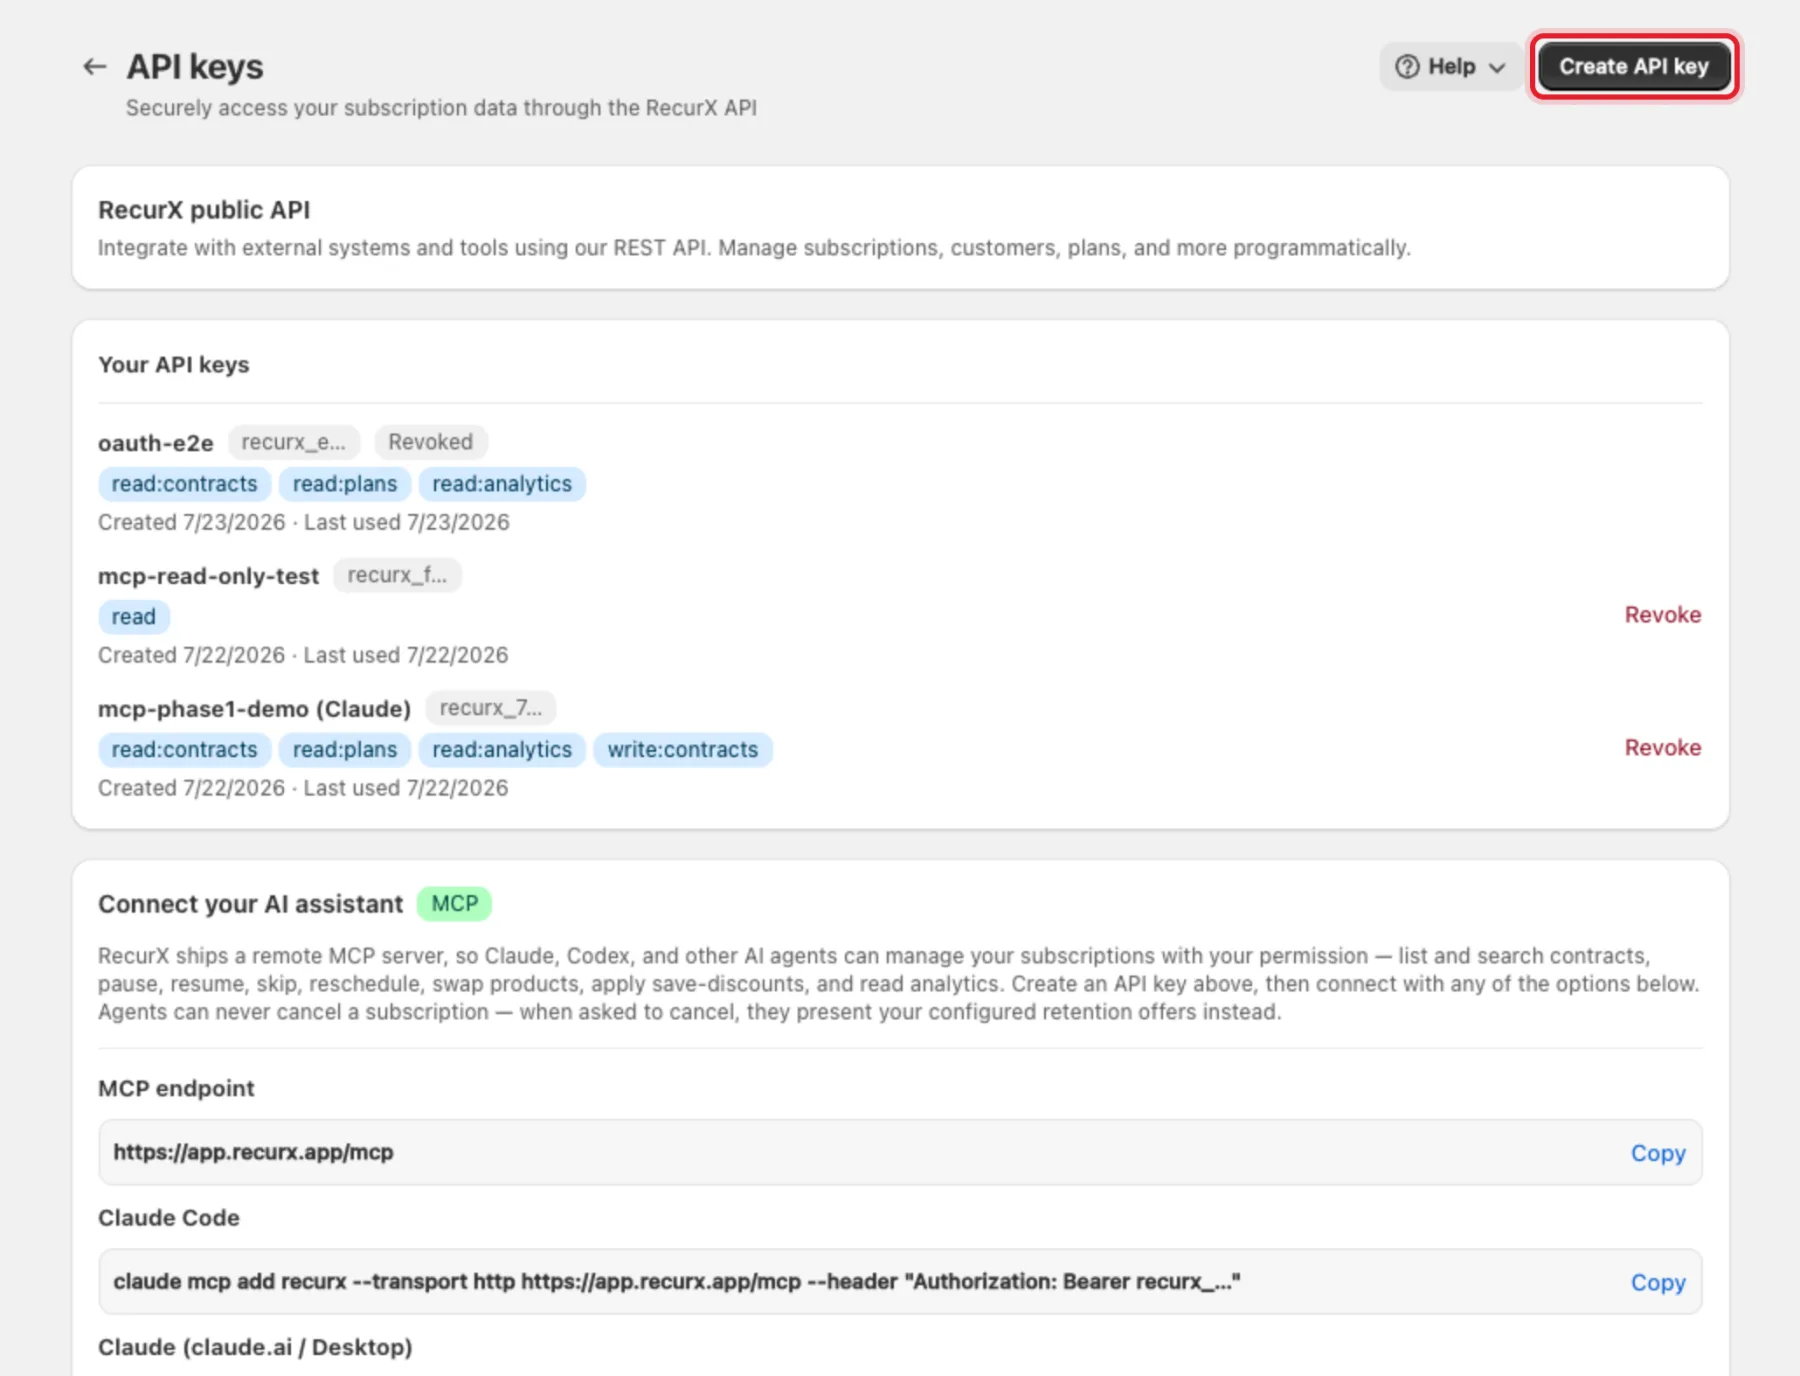
- Click Create API key in the top right.
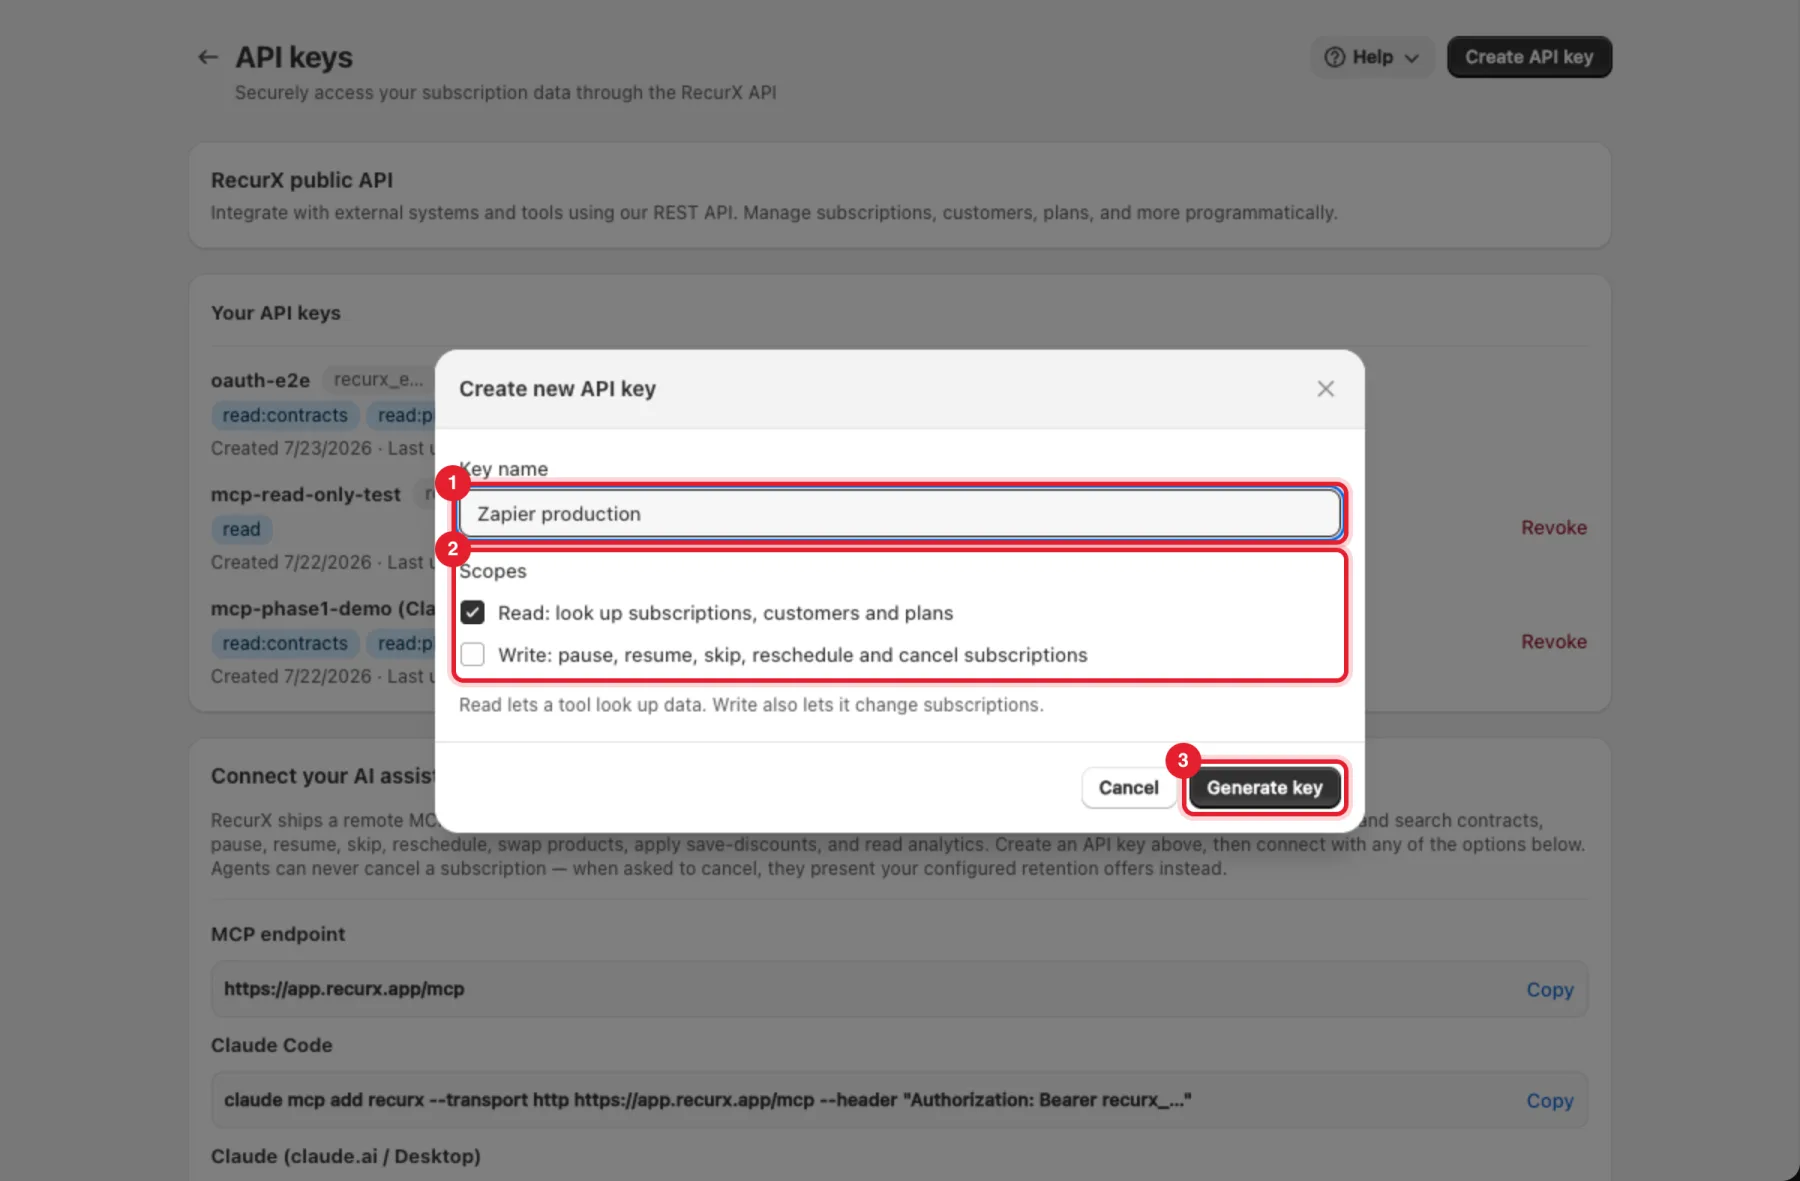
- In Create new API key, enter a Key name that says where the key is used, for example Zapier production.
- Under Scopes, tick what the key may do:
- Read: look up subscriptions, customers and plans
- Write: pause, resume, skip, reschedule and cancel subscriptions
- Click Generate key.
Tip: Give each tool its own key with only the scope it needs. A reporting tool needs Read only. You can then revoke one tool's access without touching the others.
Step 3: Copy the key
A yellow banner shows the new key with a Copy button: Copy your API key now — it won't be shown again! Click Copy and store it in your password manager or the tool that uses it.
Important: RecurX keeps only a secure hash of the key, so it can't show it again. If you lose it, revoke it and create a new one.
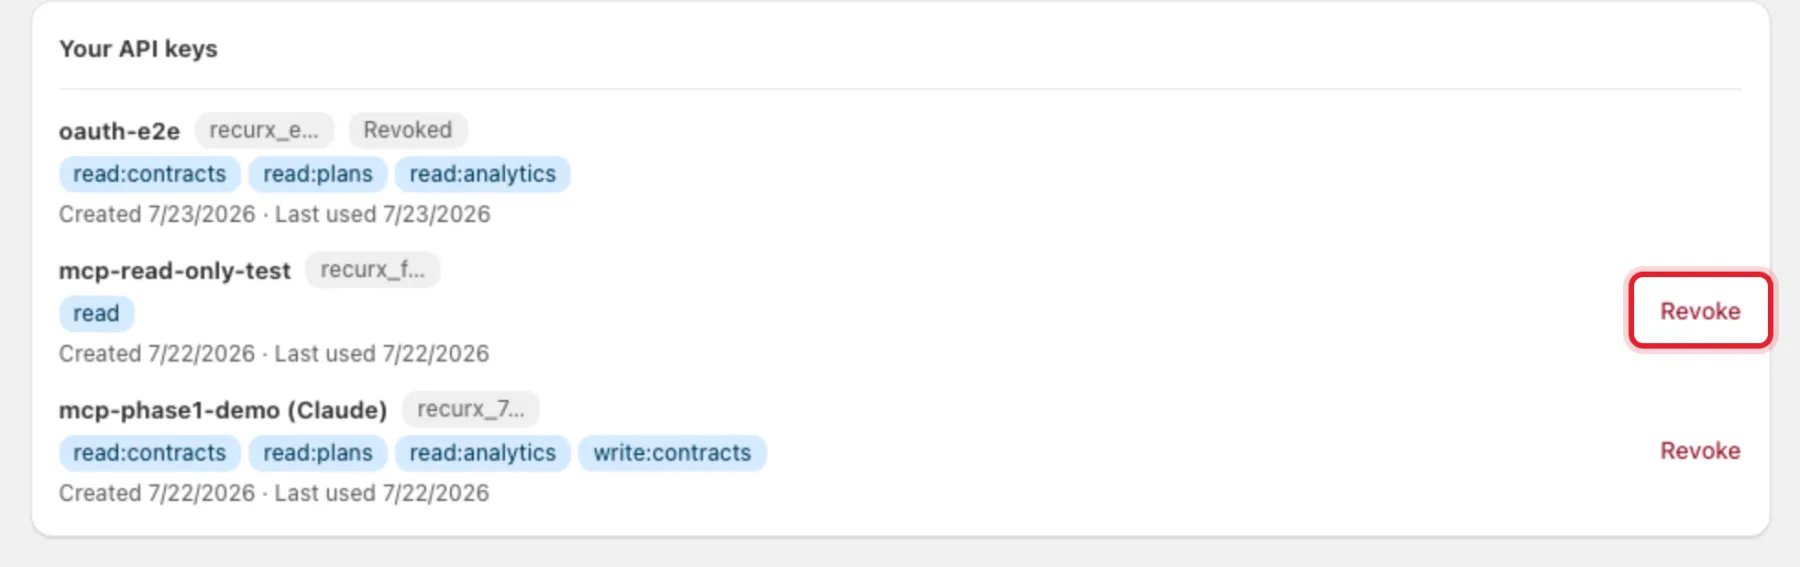
The key now appears under Your API keys with its name, the first characters of the key, its scopes and the date it was created and last used.
Note: Keys created before the Read/Write choice existed show finer scopes such as
read:contractsorwrite:contracts. They keep working.
Step 4: Call the API
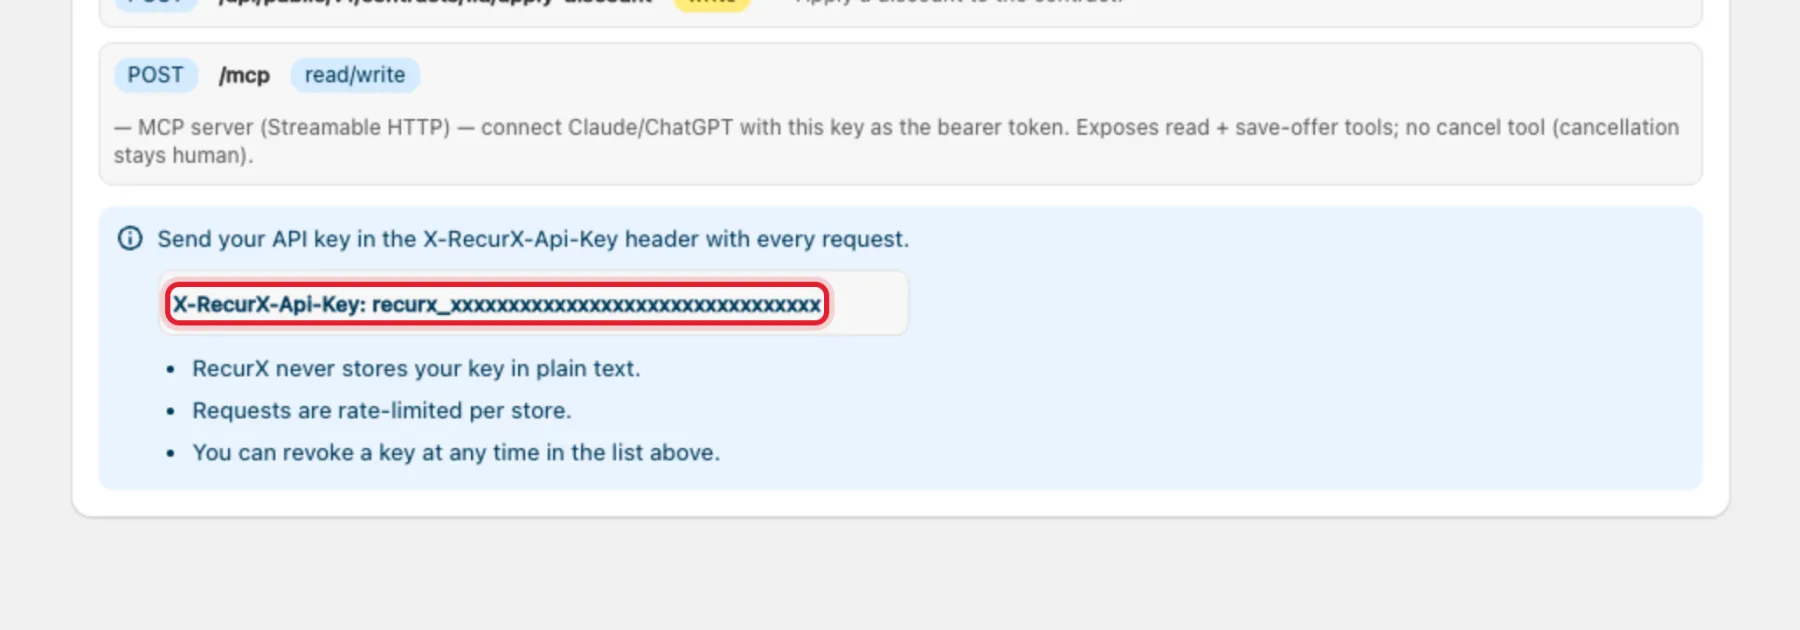
Send the key in the X-RecurX-Api-Key header with every request:
X-RecurX-Api-Key: <your API key>
The API documentation card lists every endpoint, its method and the scope it needs. All paths start with /api/public/v1/ on the same host as the MCP endpoint shown on the page. Click View OpenAPI docs for the full reference.
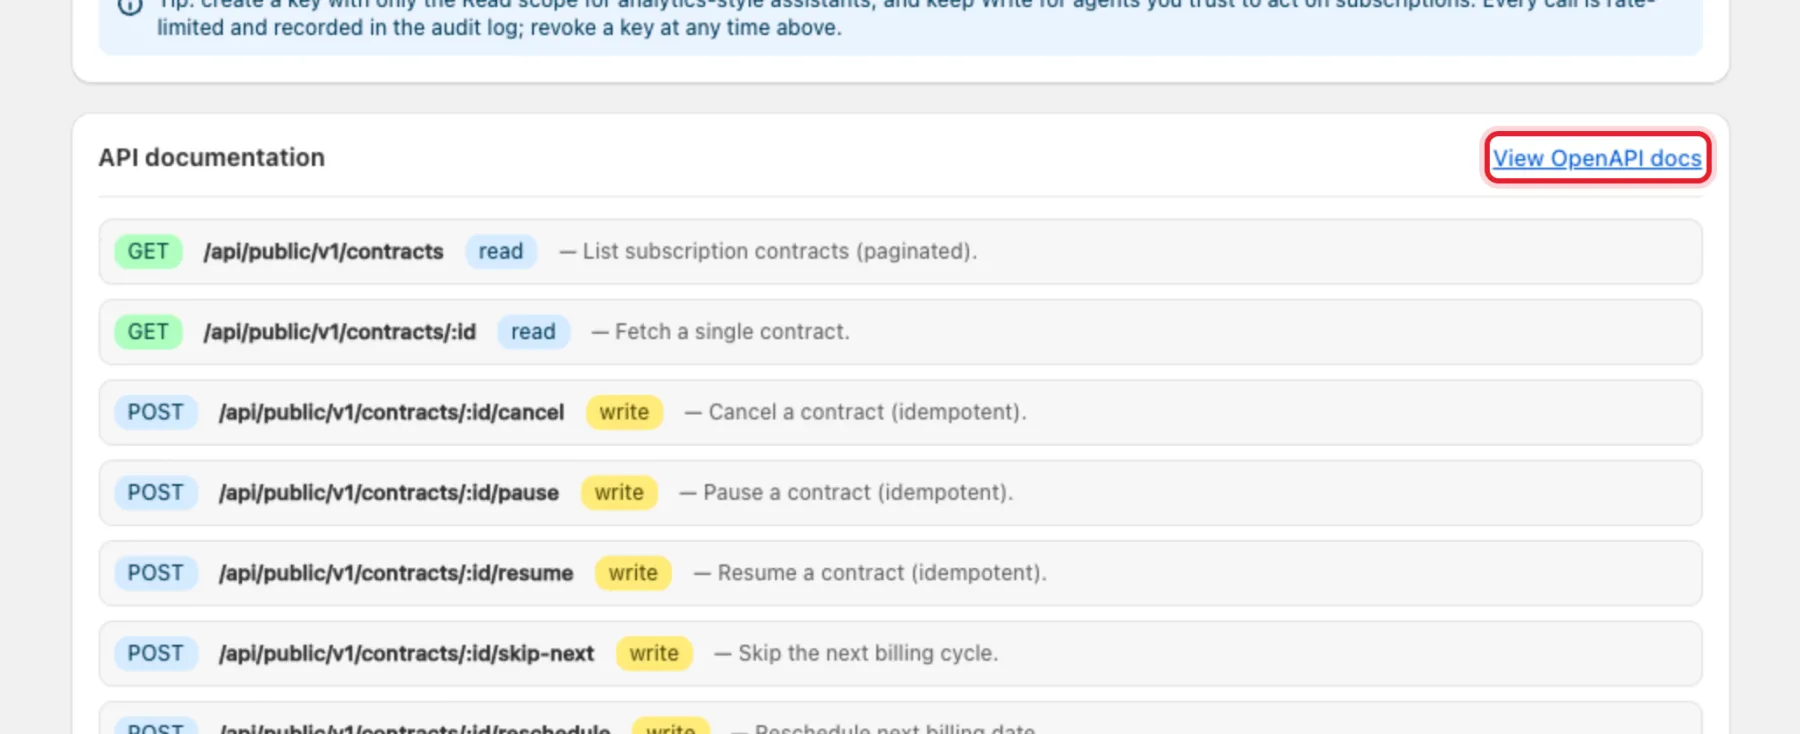
What the API covers:
| Area | Read | Write |
|---|---|---|
| Subscription contracts | List, fetch one | Cancel, pause, resume, skip next, reschedule, swap product, change frequency, apply discount |
| Customers | List customers with active contracts | — |
| Plans | List, fetch one | — |
| Analytics | Headline summary (MRR, active, churn, recovered) | — |
| Webhooks | List your endpoints | Register an HTTPS endpoint, delete one |
Requests are rate-limited, and every call is recorded in RecurX's audit log.
Connect an AI assistant (MCP)
RecurX runs a remote MCP server, so Claude, ChatGPT, Codex and other AI agents can manage subscriptions with your permission: list and search contracts, pause, resume, skip, reschedule, swap products, apply save discounts and read analytics.
- Create a key in Step 2. Use Read only for assistants that just report.
- In Connect your AI assistant, copy the MCP endpoint.
- Follow the instructions on the card for Claude Code, Claude (claude.ai / Desktop) or OpenAI (API / Codex). Assistants send the key as
Authorization: Bearer <your API key>.
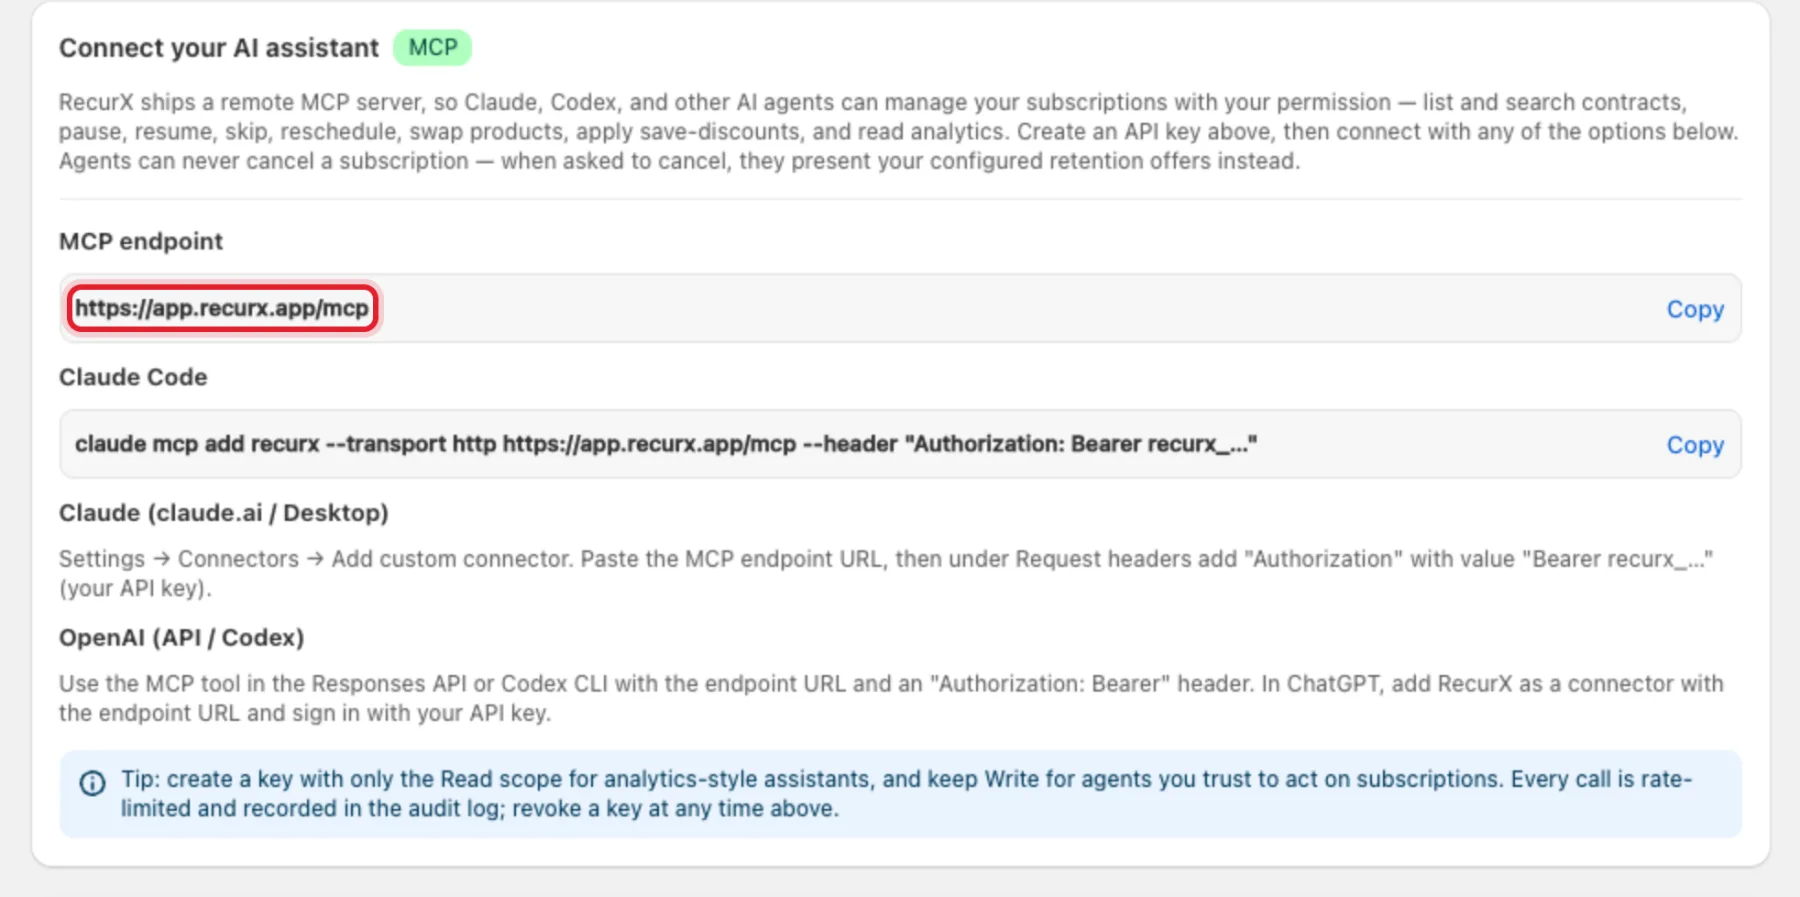
Note: AI agents can never cancel a subscription over MCP. When asked to cancel, they present your retention offers instead.
Revoke a key
- Under Your API keys, click Revoke next to the key.
- Confirm with Revoke.
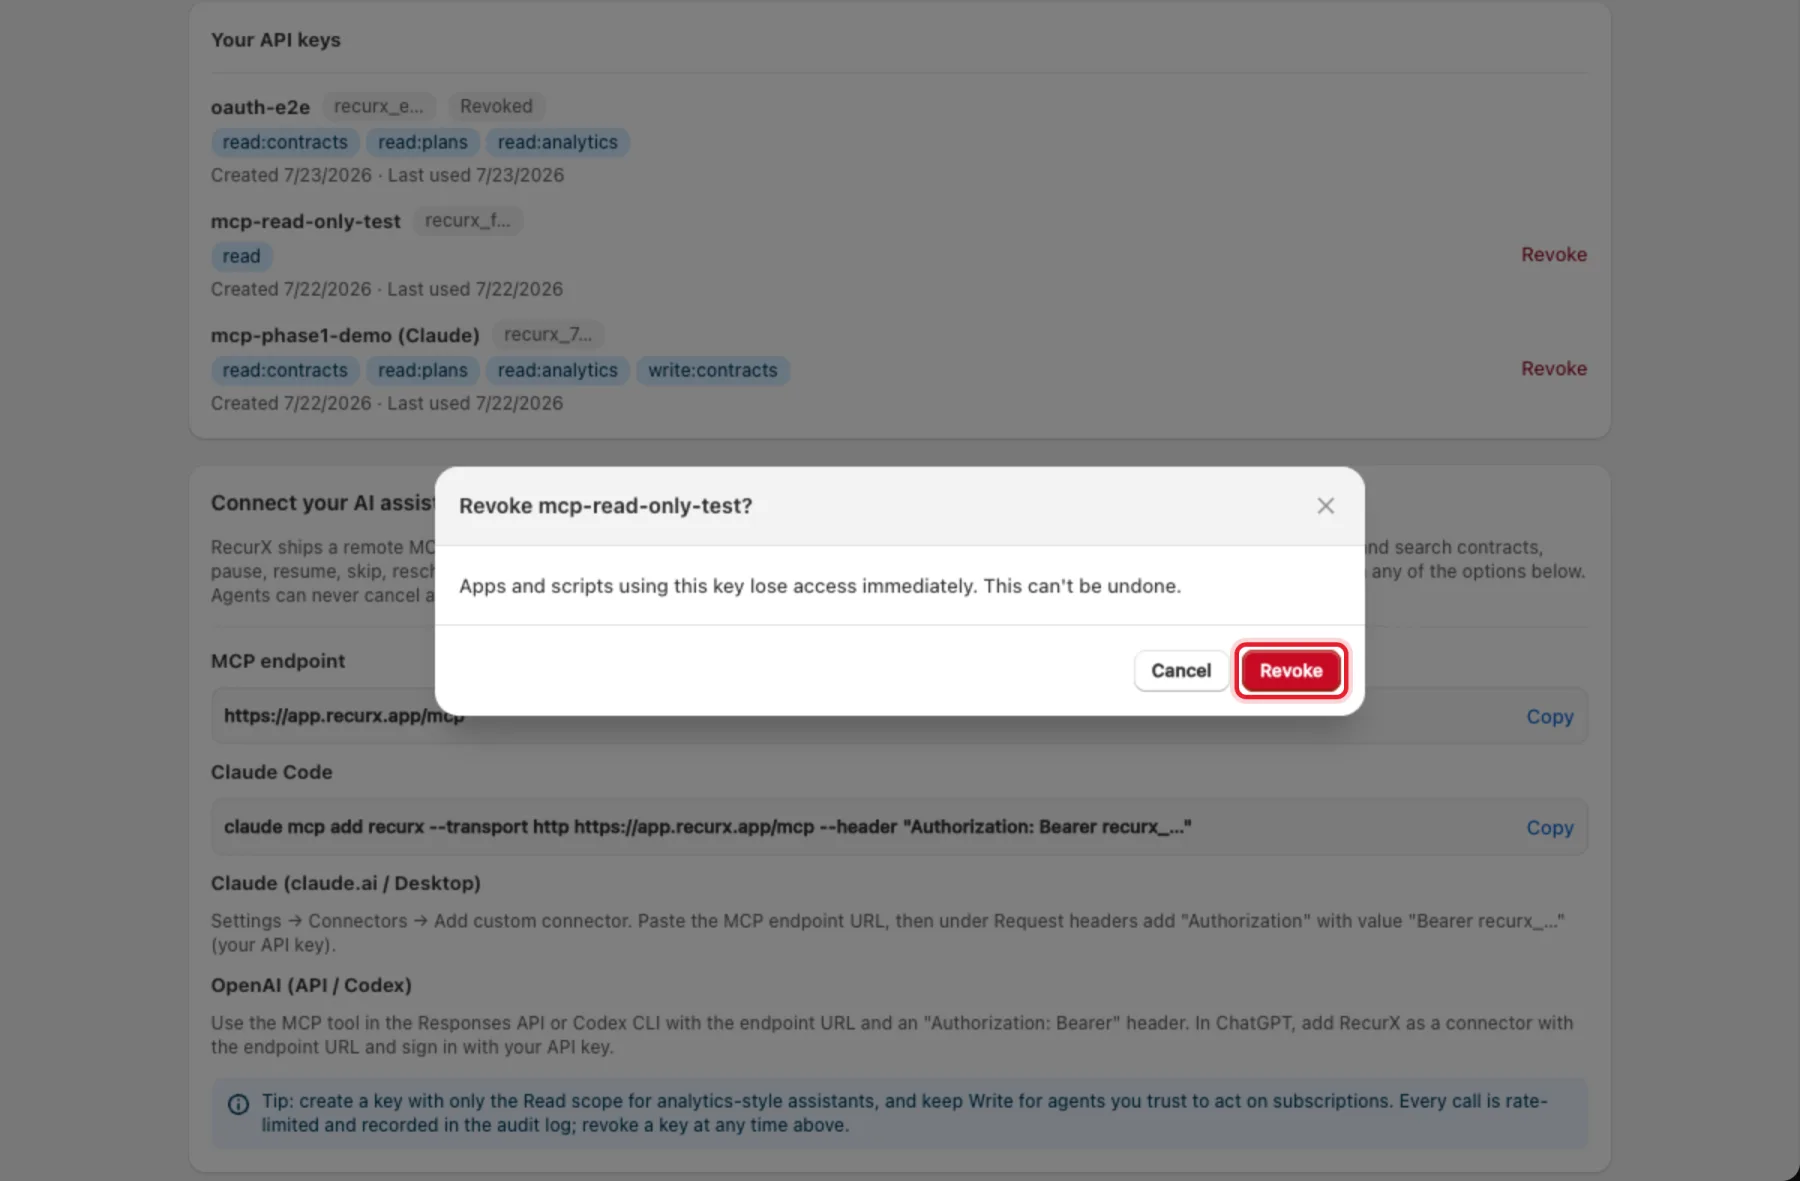
Apps and scripts using the key lose access immediately. This can't be undone — the key stays in the list marked Revoked. There is no rotate button: to rotate a key, create a new one, switch your tool over, then revoke the old one.
Troubleshooting
- "Enter a key name." / "Select at least one scope." — fill in both before clicking Generate key.
- The API answers
401— the key is missing, mistyped or revoked. Check the header name and create a new key if needed. - The API answers
403— the key doesn't have the scope for that endpoint, for example a Read key calling pause. Create a key with Write.