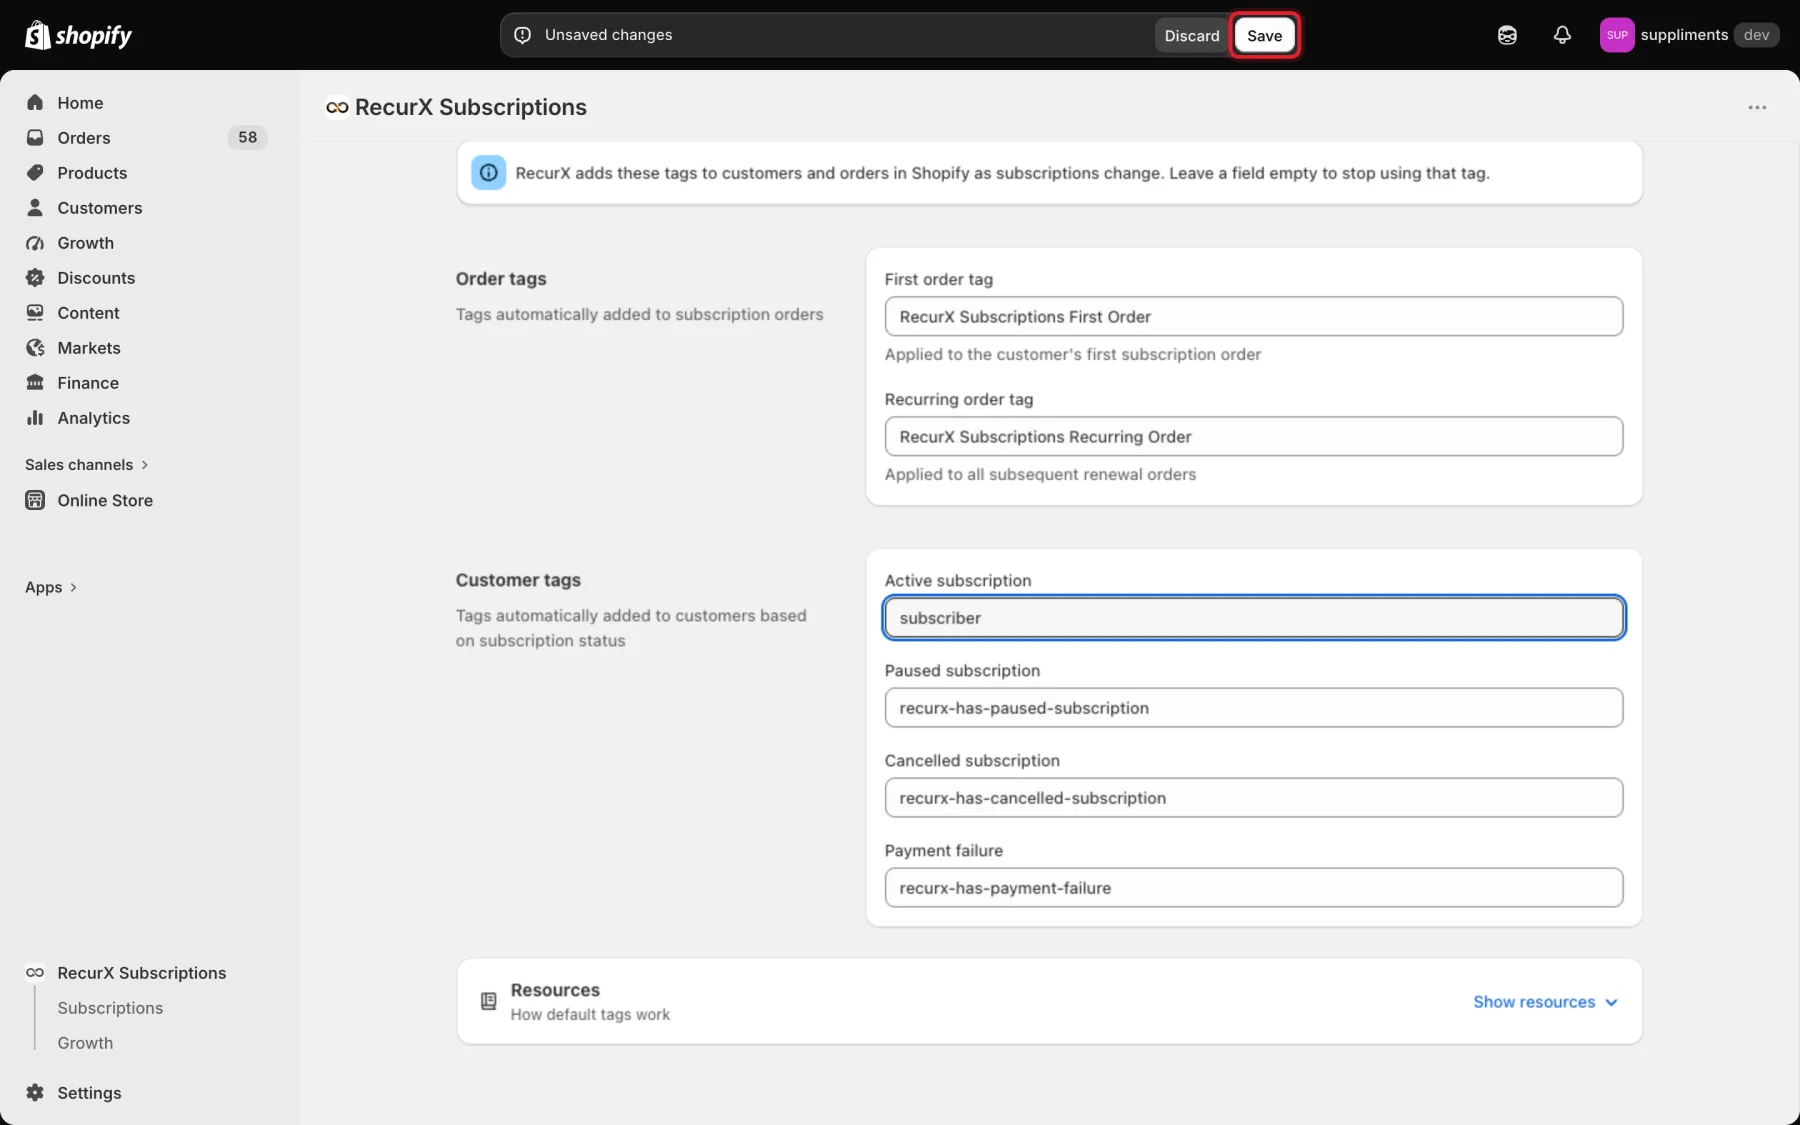
RecurX adds tags in Shopify as subscriptions change: two tags on subscription orders and four on customers. You pick the tag names on the Auto-tag customers page. Use the tags to filter orders and customers, build customer segments, or trigger Shopify Flow. Changing them takes about 2 minutes.
Step 1: Open Tag rules
- In your Shopify admin, open Apps → RecurX Subscriptions.
- Click App settings in the sidebar.
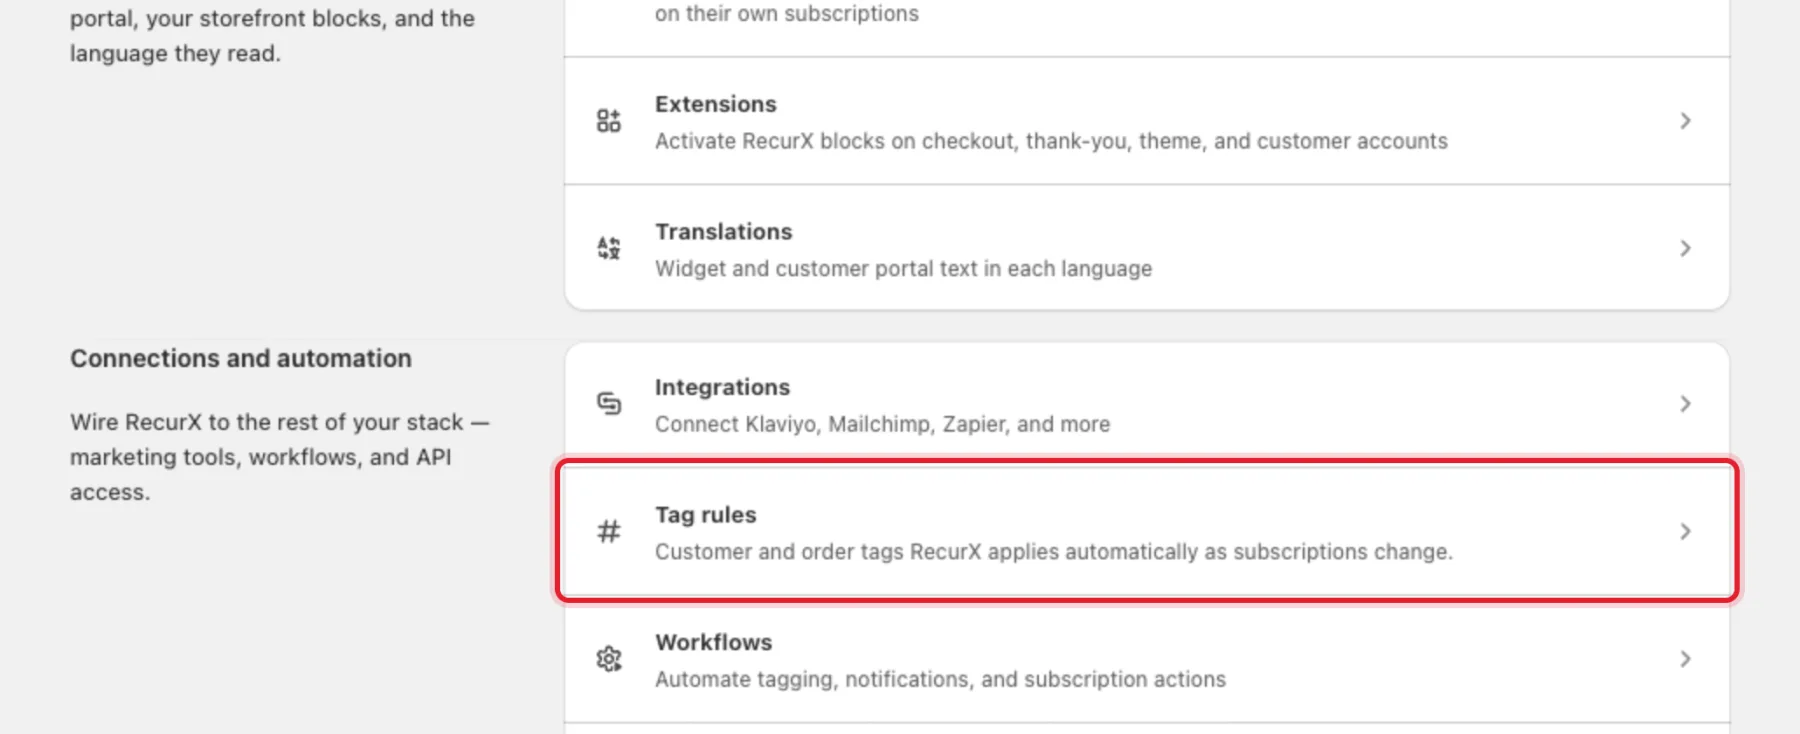
- Under Connections and automation, click Tag rules. The page that opens is called Auto-tag customers.
Step 2: Set the order tags
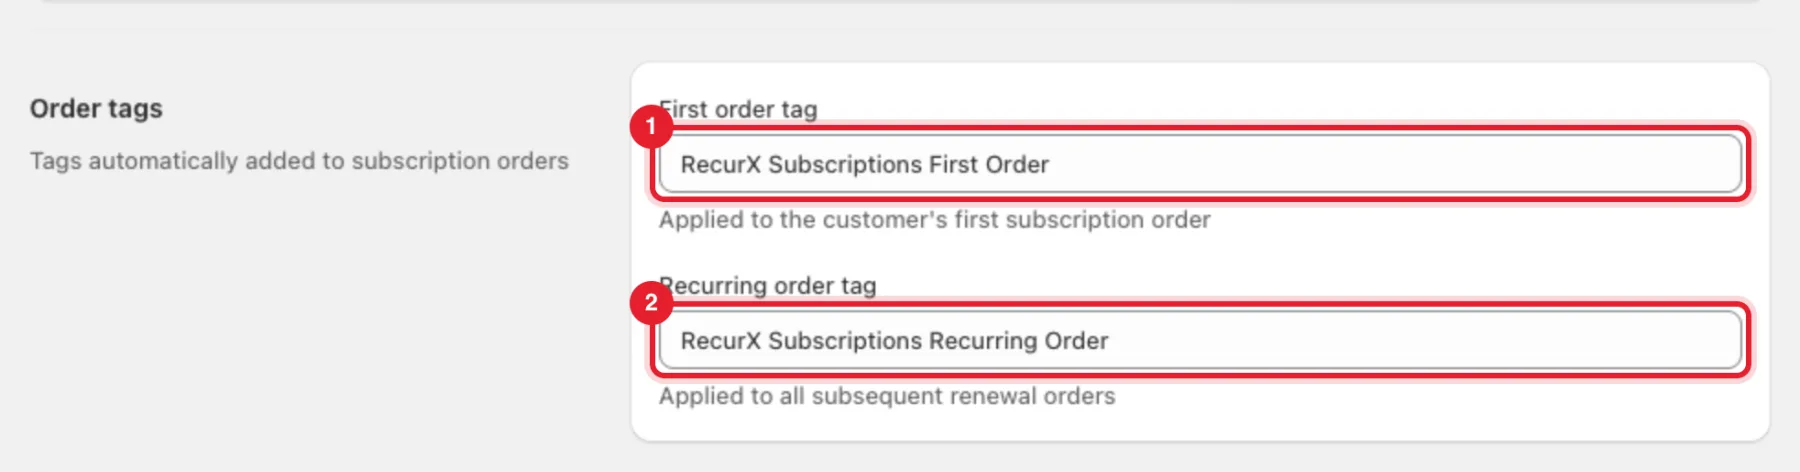
Under Order tags:
- First order tag — added to the customer's first subscription order. Default:
RecurX Subscriptions First Order. - Recurring order tag — added to every renewal order after that. Default:
RecurX Subscriptions Recurring Order.
Step 3: Set the customer tags
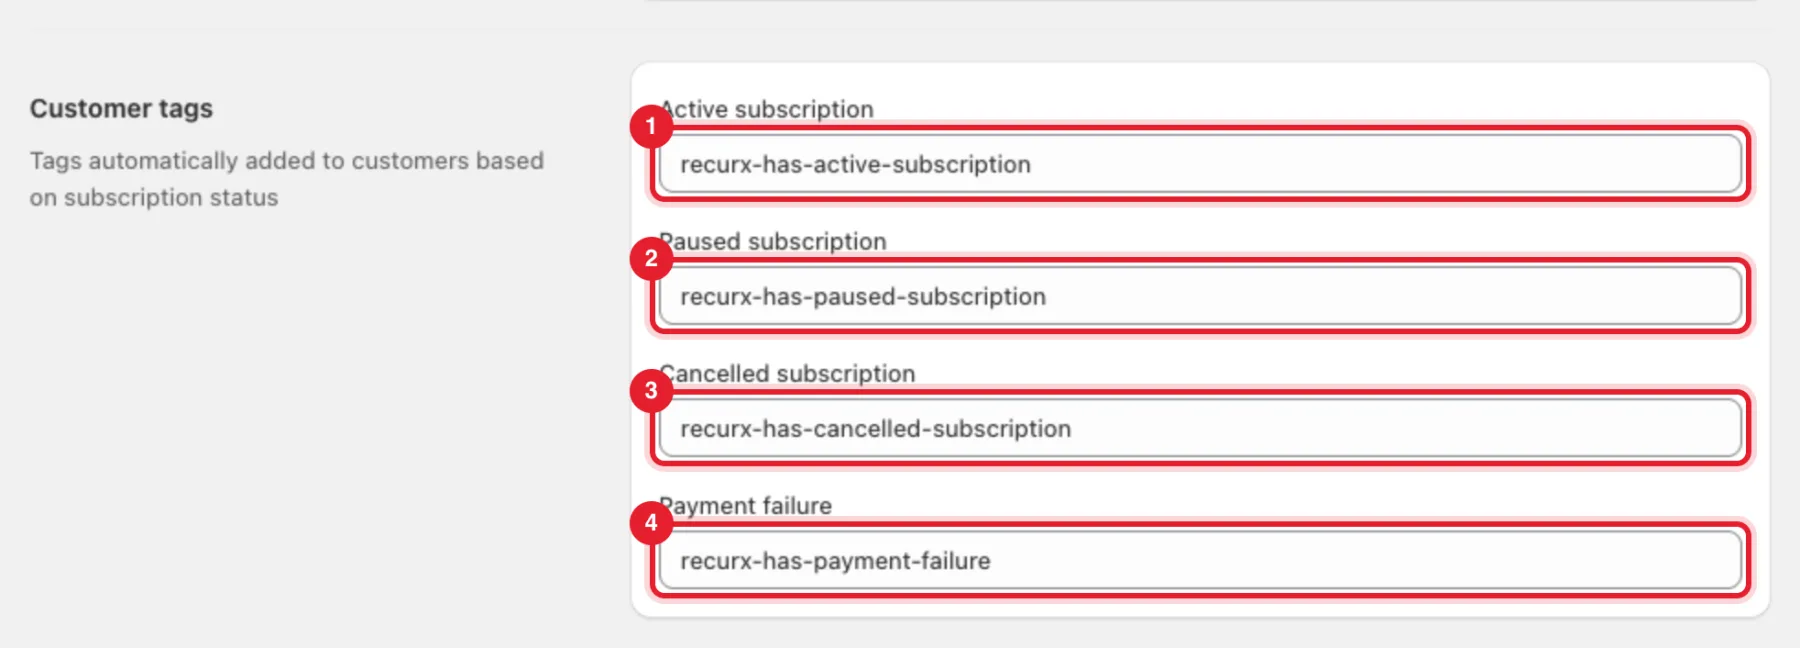
Under Customer tags:
| Field | Default tag | The customer has it while… |
|---|---|---|
| Active subscription | recurx-has-active-subscription |
at least one of their subscriptions is active |
| Paused subscription | recurx-has-paused-subscription |
at least one of their subscriptions is paused |
| Cancelled subscription | recurx-has-cancelled-subscription |
at least one of their subscriptions is cancelled |
| Payment failure | recurx-has-payment-failure |
a renewal payment has failed and not yet succeeded |
RecurX looks at all of a customer's subscriptions, so a customer with one active and one cancelled subscription has both tags.
Tip: Leave a field empty to stop using that tag.
Step 4: Save
Shopify's save bar appears at the top as soon as you change a field. Click Save, or Discard to go back.
What happens next
- When a subscription starts, pauses, resumes or is cancelled, RecurX updates that customer's tags in Shopify.
- The order that starts a subscription gets the first order tag. Every renewal order gets the recurring order tag.
- The payment failure tag is added when a renewal payment fails. It's removed when a renewal payment succeeds and none of the customer's other subscriptions has a failed payment.
- In Shopify, filter Customers or Orders by these tags, use them in customer segments, or add them as conditions in Shopify Flow. See Automations for the other automation tools.
FAQ
Are existing customers tagged? Not right away. A customer is tagged the next time one of their subscriptions starts, pauses, resumes or is cancelled.
What happens when I rename a tag? New changes use the new name. The old tag stays where it is; remove it in Shopify if you no longer need it.
Can I create my own rules, like a VIP tag after 6 months? Not on this page. It holds the six built-in tags only.
Troubleshooting
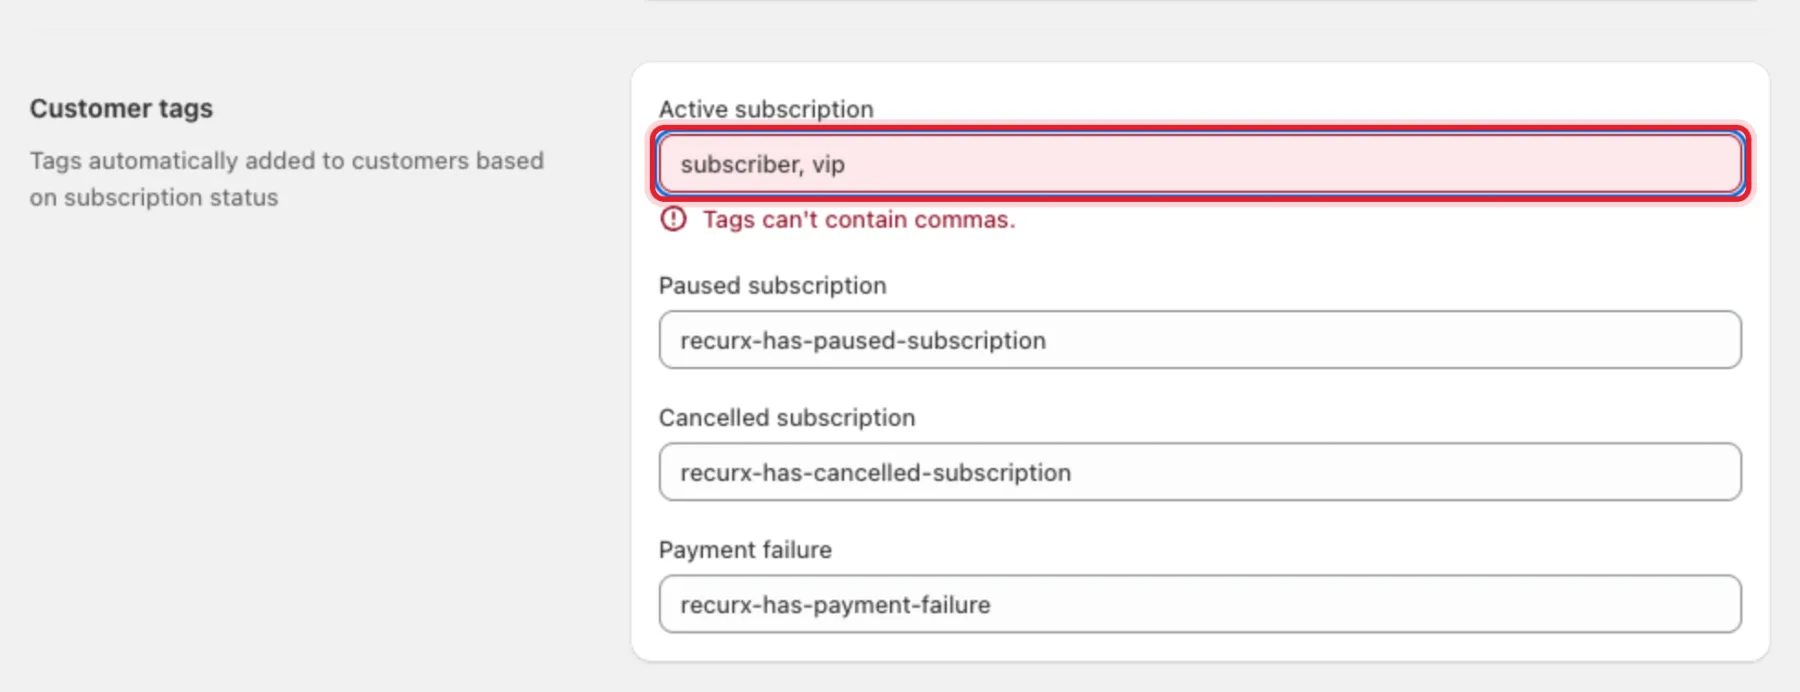
- "Tags can't contain commas." — Shopify uses commas to separate tags, so each field holds one tag. Remove the comma.
- "Use 255 characters or fewer." — Shopify tags are at most 255 characters.
- "Couldn't save your tags. Try again." — the save didn't reach RecurX. Try again in a moment.