A build-a-box lets shoppers choose the items in their subscription box — for example pick any 6 snacks — from a Shopify collection you choose. The box is linked to one of your subscription plans, which sets how often it's delivered and billed. Build-a-box is part of Launchpad Bundles and is included on the Basic and Pro plans. Setting one up takes about 5 minutes.
Before you start:
- Create a Shopify collection with the products shoppers can pick from.
- Create the subscription plan the box will use — see Create a subscription plan.
Step 1: Open Build-a-box
- In your Shopify admin, open Apps → RecurX Subscriptions.
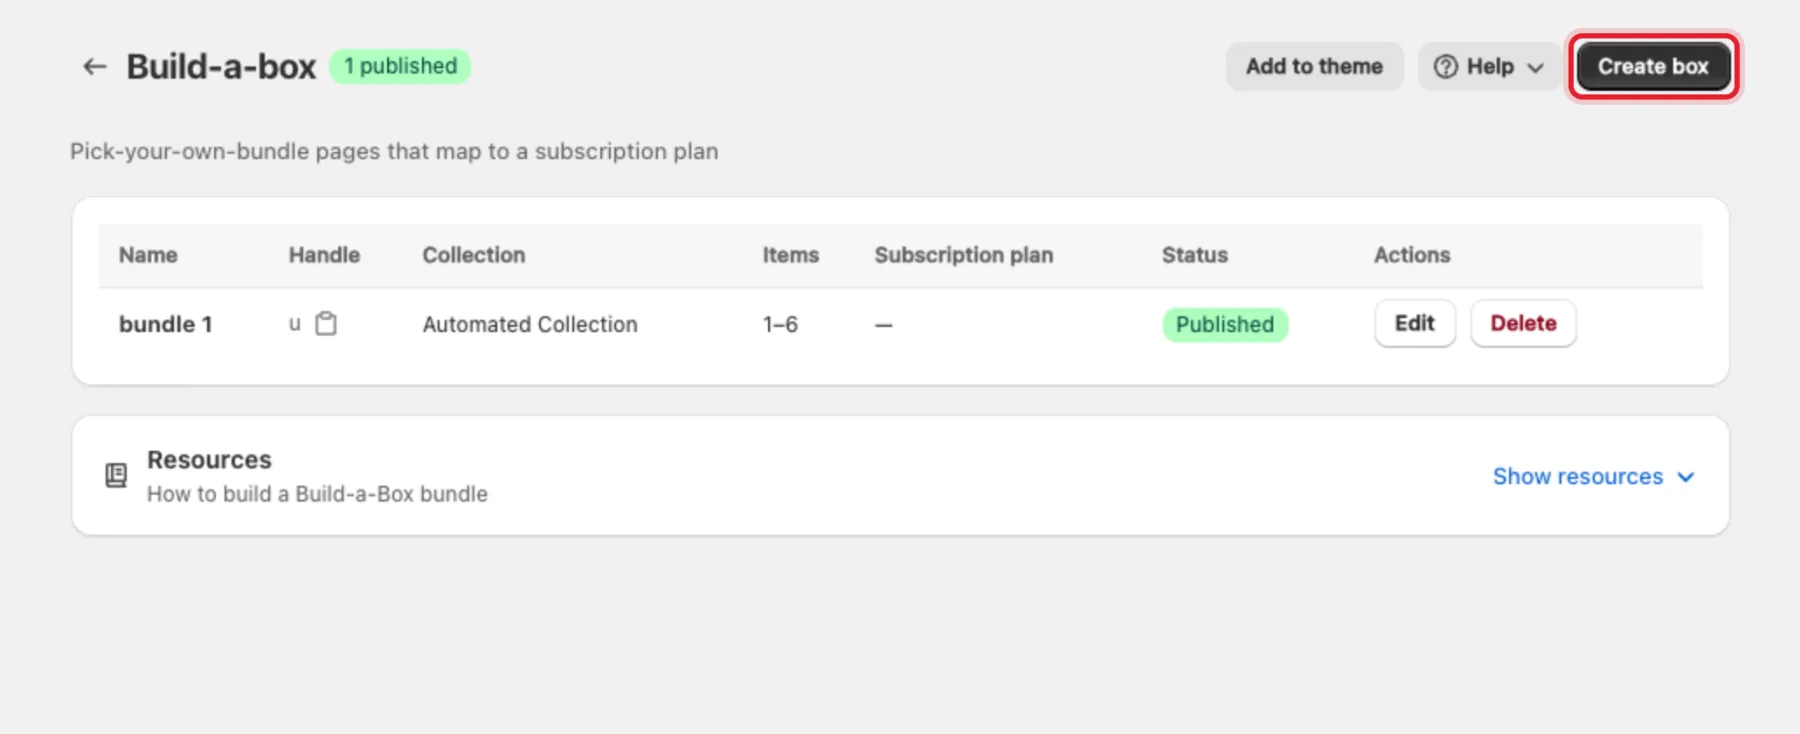
- Go to Growth → Build-a-box. The page lists your boxes with their handle, collection, number of items, plan and status.
- Click Create box.
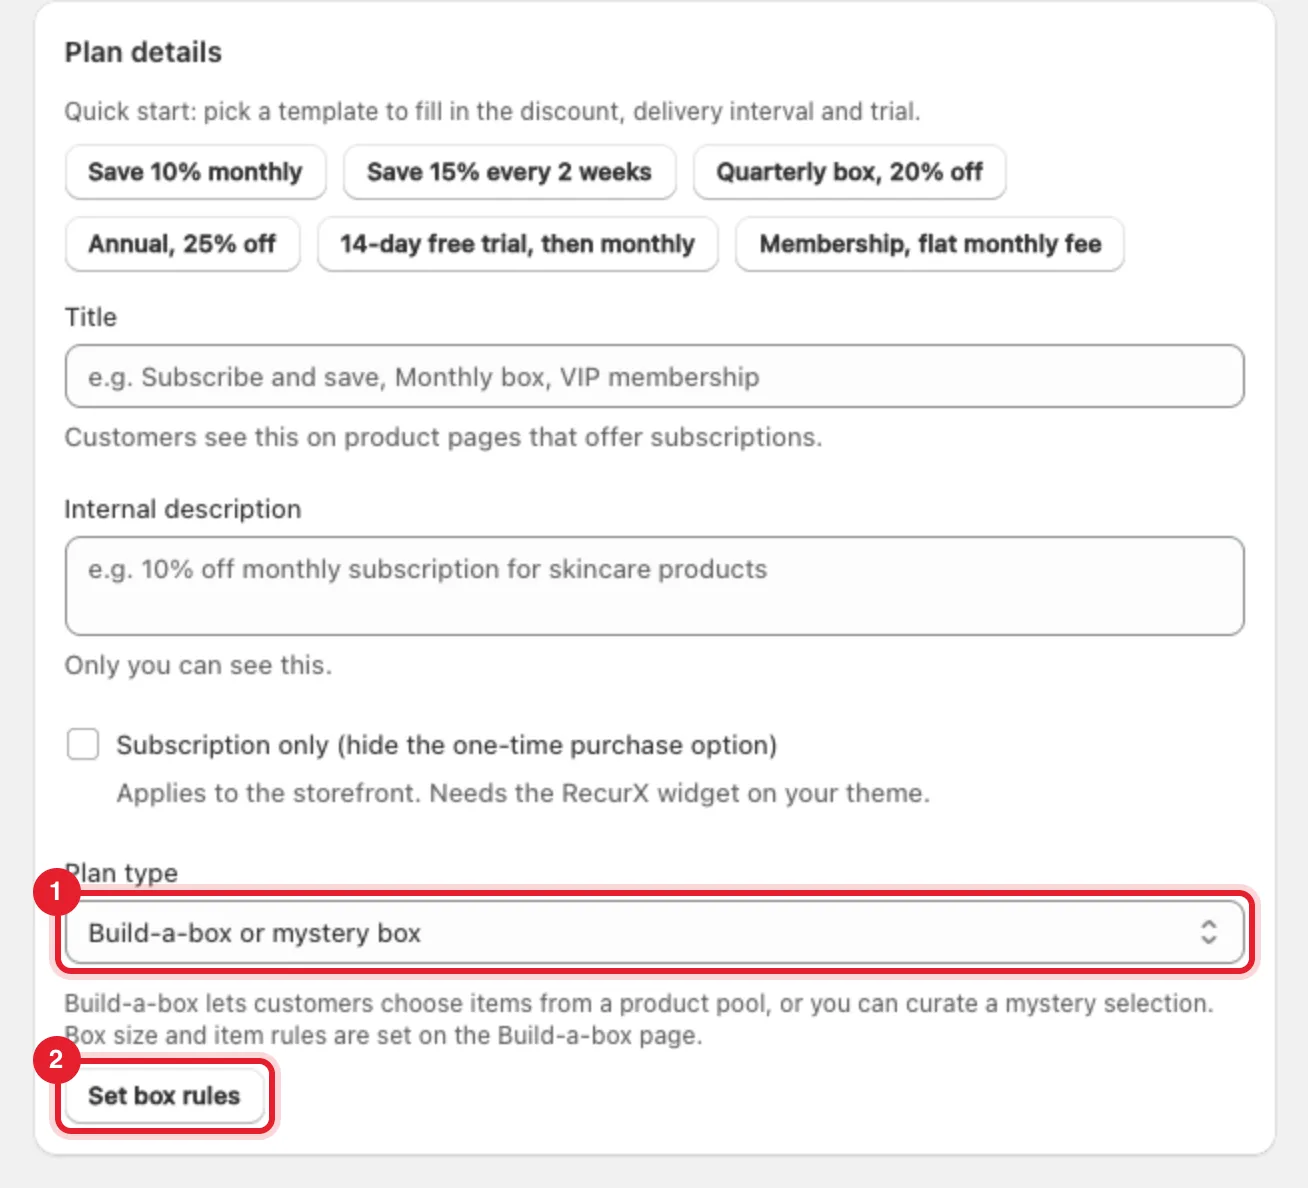
You can also get here from the plan editor: when you set a plan's Plan type to Build-a-box or mystery box (1), click Set box rules (2). Box size and item rules are set on the Build-a-box page, not in the plan.
Step 2: Name the box and set its size
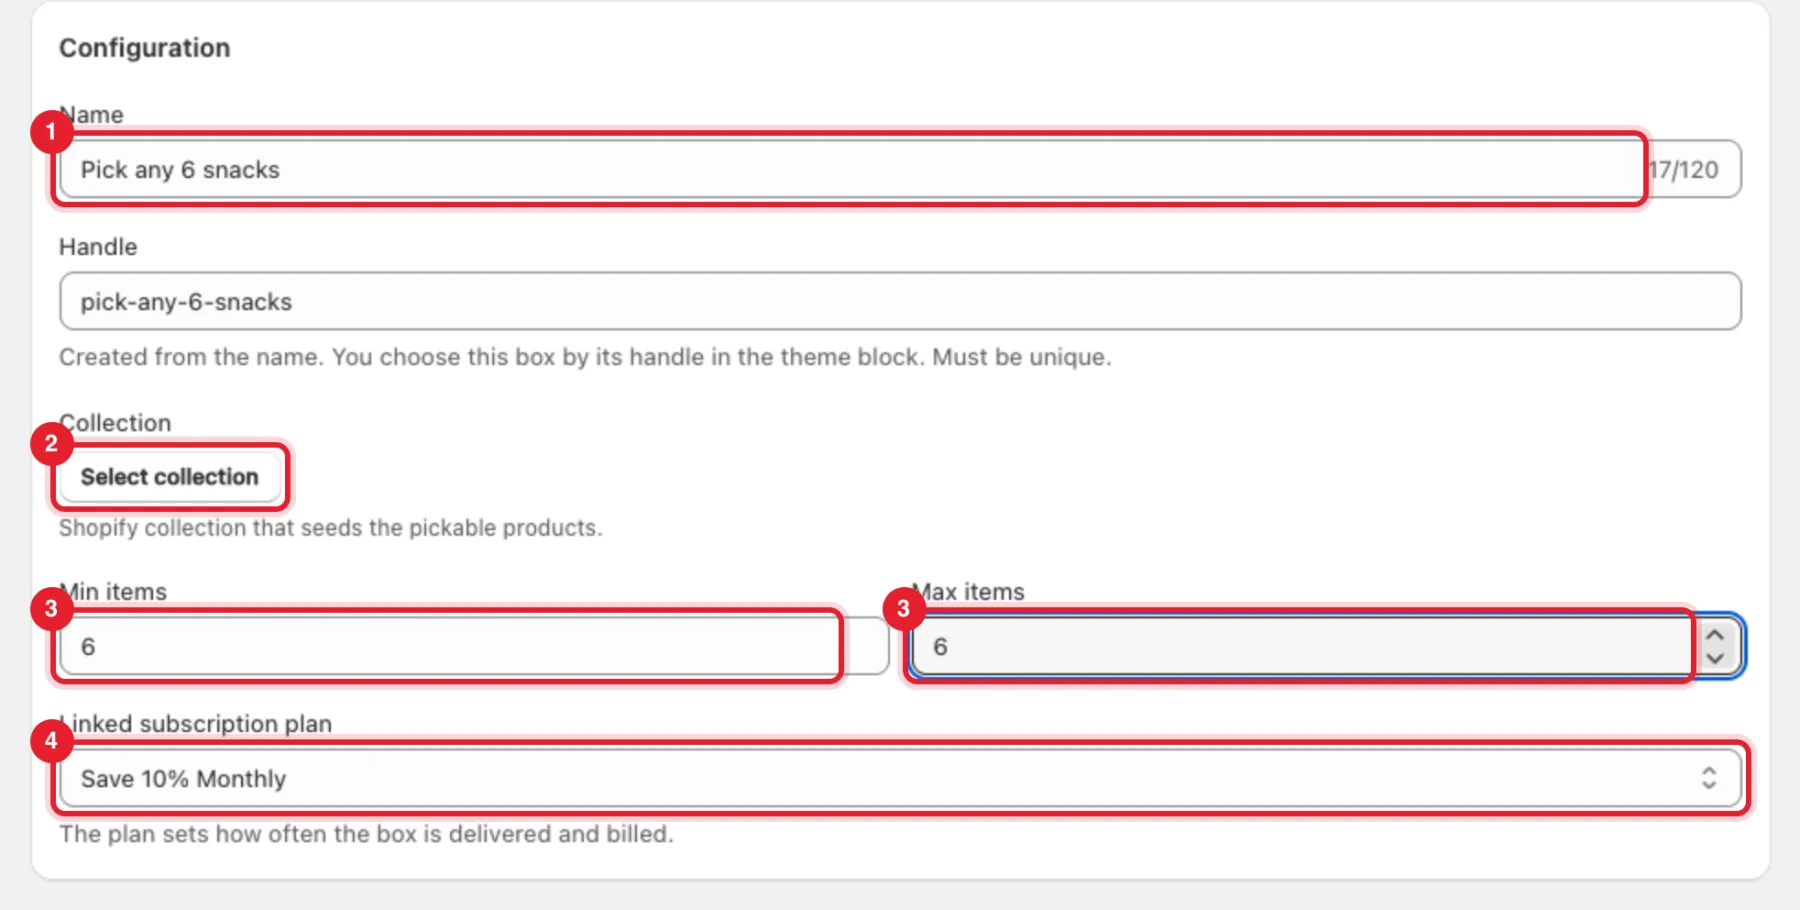
In Configuration:
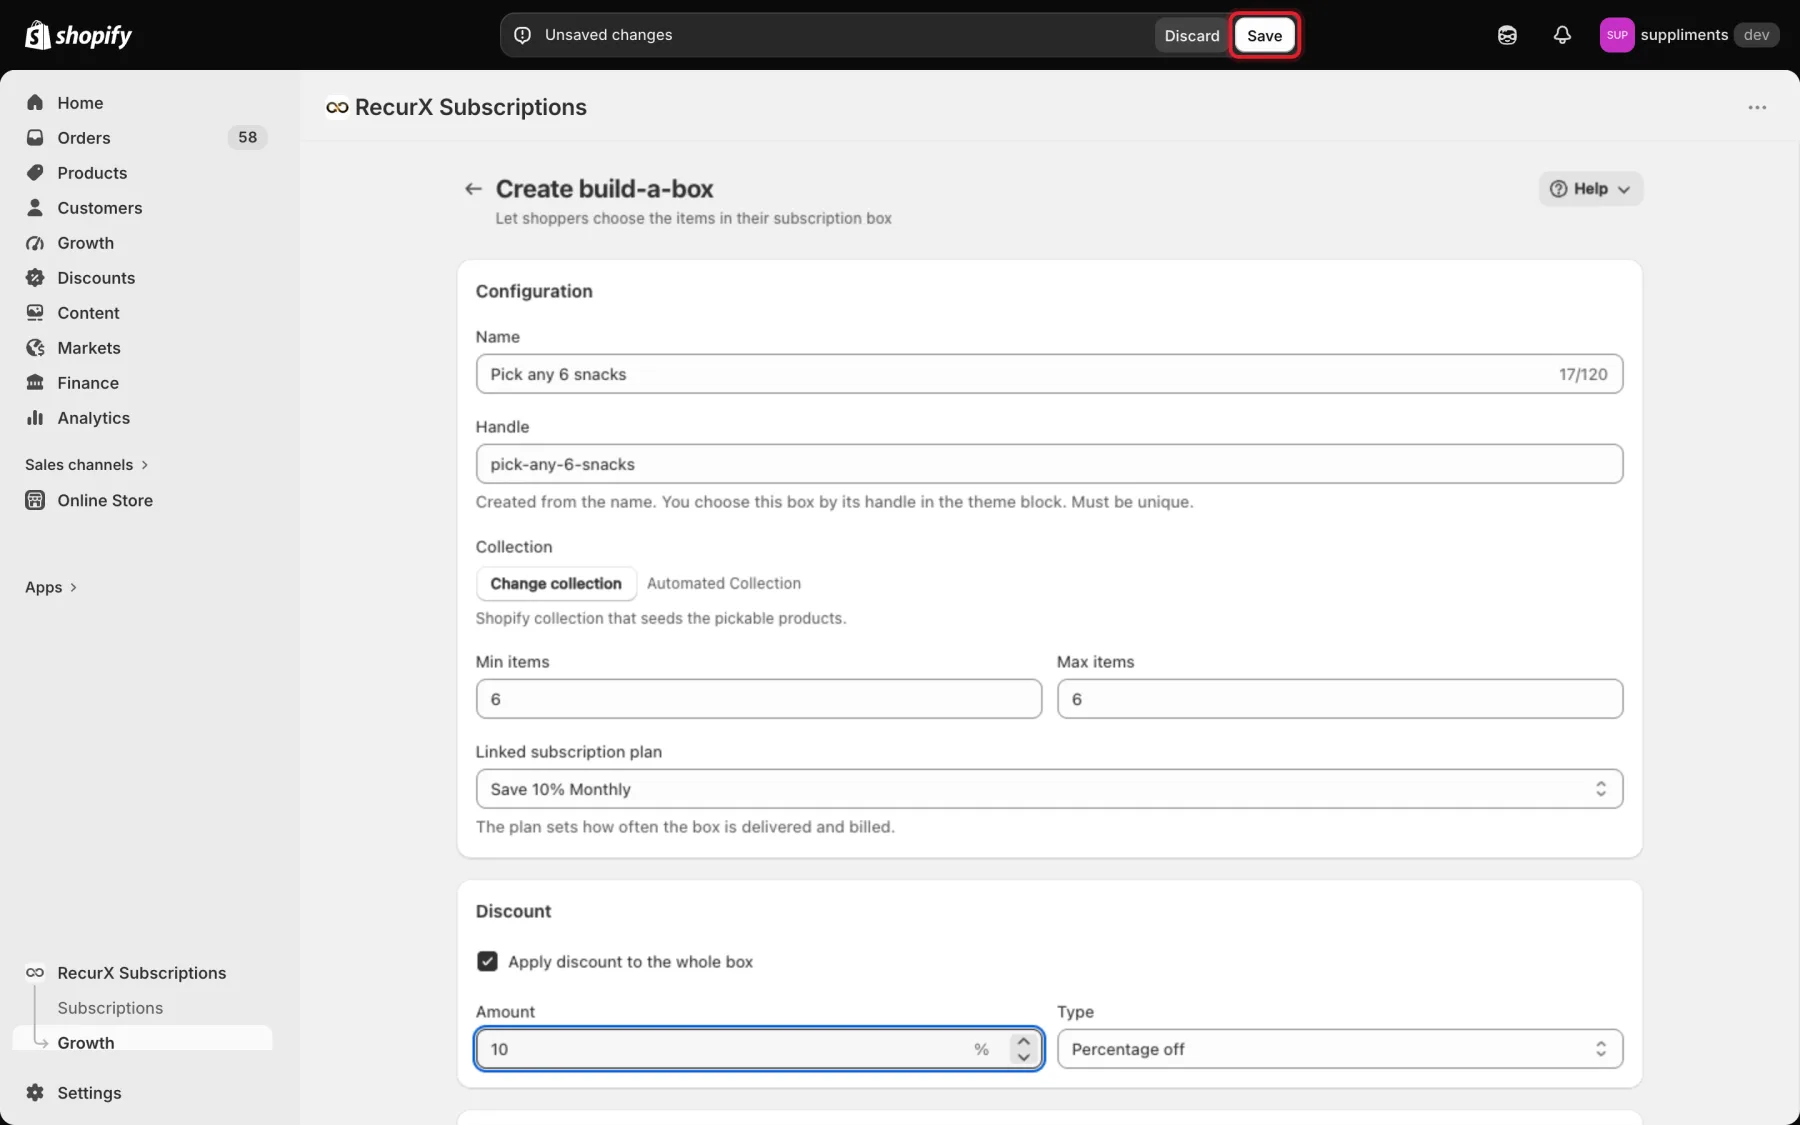
- Name (1) — shoppers see it as the box title, for example Pick any 6 snacks. The Handle is created from the name. You'll use it to place the box on your theme, and it must be unique.
- Collection (2) — click Select collection. See Step 3.
- Min items and Max items (3) — how many items a shopper must pick. The same number in both (6 and 6) means exactly 6; different numbers (4 and 8) allow any amount in that range. Max items can be 24 at most.
- Linked subscription plan (4) — the plan sets how often the box is delivered and billed.
Step 3: Pick the collection
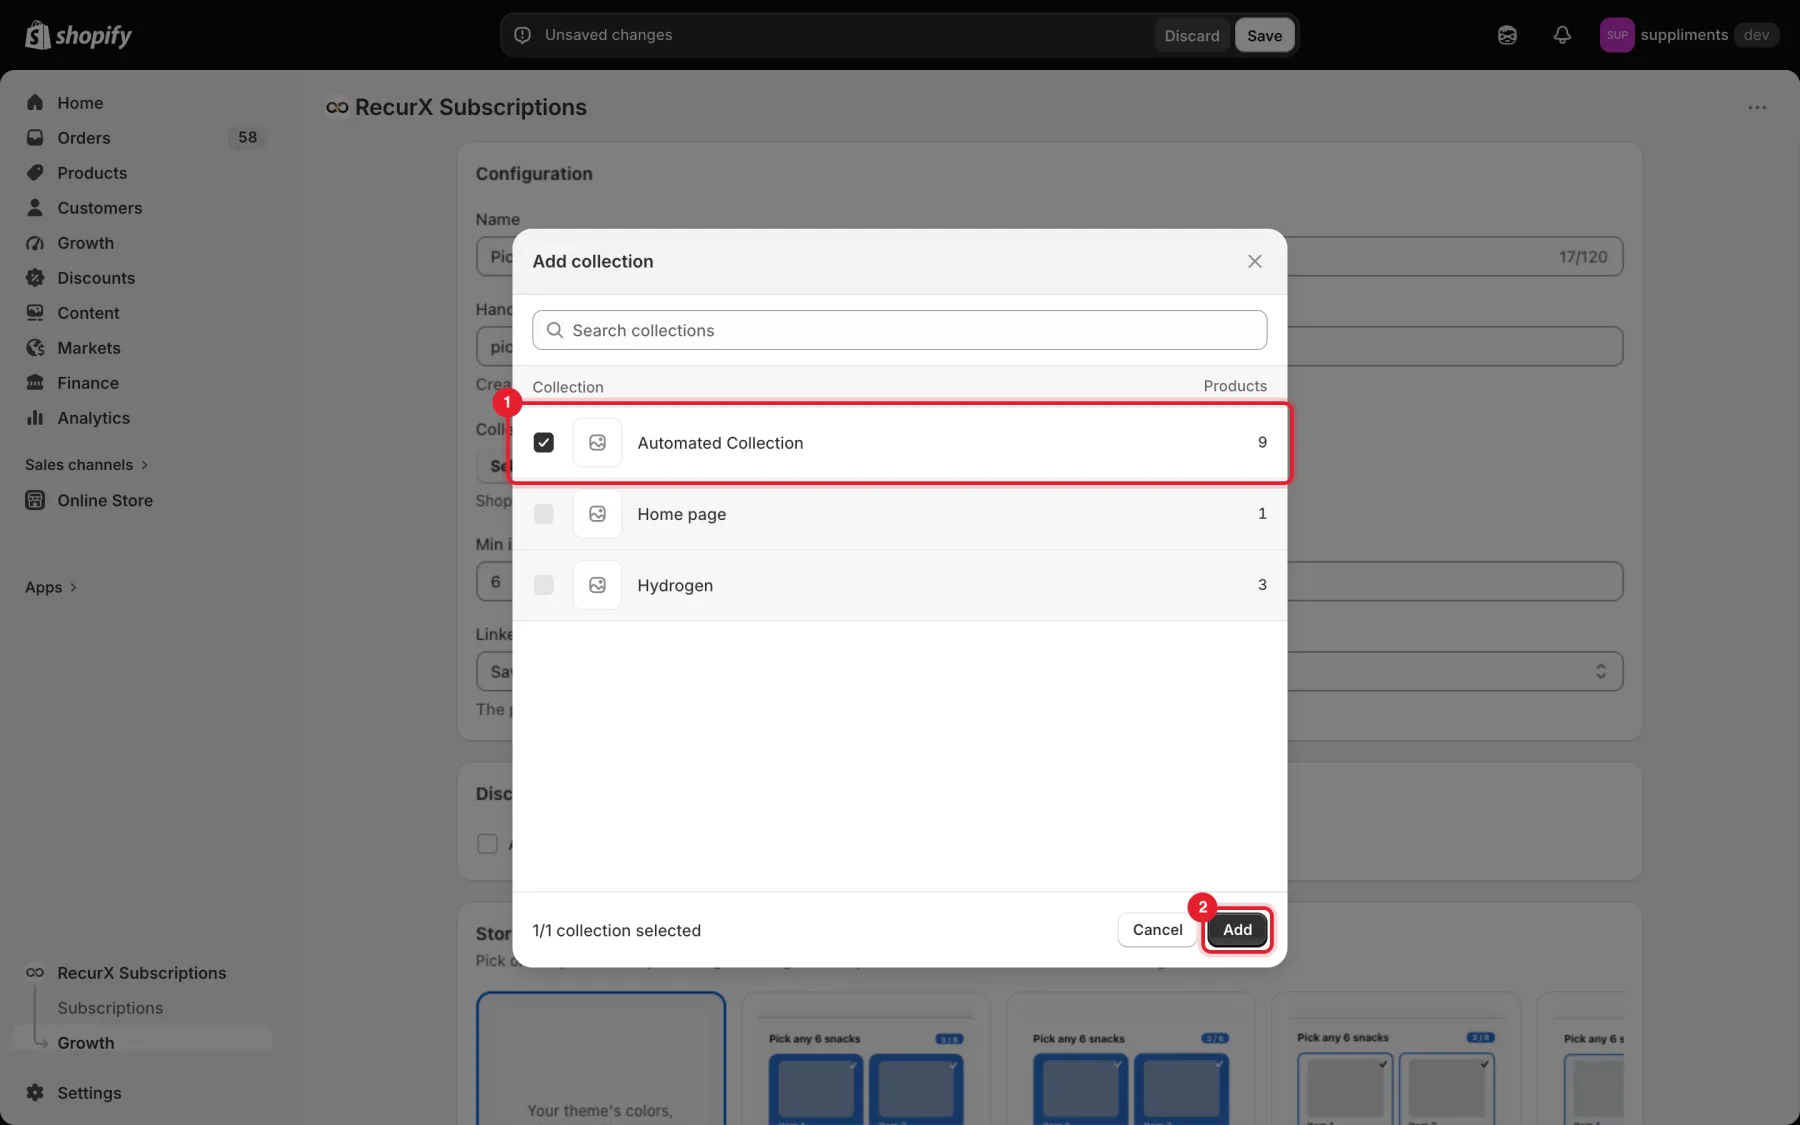
- Shopify's collection picker opens. Tick the collection (1) — its products are the ones shoppers can choose from.
- Click Add (2).
The collection's name now shows next to Change collection.
Tip: Keep the collection small and curated. Every product and variant in it appears as a choice in the box (the box loads up to 50 products).
Step 4: Add a discount (optional)
- In Discount, tick Apply discount to the whole box.
- Enter the Amount (1).
- Choose the Type (2): Percentage off (up to 100) or Fixed amount.

Note: Place a test order for your box on your storefront before you promote it, and check the price in the cart and at checkout.
Step 5: Choose the storefront design
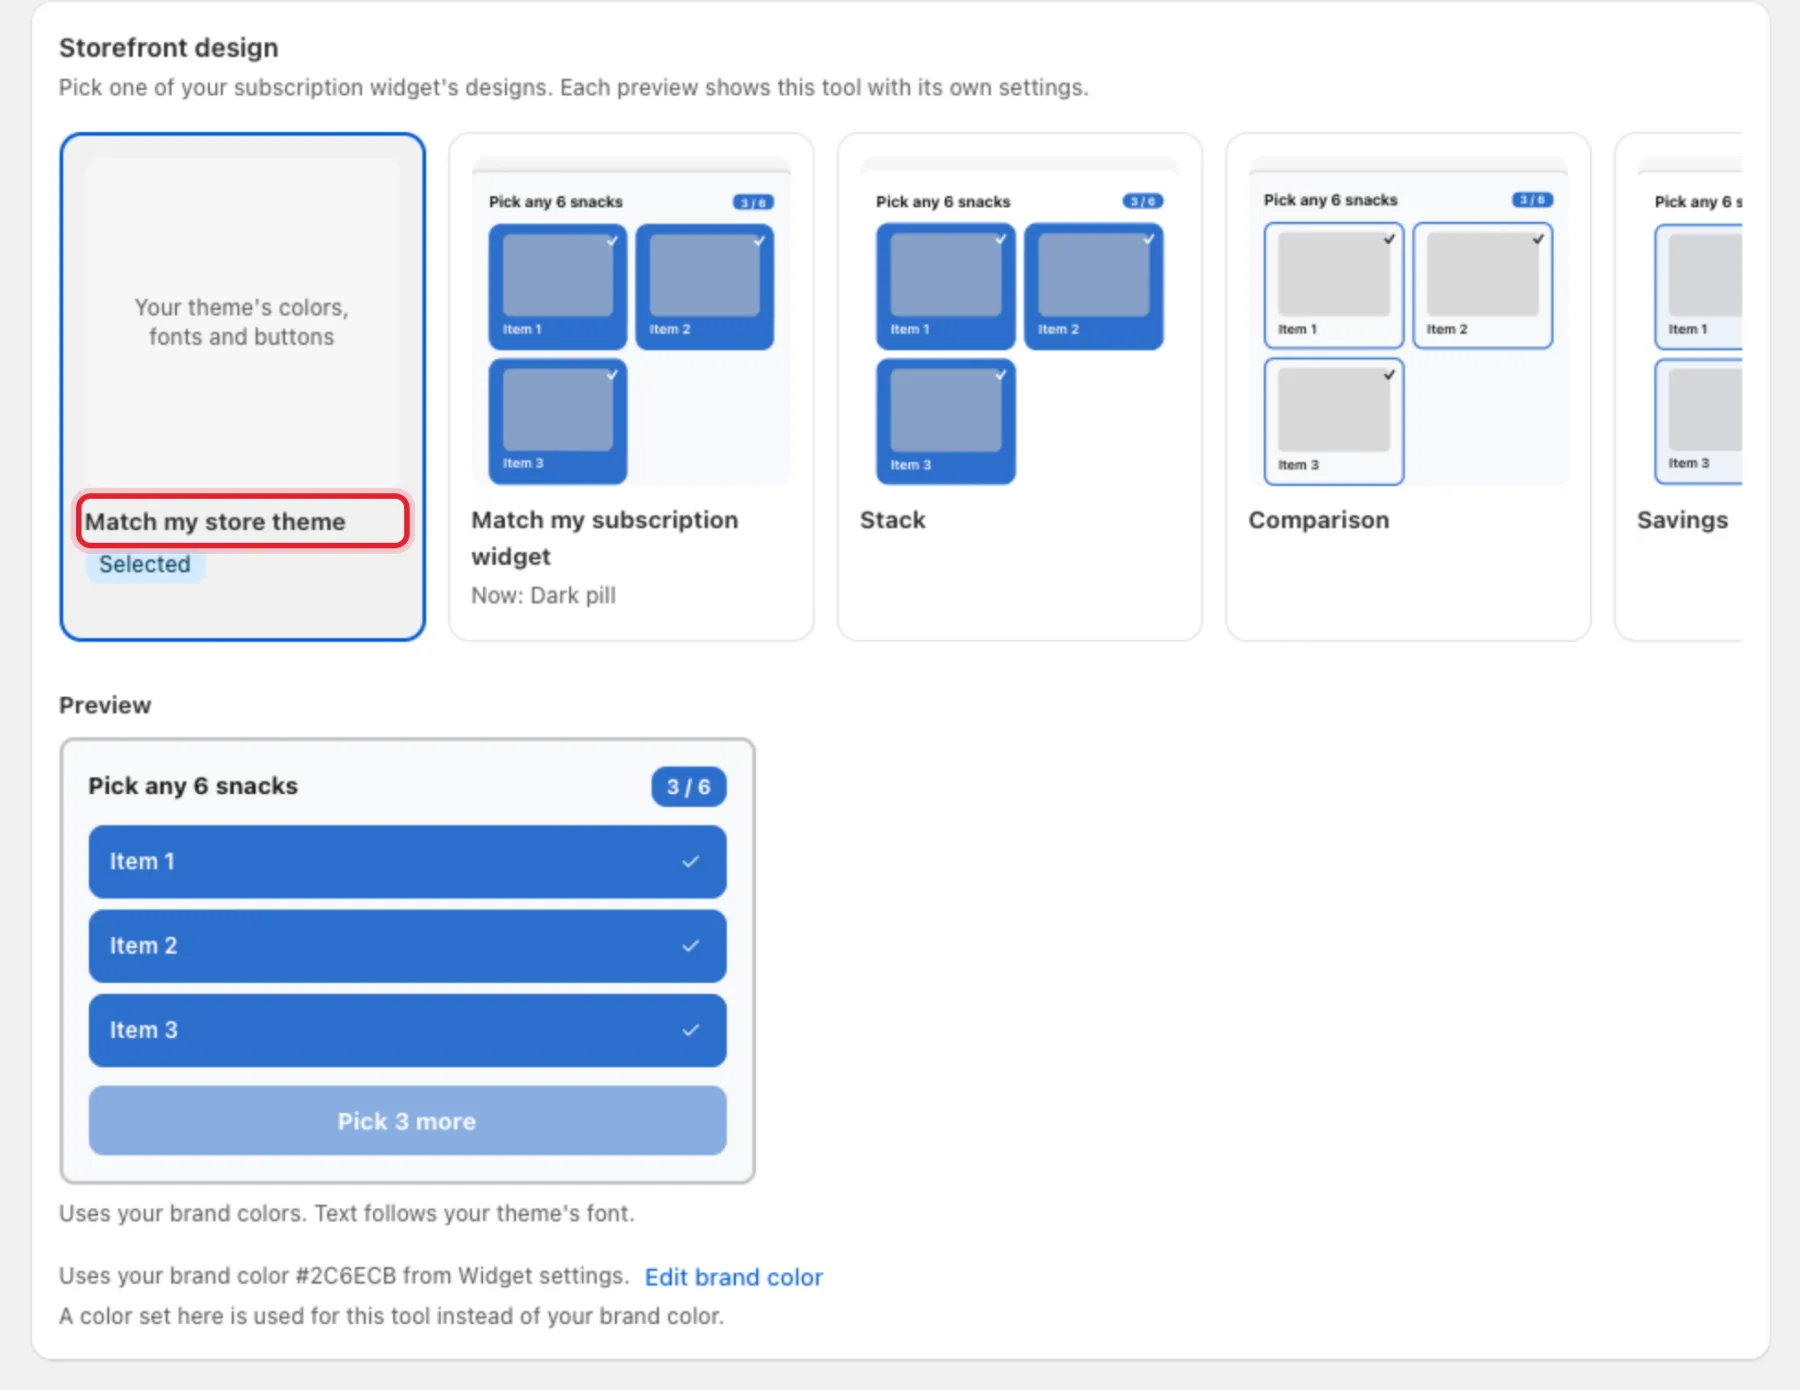
Storefront design controls how the box looks on your store:
- Match my store theme (the default) uses your theme's colors, fonts and buttons.
- Match my subscription widget reuses the design of your RecurX subscription widget.
- The other templates (Stack, Comparison, Savings and more) are ready-made looks you can pick instead.
The Preview under the templates updates as you change the name and box size.
Step 6: Publish and save
- In Publish, tick Show on storefront. When it's off, shoppers can't see or order the box.
- Click Save in the bar at the top of the page.

The box now appears in the list with the status Published.
What happens next
The box doesn't appear on your store until you add the RecurX Build-a-Box block to your theme and enter the box's handle. Follow Launchpad Bundles: put a box on your store.
On your store, shoppers tap items (or use + and −) until the counter reaches the box size — the button reads Pick 3 more until then — and click Add box to cart. The picked items go to the cart on the box's subscription plan, and the shopper is taken to the cart.
Troubleshooting
- "Collection is required" — pick a collection in Step 3.
- "Max items must be ≥ min items" — Max items can't be lower than Min items.
- "Another box already uses this handle. Choose a different one." — change the Handle.
- The store shows "Box not found or not published" instead of the box — the box isn't published, or the handle in the theme block doesn't match. Tick Show on storefront, save, and copy the handle again with the copy button in the list.