Launchpad Bundles is the RecurX feature behind build-a-box: shoppers pick their own items from a collection and subscribe to the whole box. It lives under Growth → Build-a-box and is included on the Basic and Pro plans. This guide shows how to get a box you've created onto your storefront, and how to manage your boxes afterwards.
Before you start: create and publish a box — see Build-a-box subscriptions.
Note: Launchpad Bundles are pick-your-own boxes. RecurX doesn't sell pre-packed bundles with a fixed selection that you choose for the customer.
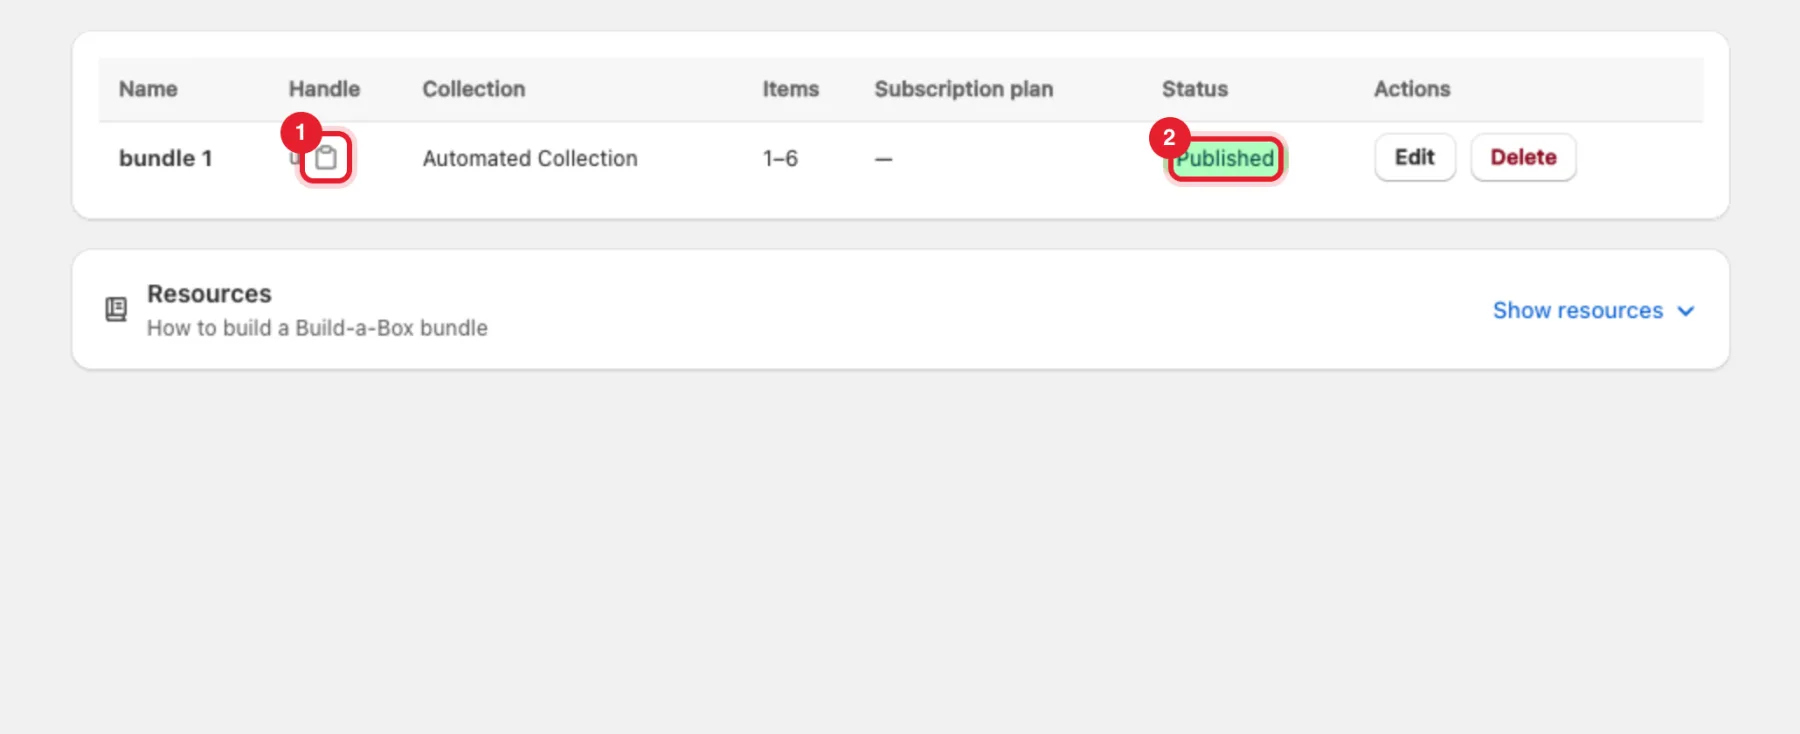
Step 1: Copy the box's handle
- In your Shopify admin, open Apps → RecurX Subscriptions → Growth → Build-a-box.
- Check the box's Status is Published (2). A Draft box can't be seen or ordered.
- Click the copy button next to the handle (1). RecurX confirms Copied "…". Paste it into the Build-a-box block setting.
Step 2: Open the theme editor with Add to theme
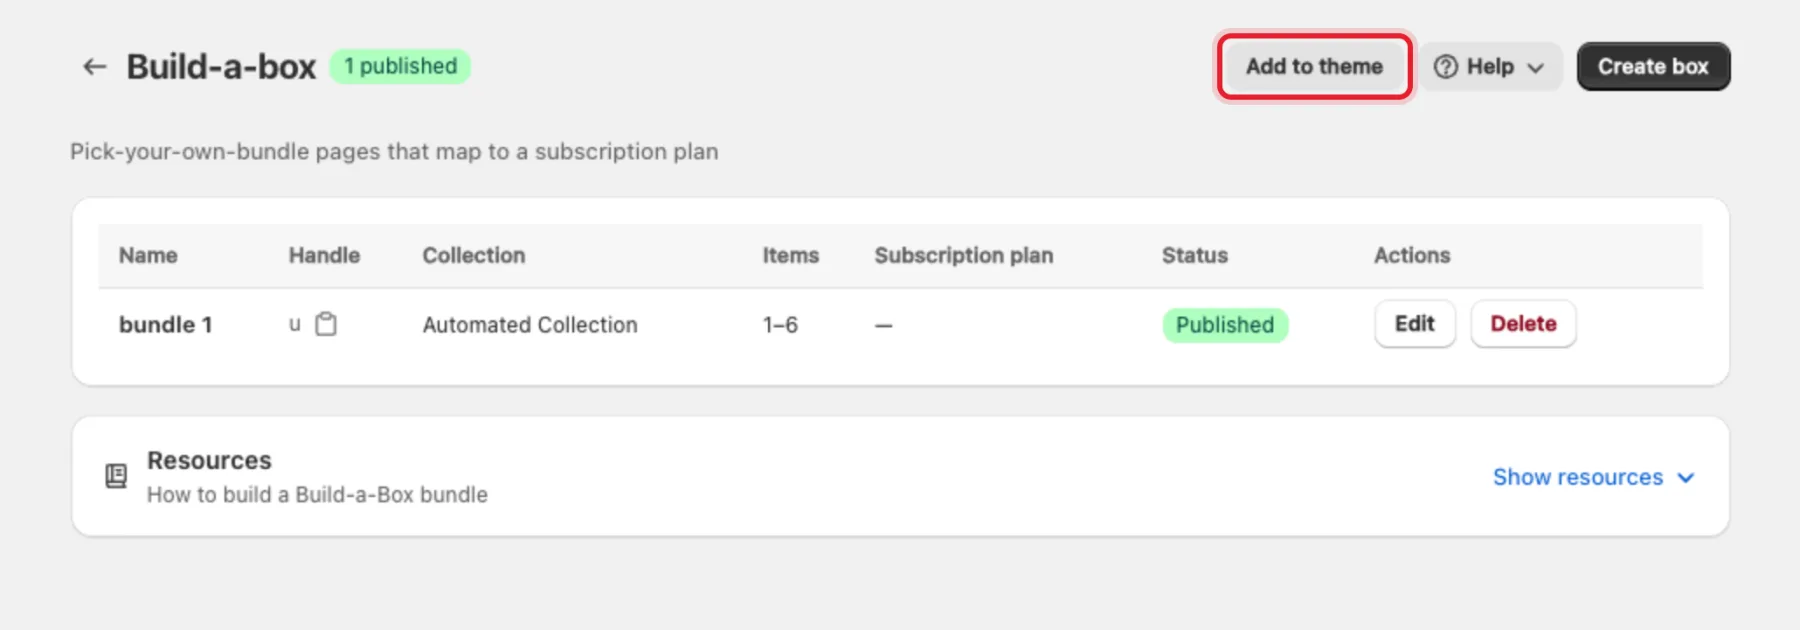
Click Add to theme at the top of the Build-a-box page. Shopify's theme editor opens with a RecurX Build-a-Box block already added to your page template.
Tip: To show the box somewhere else — for example on a product page or a dedicated page — pick that template at the top of the theme editor, click Add block in the section where you want it, and choose RecurX Build-a-Box under Apps.
Step 3: Set up the block
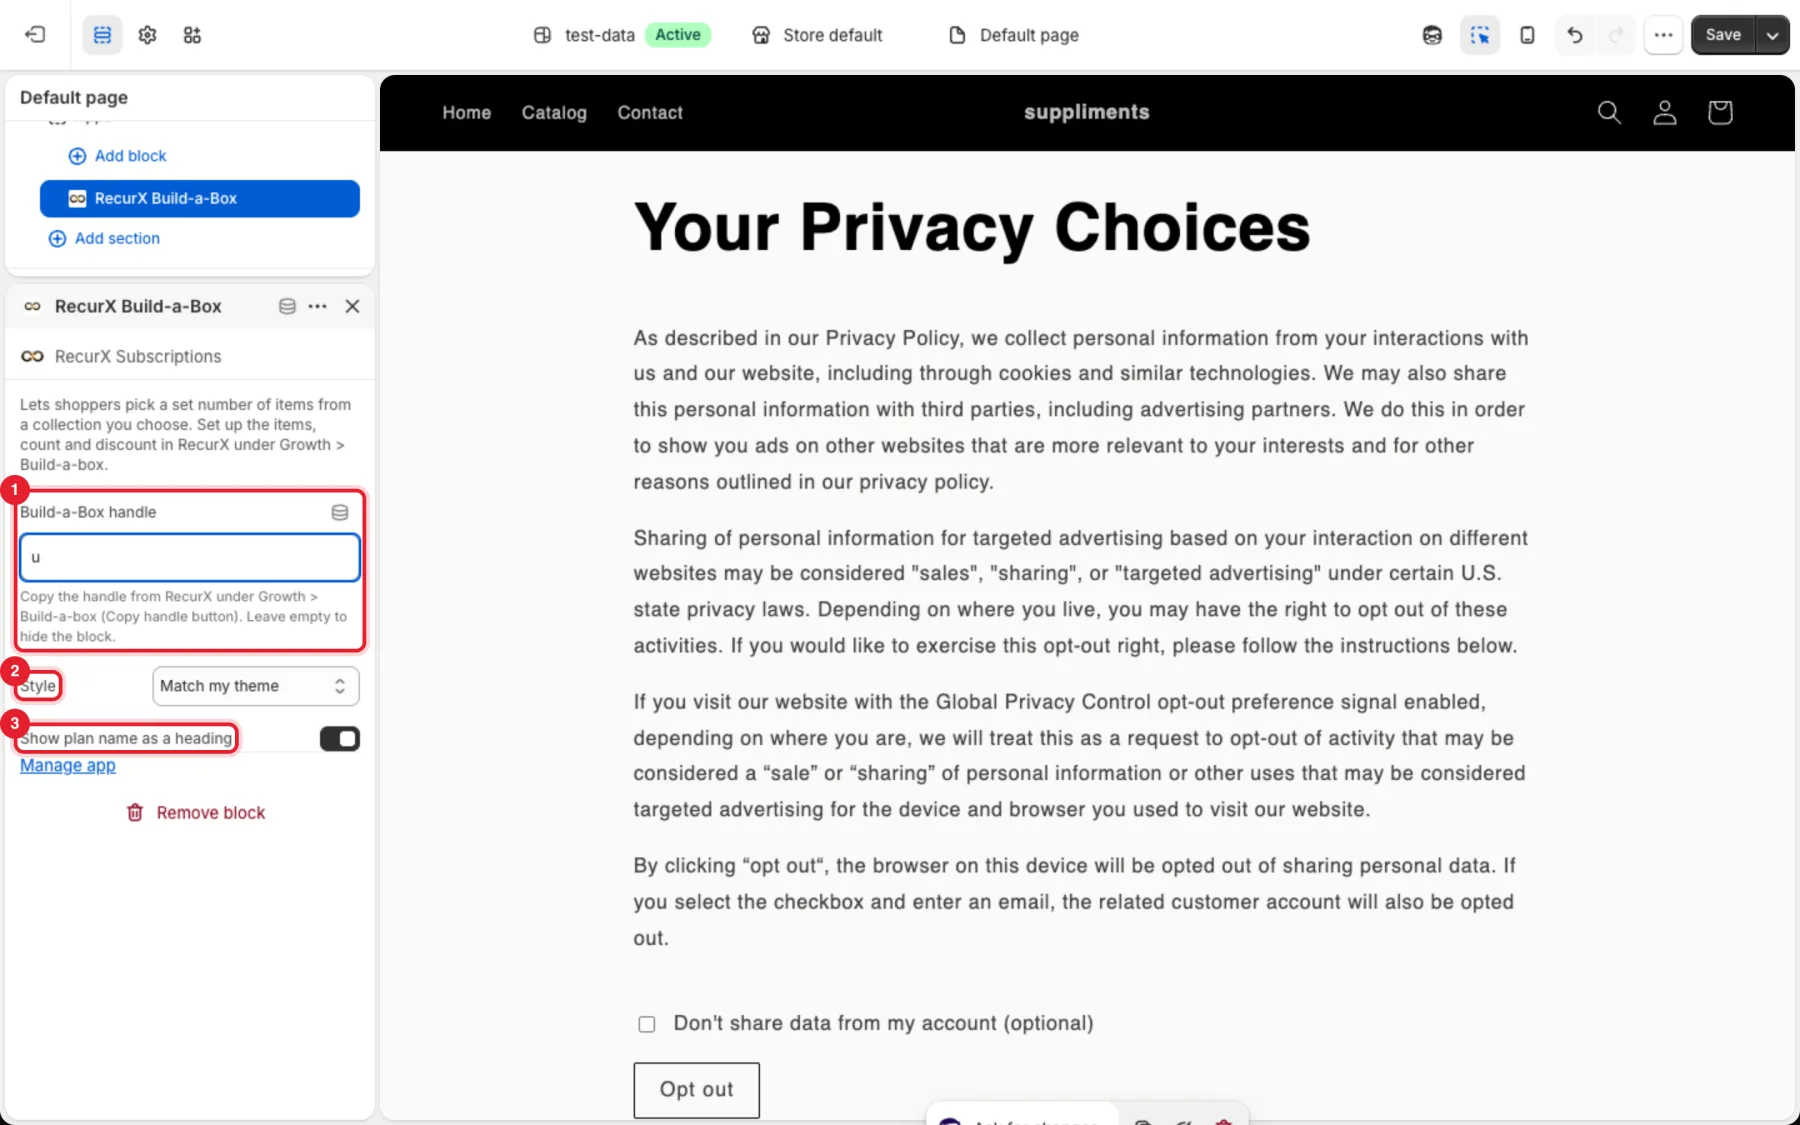
Click RecurX Build-a-Box in the left panel to open its settings:
- Build-a-Box handle — paste the handle you copied in Step 1. Leave it empty to hide the block.
- Style — Match my theme (the default) or RecurX Void (black, white and green).
- Show plan name as a heading — shows the box name above the items.
Step 4: Check the preview and save the theme
The preview shows your box with its counter (for example 0 / 6) and every item shoppers can pick. When it looks right, click Save in the top right of the theme editor.
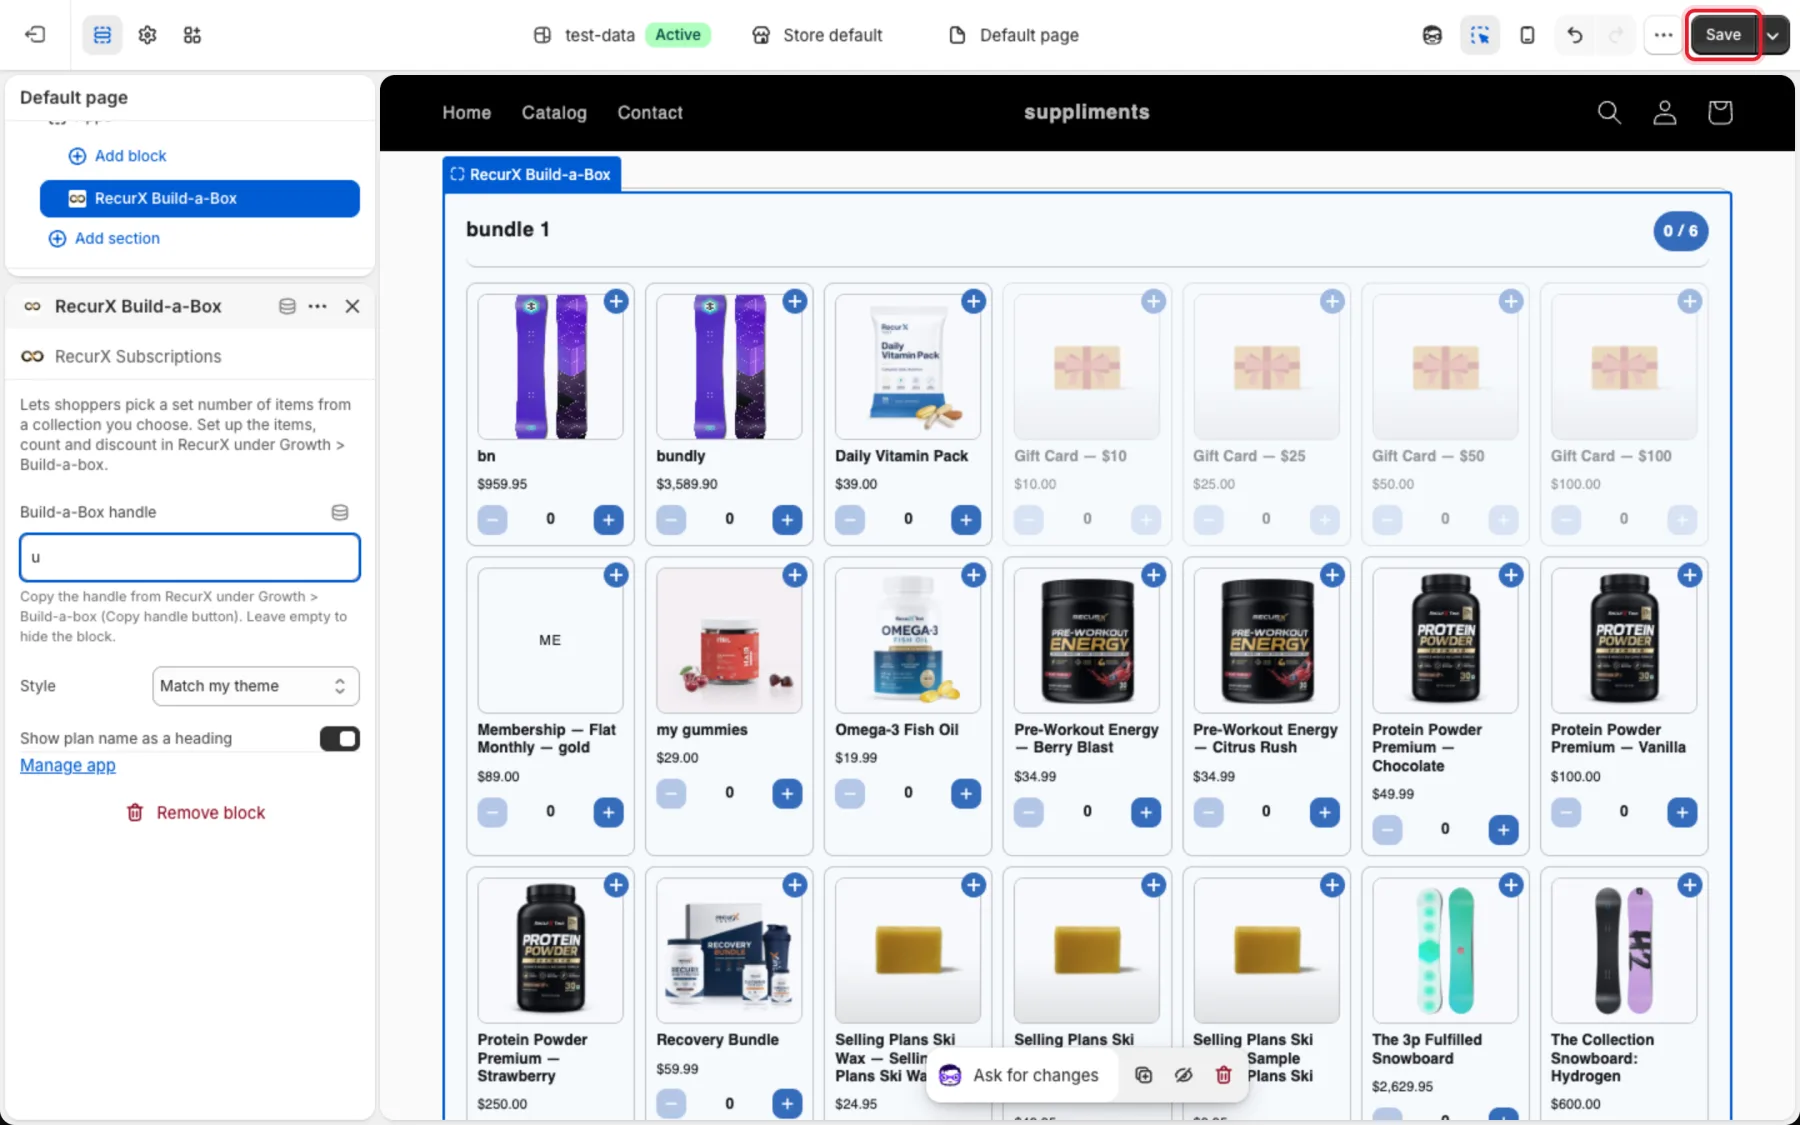
Important: Nothing changes on your live store until you click Save in the theme editor.
Step 5: Manage your boxes
Back on Growth → Build-a-box:
- Edit — change the box's items, size, plan, discount or design. To take a box off your store without deleting it, untick Show on storefront and save.
- Delete — removes the box from RecurX after you confirm.
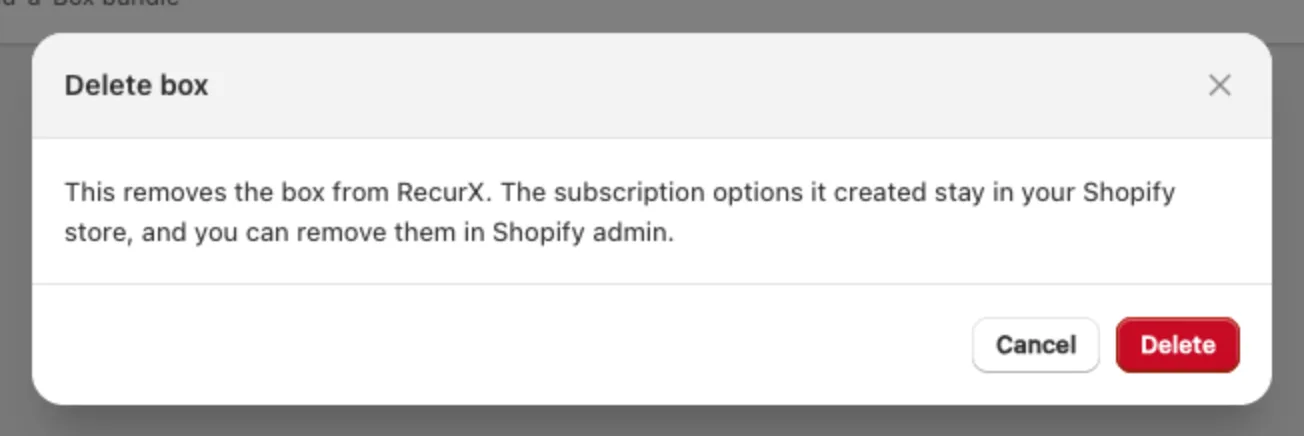
Note: Deleting a box keeps the subscription options it created in your Shopify store (named Launchpad Bundles — your box name). Remove them in Shopify admin if you no longer need them. Remove the RecurX Build-a-Box block from your theme too.
What your shoppers see
Shoppers tap items, or use + and −, until the counter reaches the box size. The button reads Pick 3 more until the box is full, then Add box to cart. The items go into the cart on the box's subscription plan and the shopper is taken to the cart.
FAQ
Which plan do I need? Launchpad Bundles is on both Basic ($29/month) and Pro ($49/month). See RecurX billing.
The block says "RecurX Build-a-Box: paste your box handle into the block settings to show the box here." The Build-a-Box handle setting is empty. Paste the handle from Step 1.
The block shows "Box not found or not published". The handle doesn't match any published box. Copy it again from the list and check the box's status is Published.