
A win-back campaign sends subscribers who cancelled an offer to come back, for example 15% off if they restart. RecurX sends it automatically a set number of days after the cancellation, and can follow up with a bigger offer if the first one isn't taken. In RecurX this tool is called Customer recovery. Setup takes about 5 minutes.
Before you start:
- Plan: win-back is included in the Basic and Pro plans.
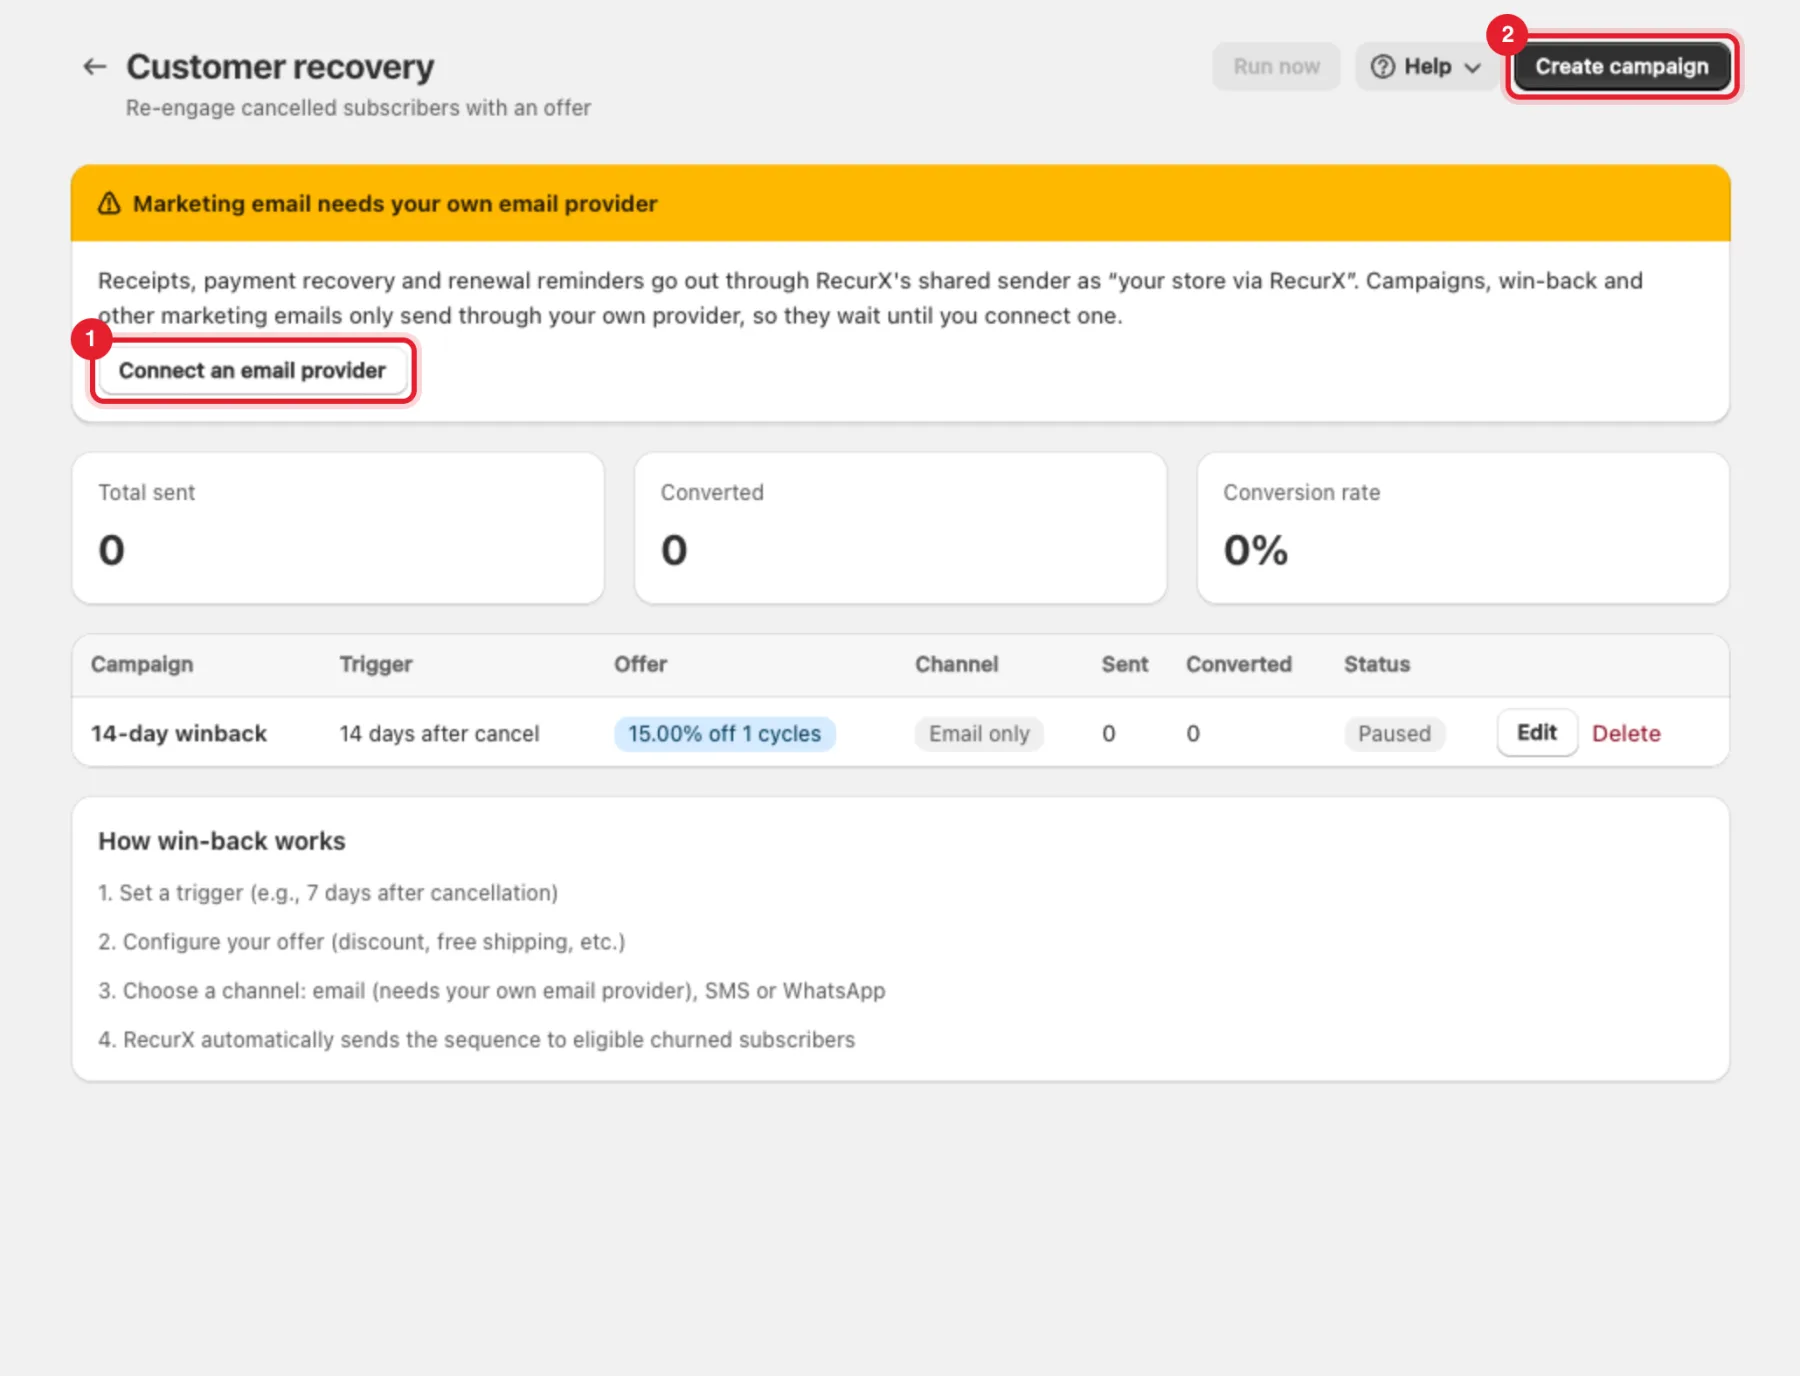
- Email needs your own email provider. Receipts, payment recovery and renewal reminders go out through RecurX's shared sender, but campaigns and win-back emails only send through your own provider. See Email provider setup. For text messages, see SMS and WhatsApp.
Step 1: Open Customer recovery
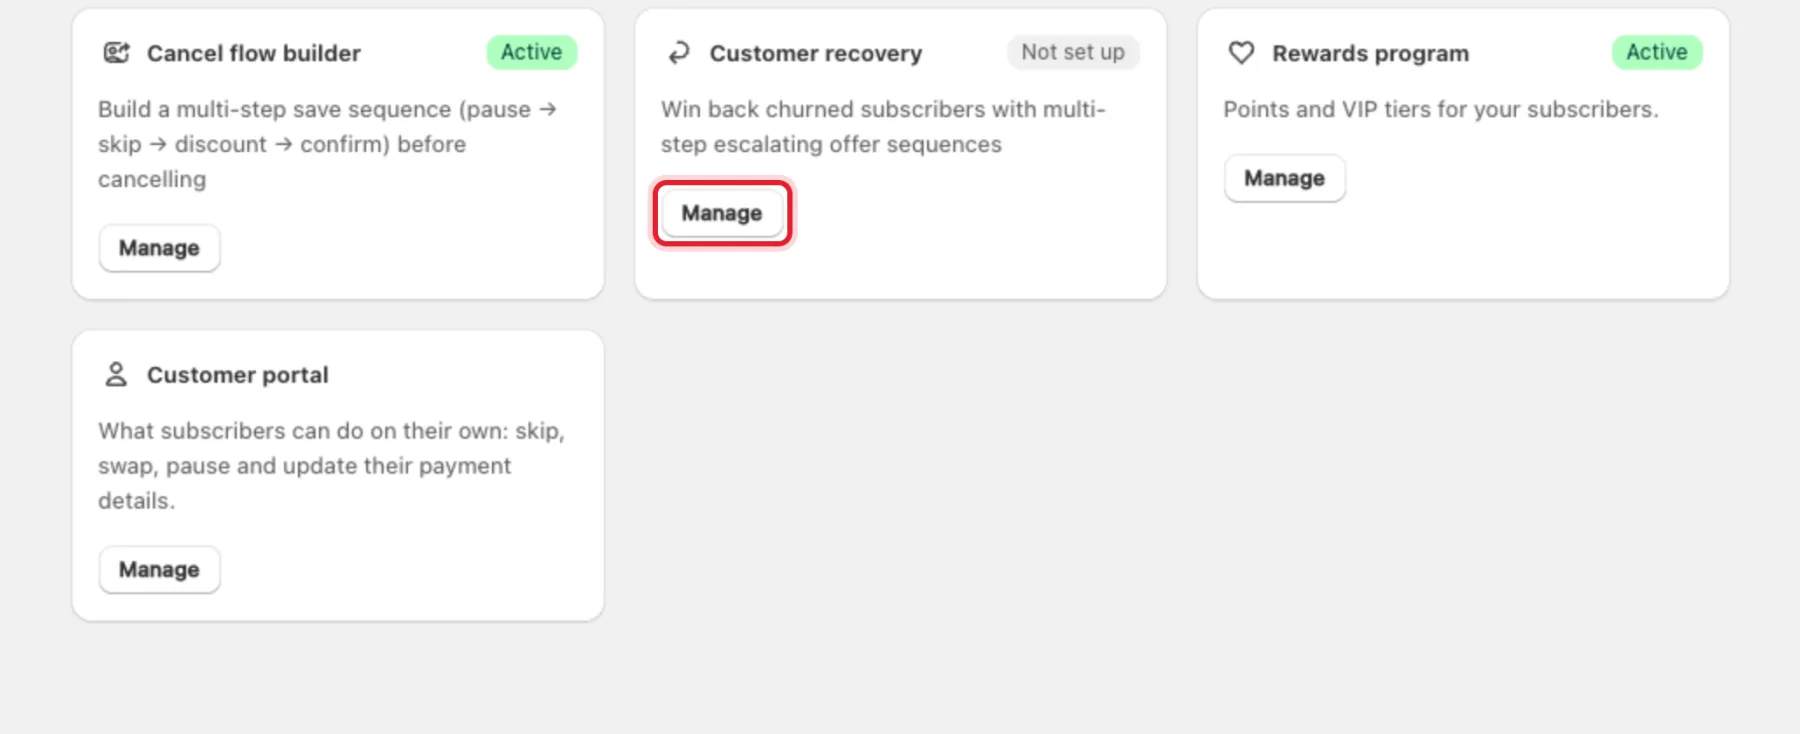
- In your Shopify admin, open Apps → RecurX Subscriptions → Retention.
- Click Manage on the Customer recovery card.
Step 2: Connect a provider, then create a campaign
- If you see Marketing email needs your own email provider, click Connect an email provider first (or plan to use SMS or WhatsApp).
- Click Create campaign in the top right.
Step 3: Set the trigger and the offer
In Create win-back campaign:
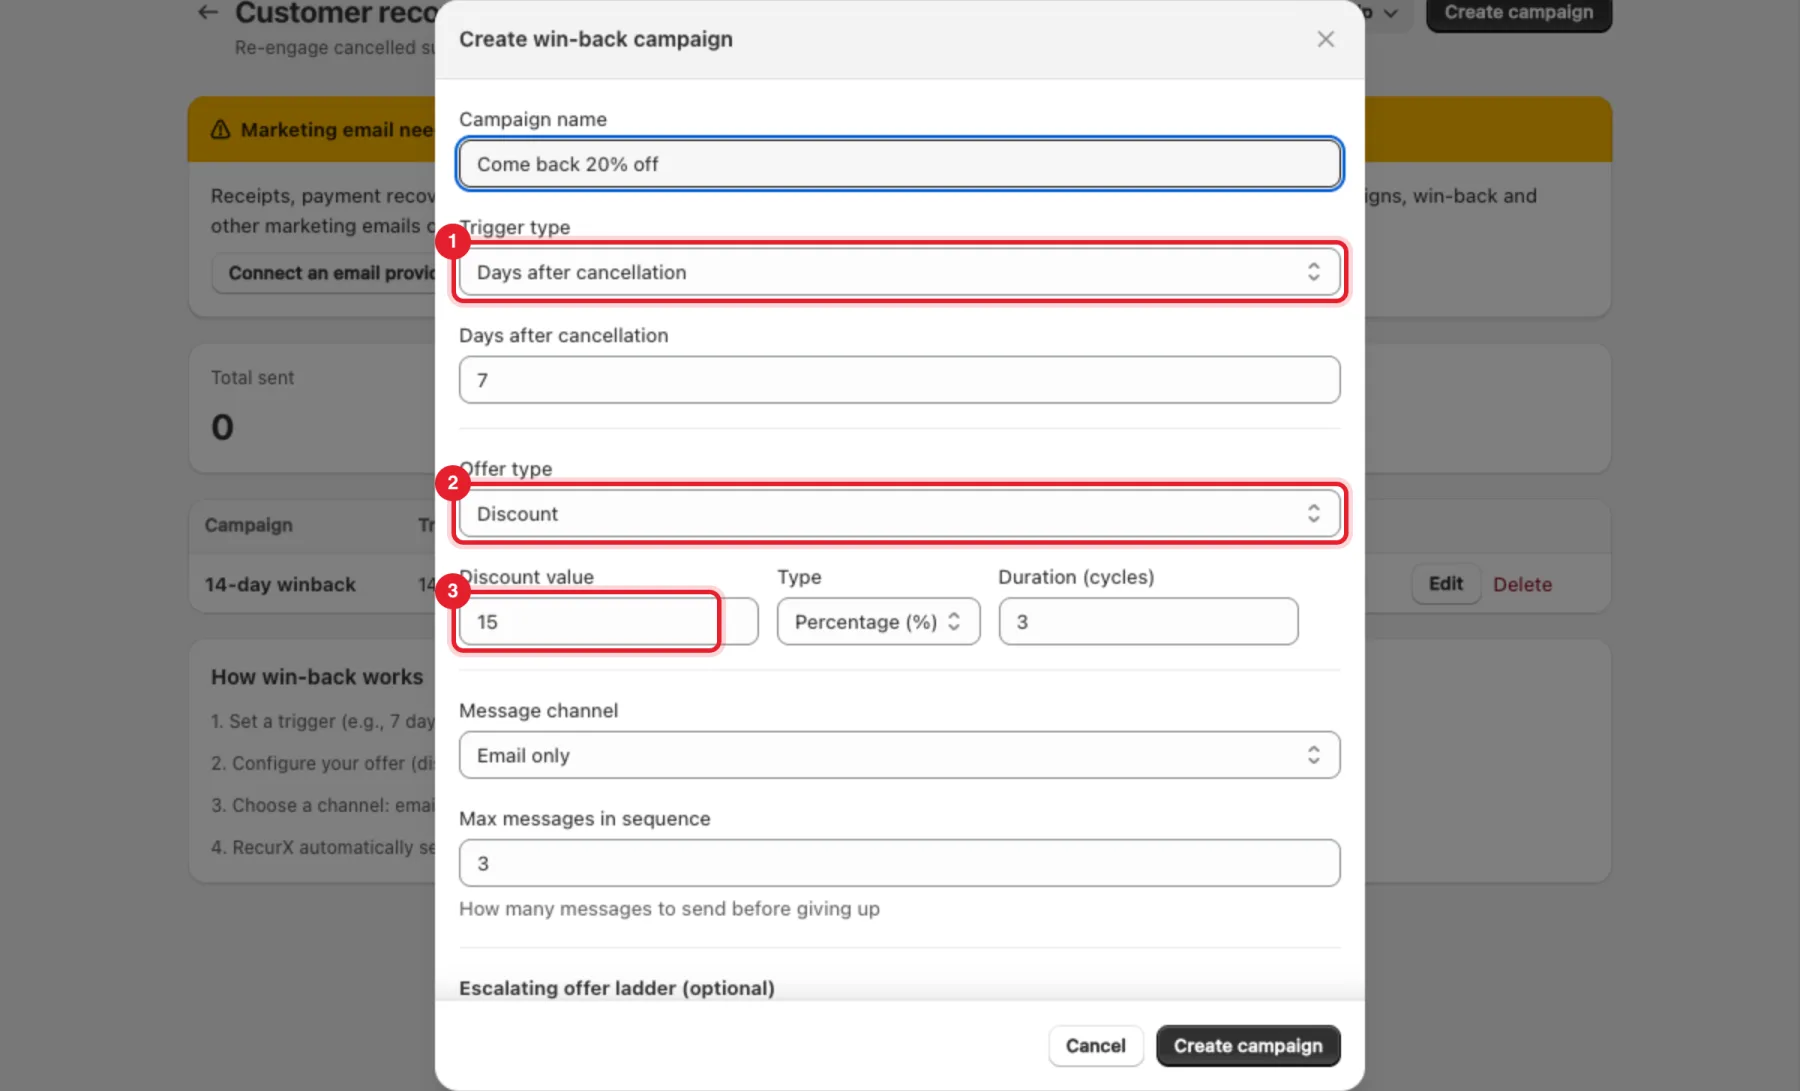
- Enter a Campaign name, for example Come back 20% off.
- Trigger type — Days after cancellation (set the number of days), Specific cancel reason (only customers who cancelled for that reason), or Manual trigger only.
- Offer type — Discount, Free shipping or Custom message only.
- For a discount, set the Discount value, the Type (Percentage (%) or Fixed ($)) and the Duration (cycles).
Step 4: Choose the channel and the follow-ups
- Message channel — Email only, SMS only or WhatsApp.
- Max messages in sequence — how many messages to send before giving up.
- Escalating offer ladder (optional) — click + Add rung to add a bigger offer per attempt, for example 10% → 20% → 30%. Attempt N uses rung N; beyond the last rung, the deepest offer repeats. Leave it empty to send the same discount every time.
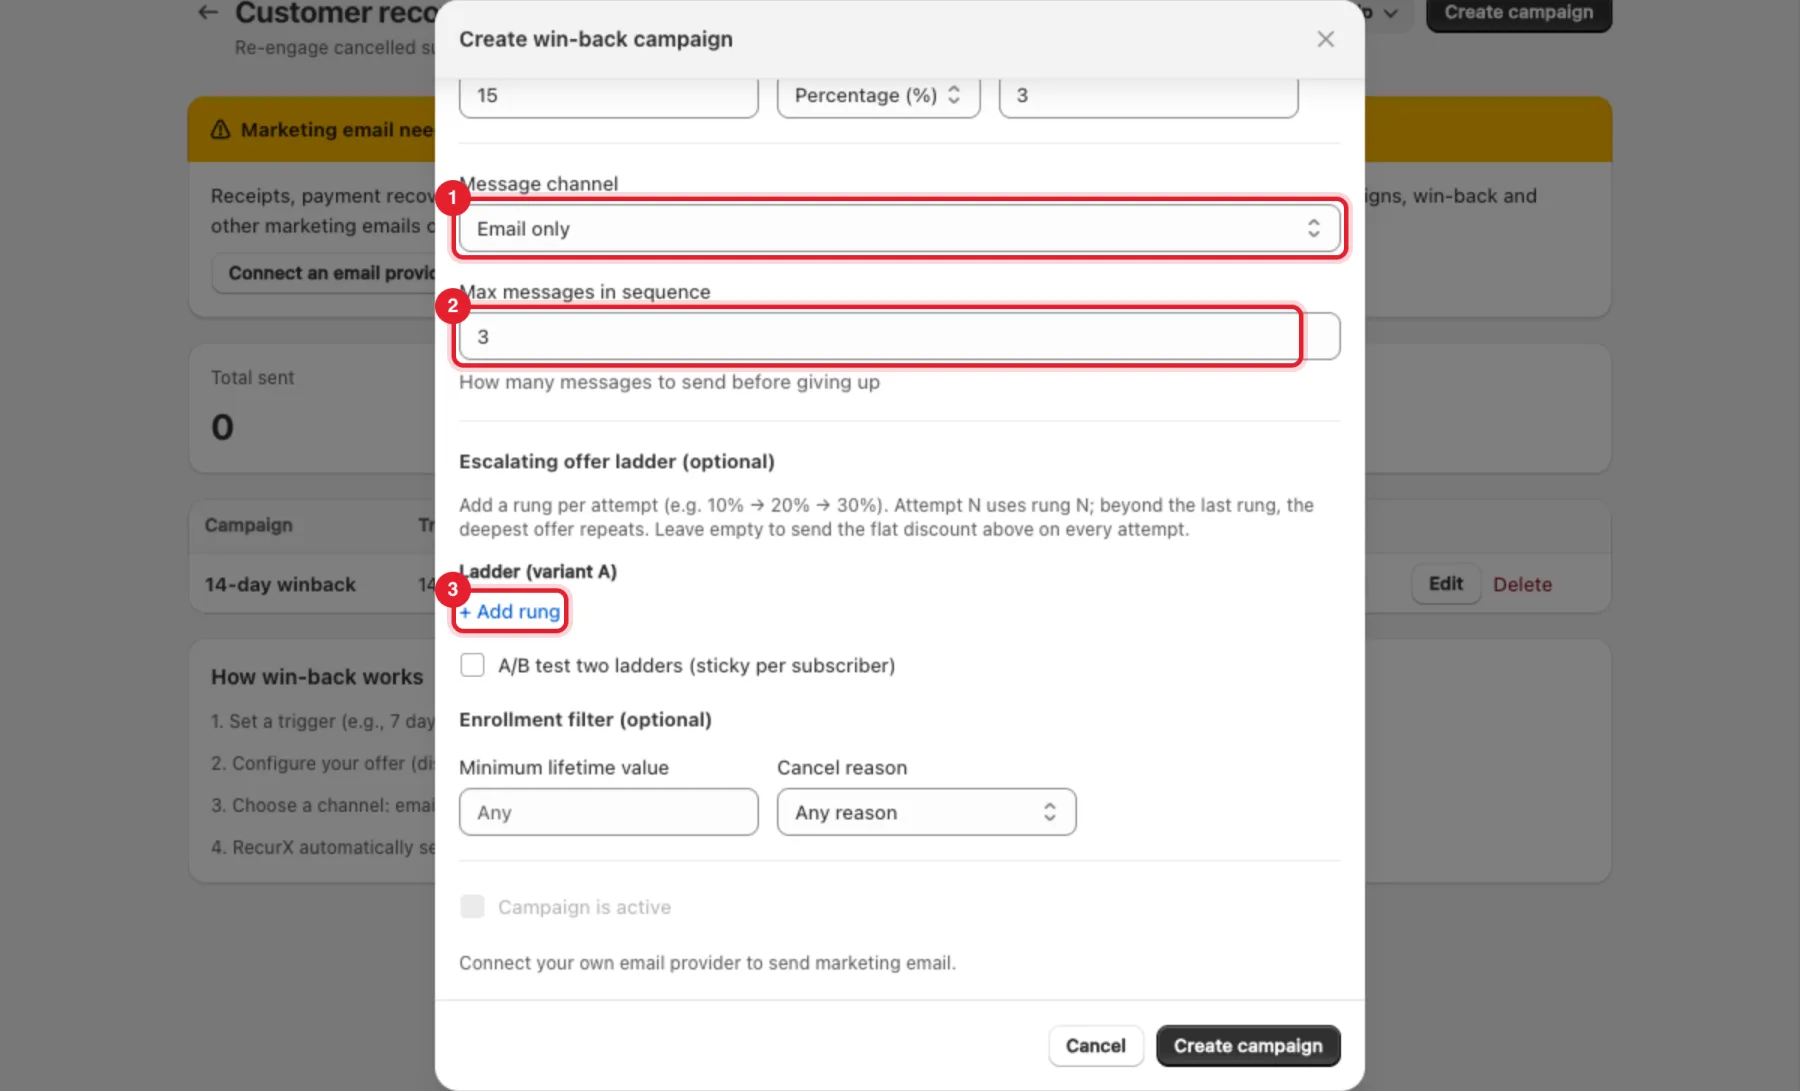
Tip: Tick A/B test two ladders (sticky per subscriber) to compare two ladders. Each subscriber stays on the ladder they were given.
Step 5: Filter who gets it and turn it on
- Enrollment filter (optional) — a Minimum lifetime value, or one Cancel reason only.
- Tick Campaign is active, then click Create campaign.
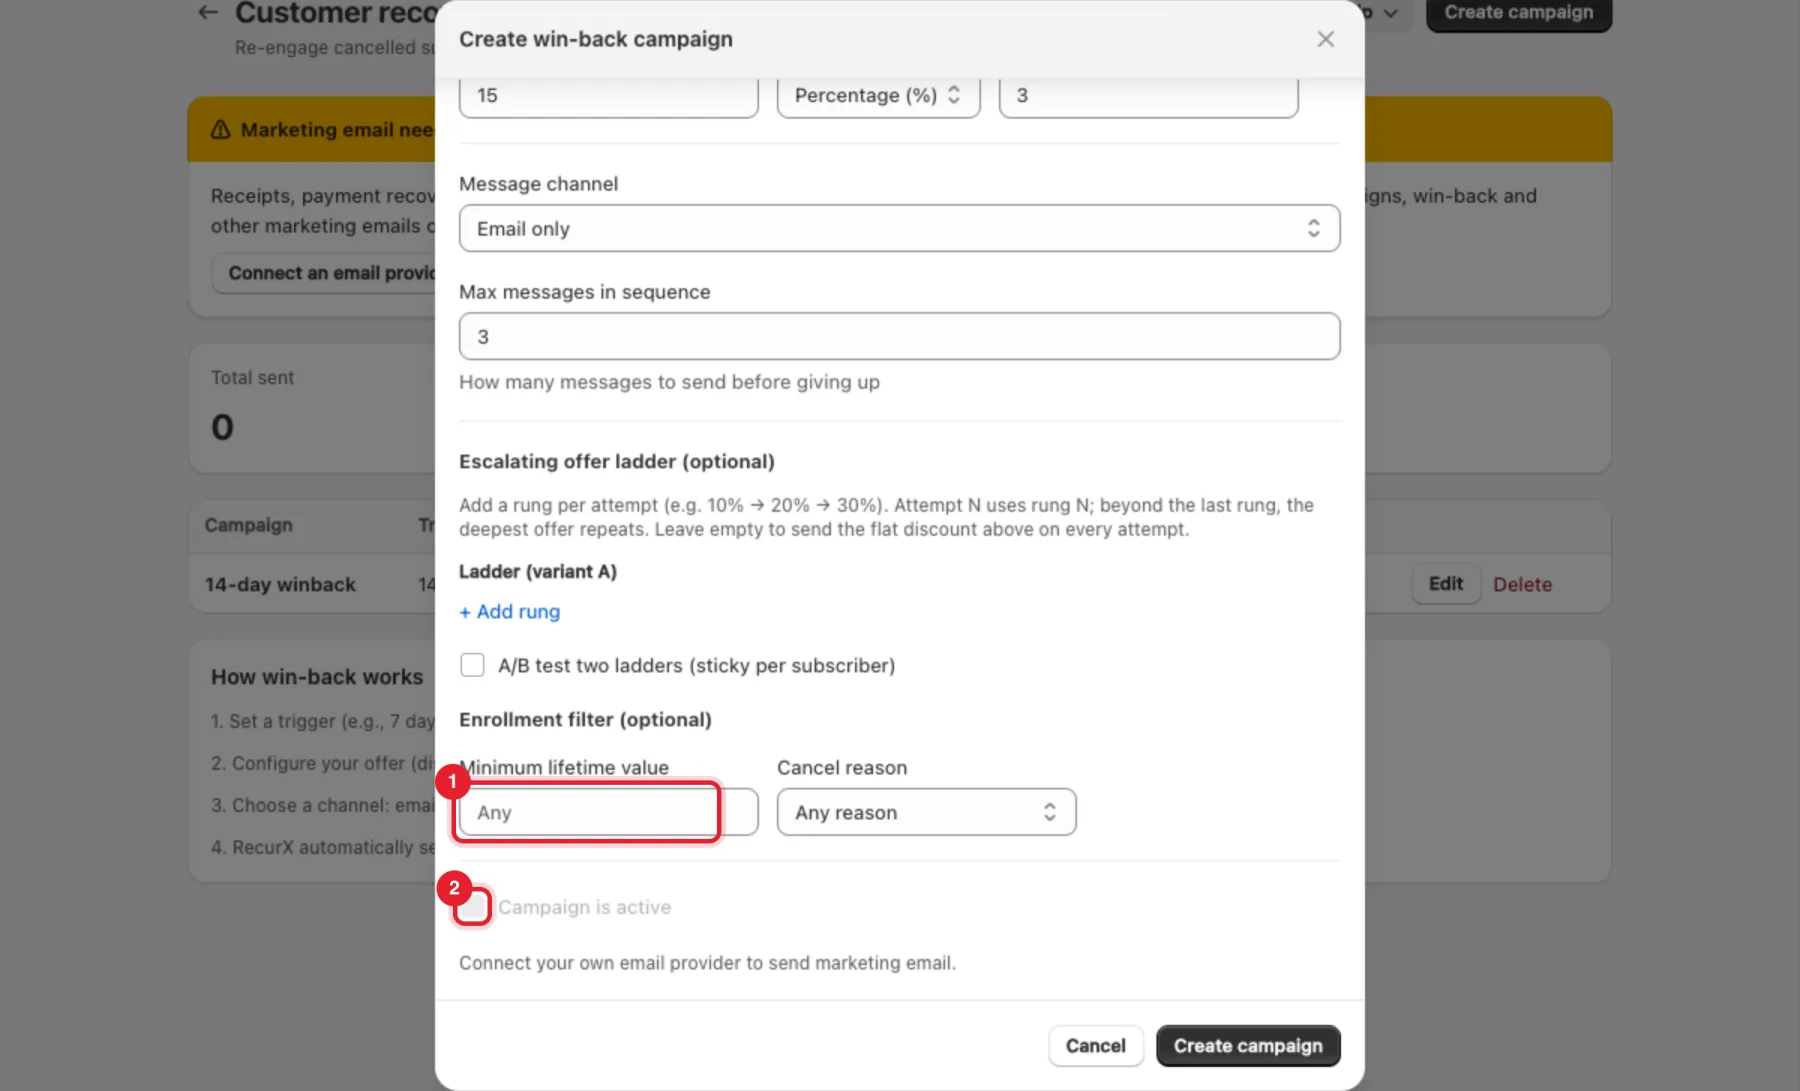
Note: Campaign is active can't be ticked for an email campaign until you connect your own email provider (Connect your own email provider to send marketing email.).
Step 6: Manage your campaigns
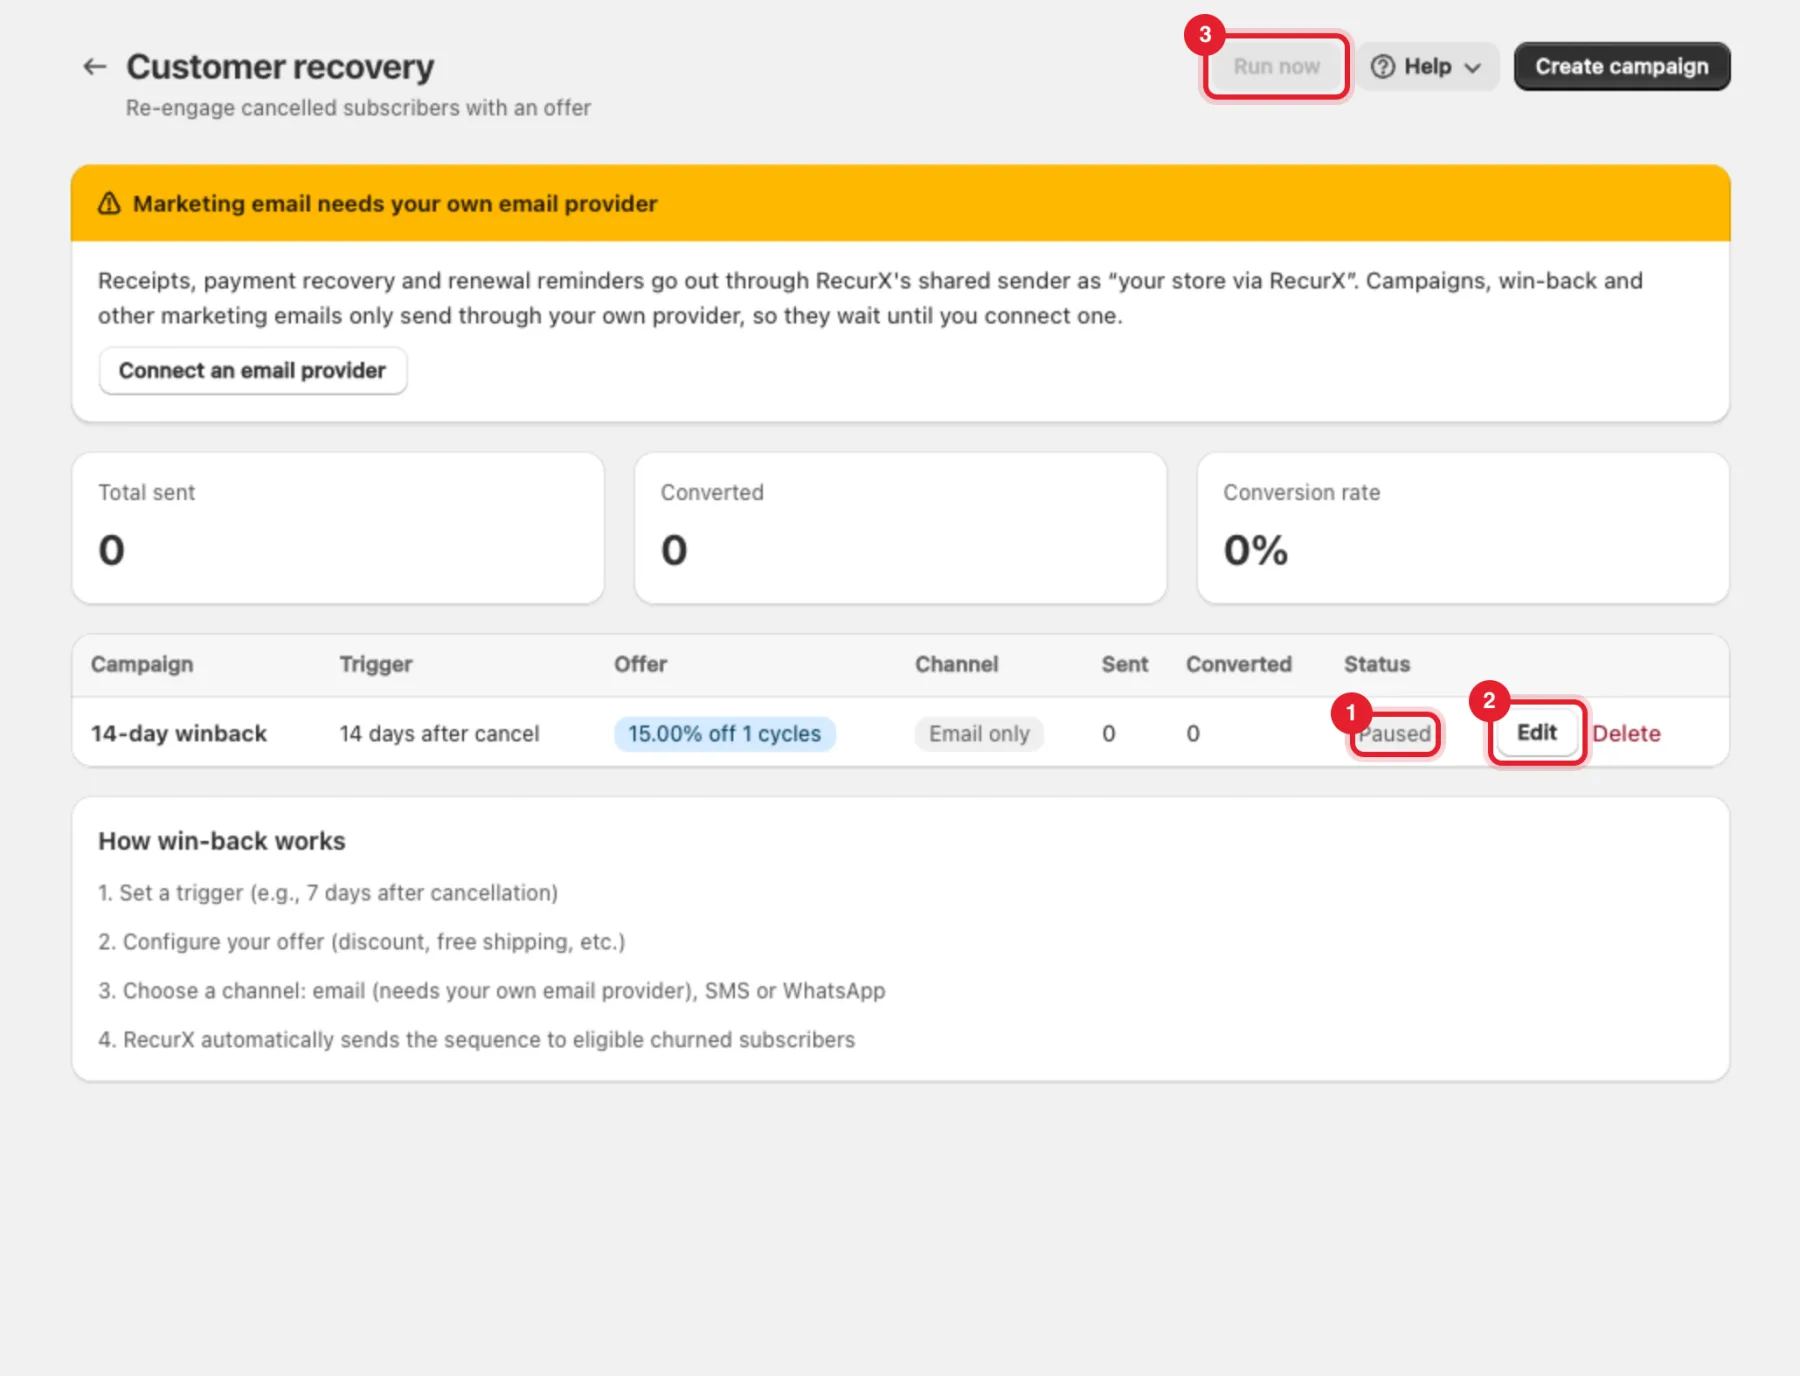
Your campaigns are listed with their Trigger, Offer, Channel, Sent, Converted and Status. The cards above show Total sent, Converted and Conversion rate.
- Status — Paused campaigns send nothing.
- Edit — change a campaign (Save changes in the modal).
- Run now — sends to eligible subscribers straight away instead of waiting for the next automatic run. RecurX asks you to confirm first, and the button is disabled when nothing could be sent.
Offer a restart right after a cancel
Separately from campaigns, the customer portal can show an instant offer on the subscription the customer just cancelled. Open Retention → Customer portal → Open customer portal settings, then the Offers tab:
- Discount on the first order back (%) —
0turns the offer off. It applies to one order only. - Offer lasts (hours after cancelling) — how long the offer is shown.
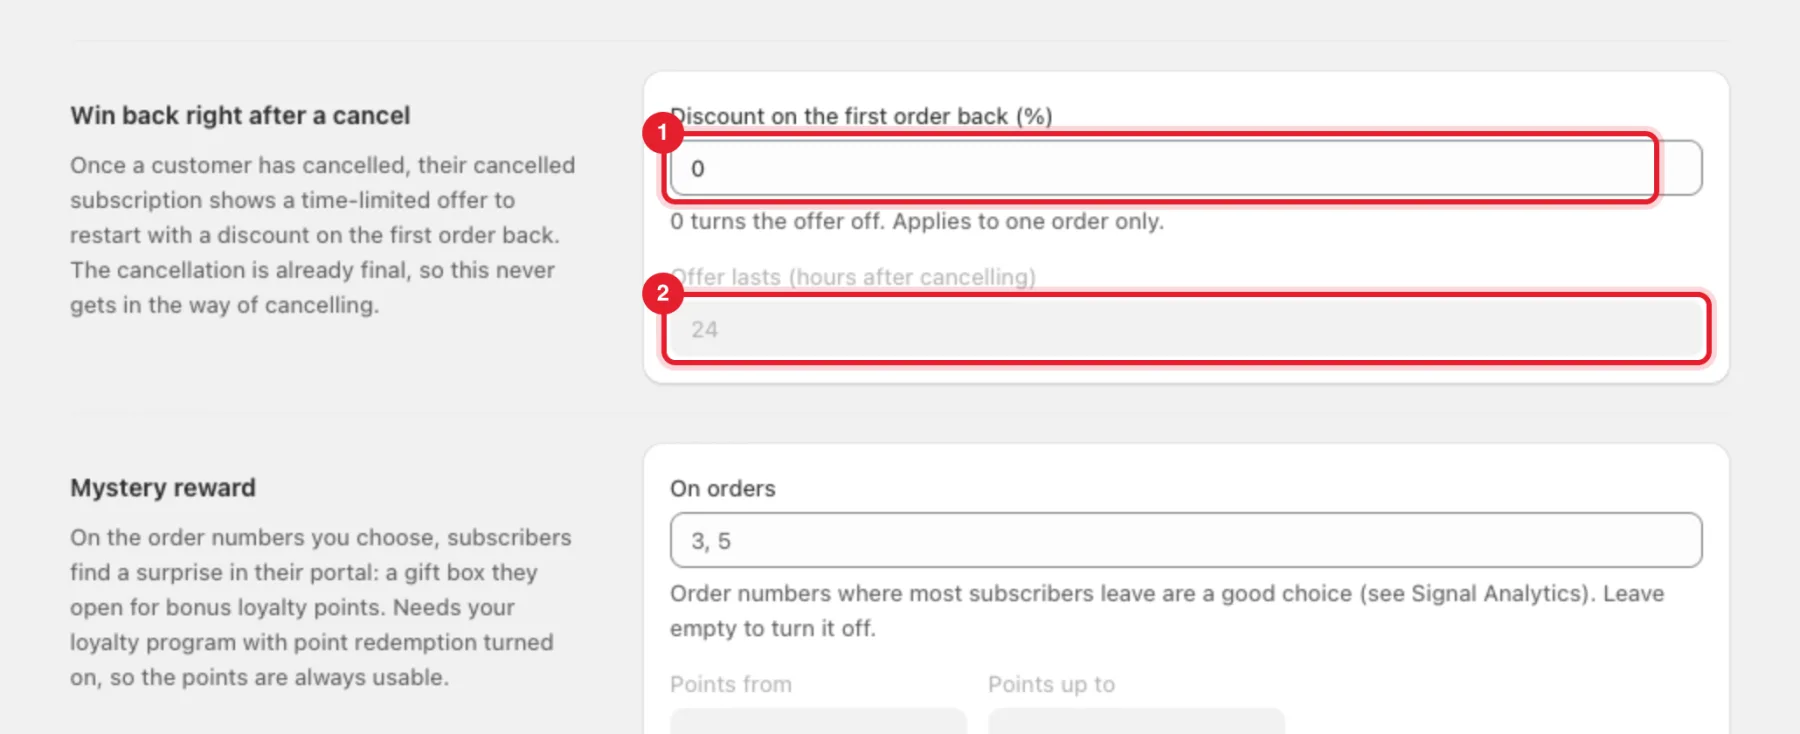
The cancelled subscription then shows Come back for N% off with a countdown and a Restart subscription button. The cancellation is already final, so this never gets in the way of cancelling.
Who receives win-back messages
- Only subscribers who cancelled, once the trigger's number of days has passed.
- Email goes only to customers with marketing consent who aren't on your suppression list, and each email has an unsubscribe link. SMS and WhatsApp follow their own opt-in.
- Each subscriber gets at most Max messages in sequence messages per campaign.
FAQ
- The campaign shows Sent 0. Check the Status is active, the channel's provider is connected, and that customers cancelled at least the trigger's number of days ago.
- Can I stop customers cancelling in the first place? Use the cancel flow.