
When you first open RecurX, the Set up RecurX guide opens. It has five tasks:
- How are you starting?
- Build your first plan
- Choose widget
- Turn on your widget
- Choose pricing
It takes about 10 minutes. You can leave at any point and pick up where you stopped.
Who it's for: new RecurX stores, and anyone who wants to re-check their setup.
Step 1: Open the guide
The guide opens by itself the first time you open Apps → RecurX Subscriptions. To open it again later, click App settings in the sidebar, then Setup guide under Account.
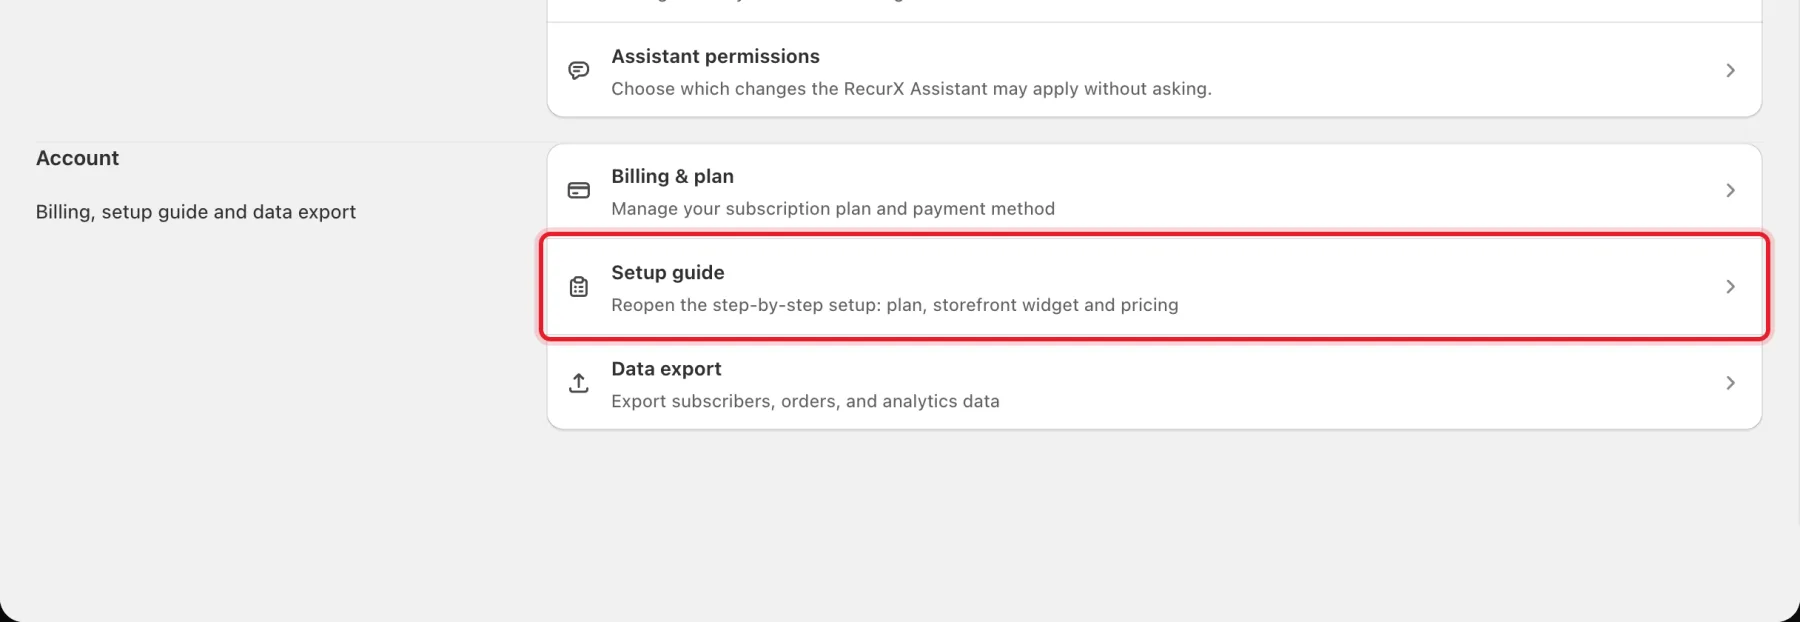
Note: The guide opens on the first task you haven't finished. Finished tasks show a check mark, and Setup guide shows how many of the 5 tasks are complete.
Step 2: How are you starting?
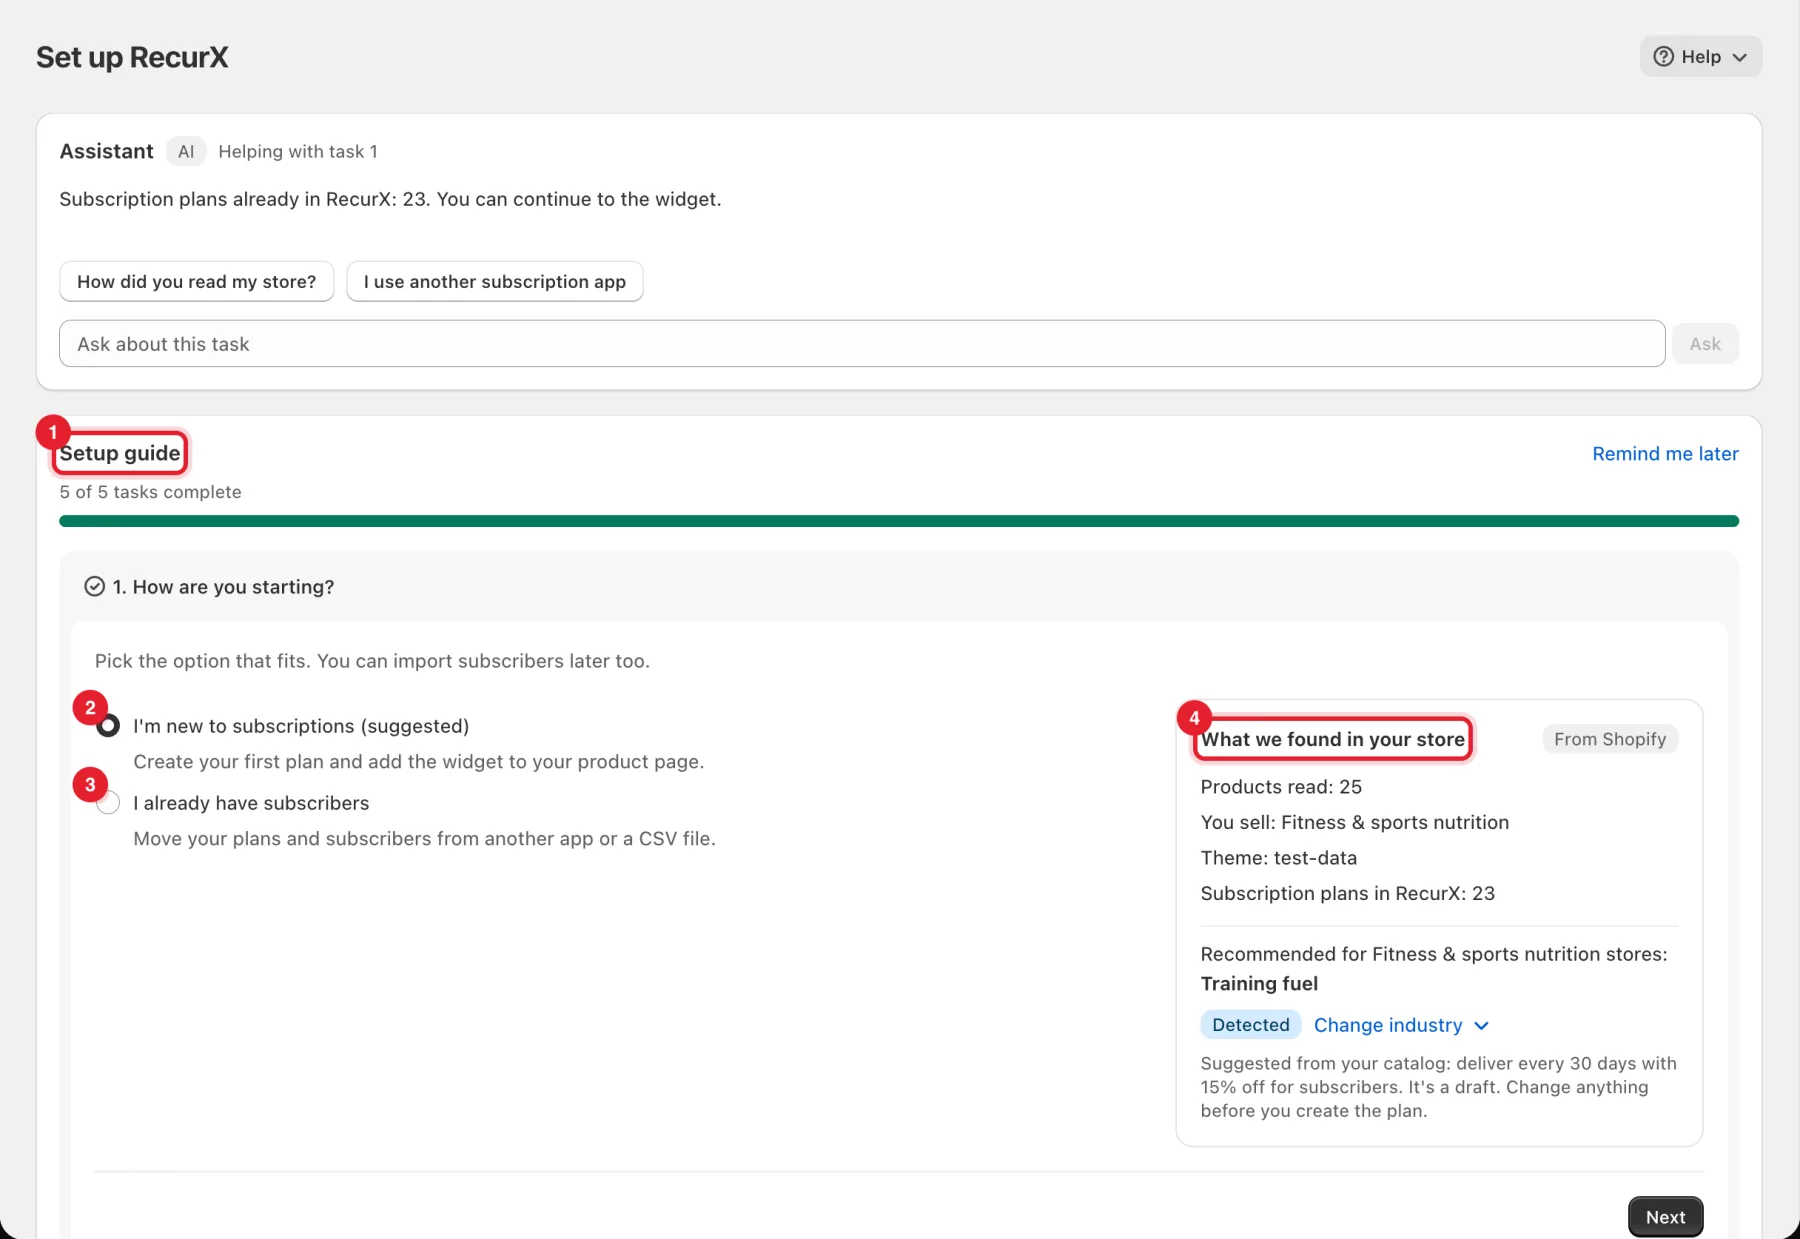
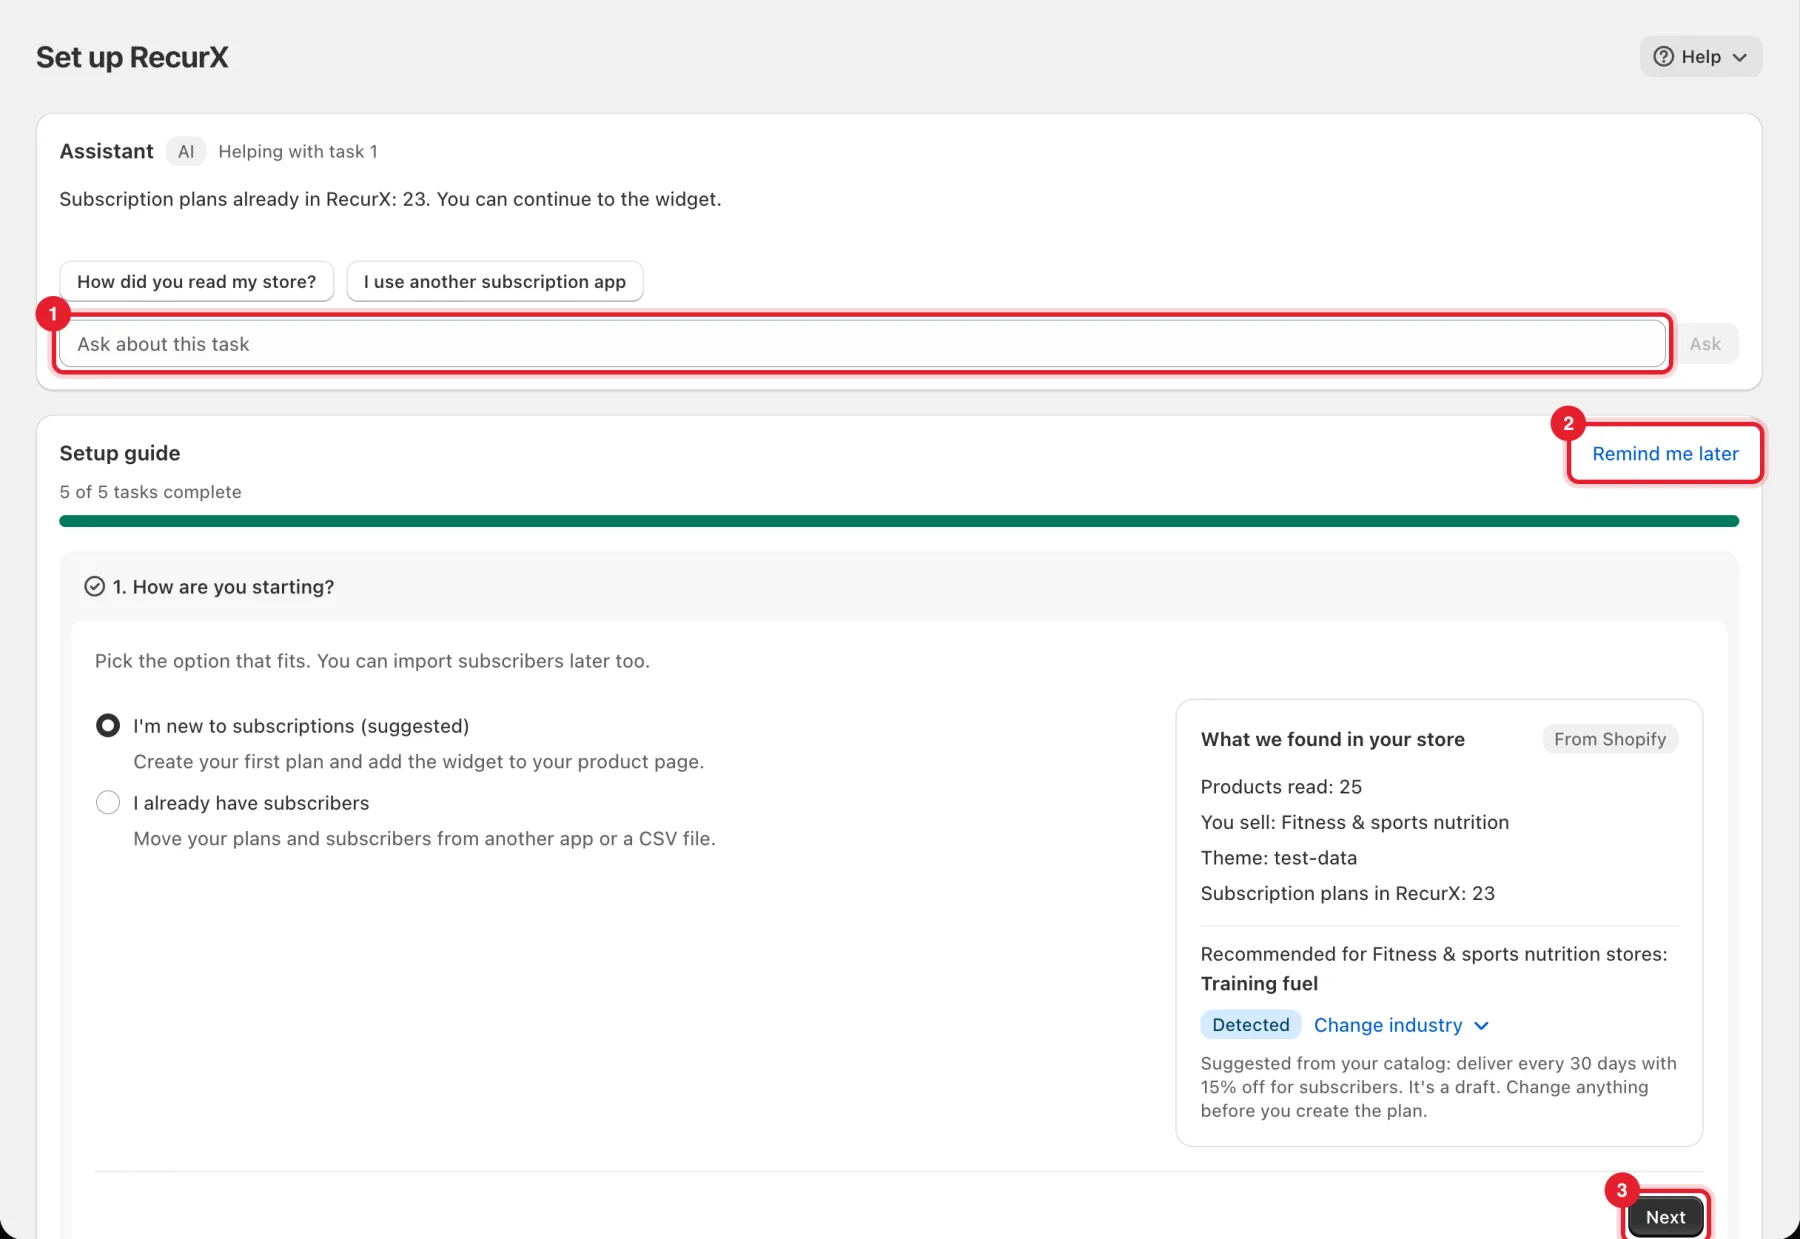
- Setup guide shows your progress, for example 5 of 5 tasks complete.
- Choose I'm new to subscriptions (suggested) to create your first plan and add the widget to your product page.
- Or choose I already have subscribers to move your plans and subscribers from another app or a CSV file. See Migrate from another app.
- What we found in your store shows what RecurX read from Shopify: products read, what you sell, your theme and your plans. It also shows the widget design recommended for your industry and a suggested delivery schedule and discount. Click Change industry if it guessed wrong.
Click Next.
Note: Nothing appears on your storefront until you switch the widget on in task 4.
Step 3: Build your first plan
- Products: RecurX suggests products. Click Select products to change them, or the × next to a product to remove it. Each product shows what subscribers pay.
- Deliver every: pick a quick option such as Every month, or enter a number and choose Week, Month or Year.
- Subscriber discount: pick a quick option such as 15% off, or choose from the list.
Check the line Shoppers see: at the bottom, then click Create plan and continue.
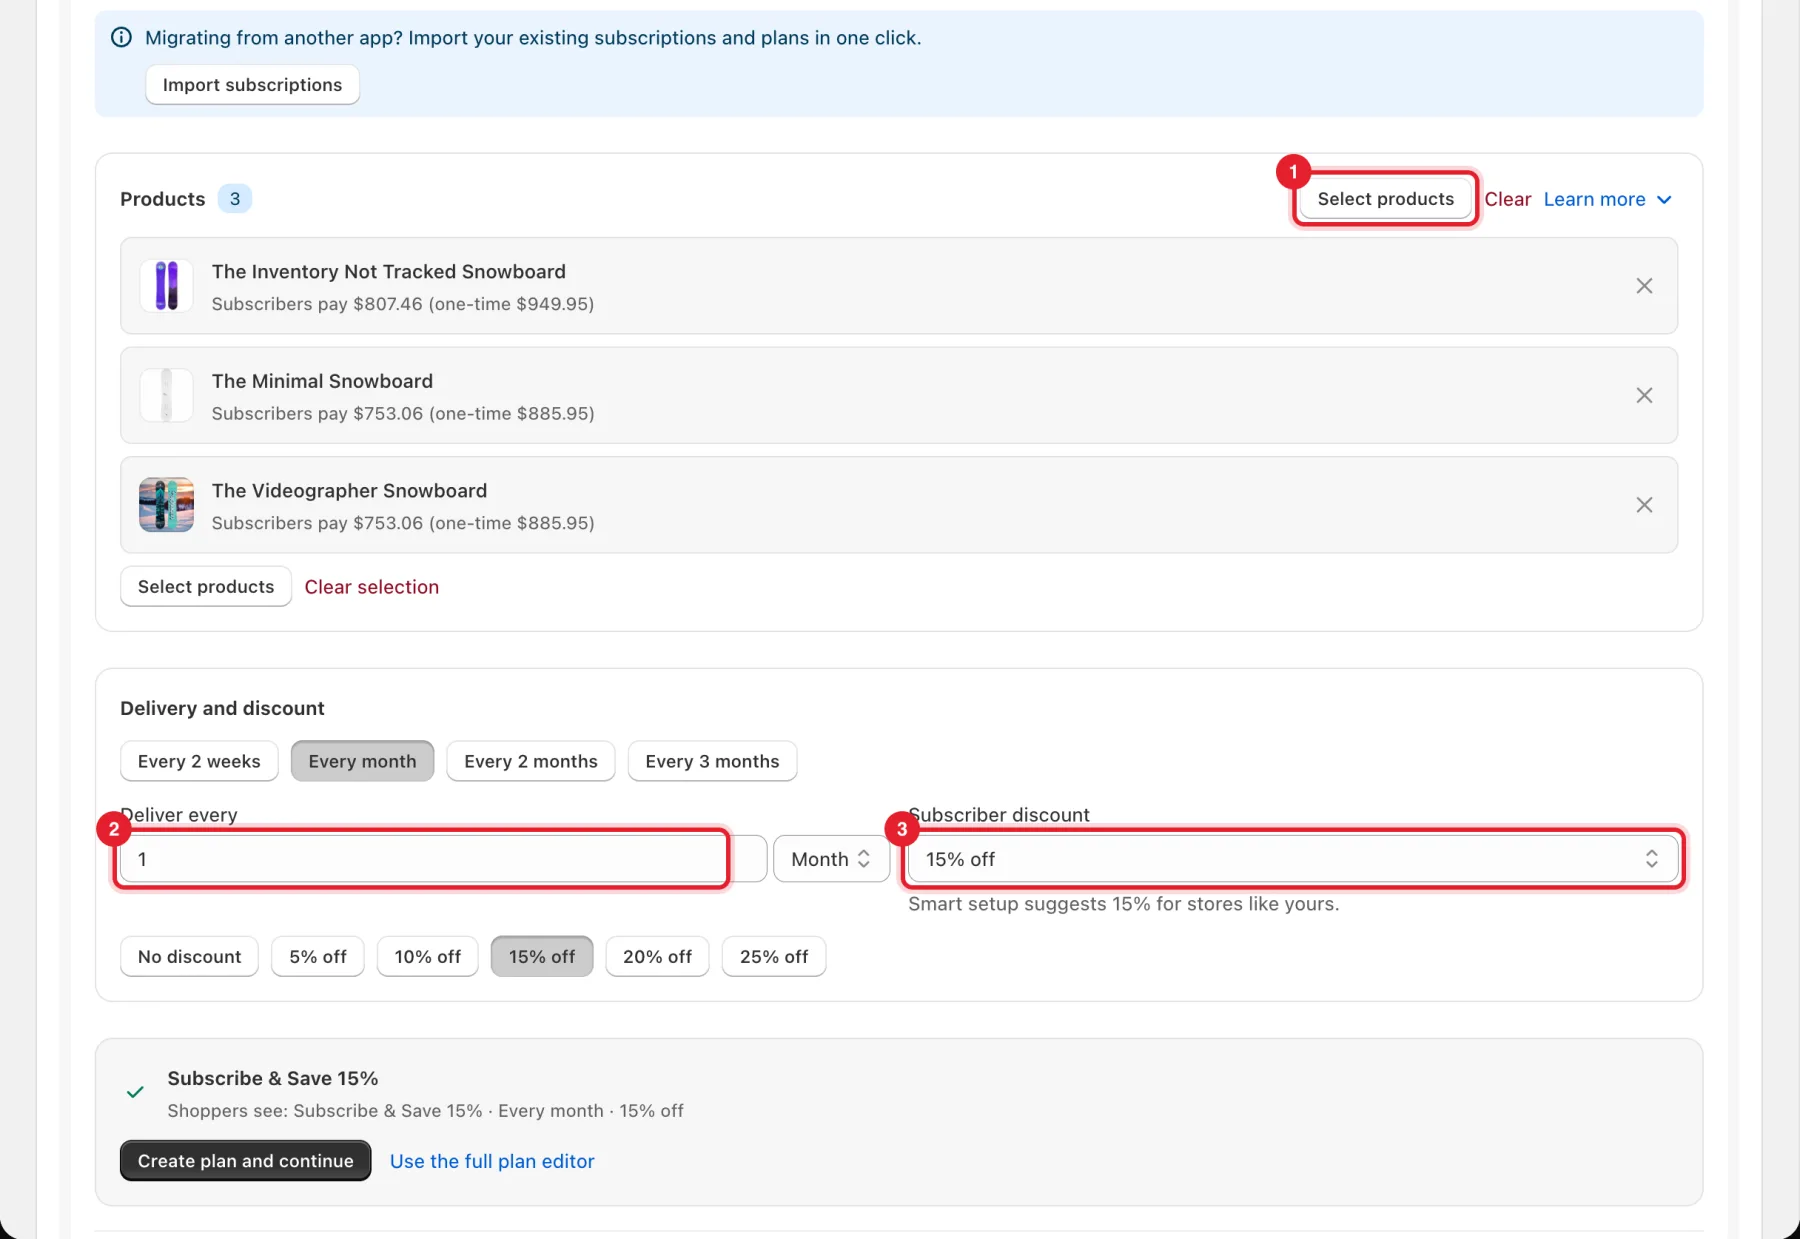
Tip: Need prepaid billing, several delivery options or a trial? Click Use the full plan editor and follow Create a subscription plan. If you're moving from another app, click Import subscriptions.
Step 4: Choose widget
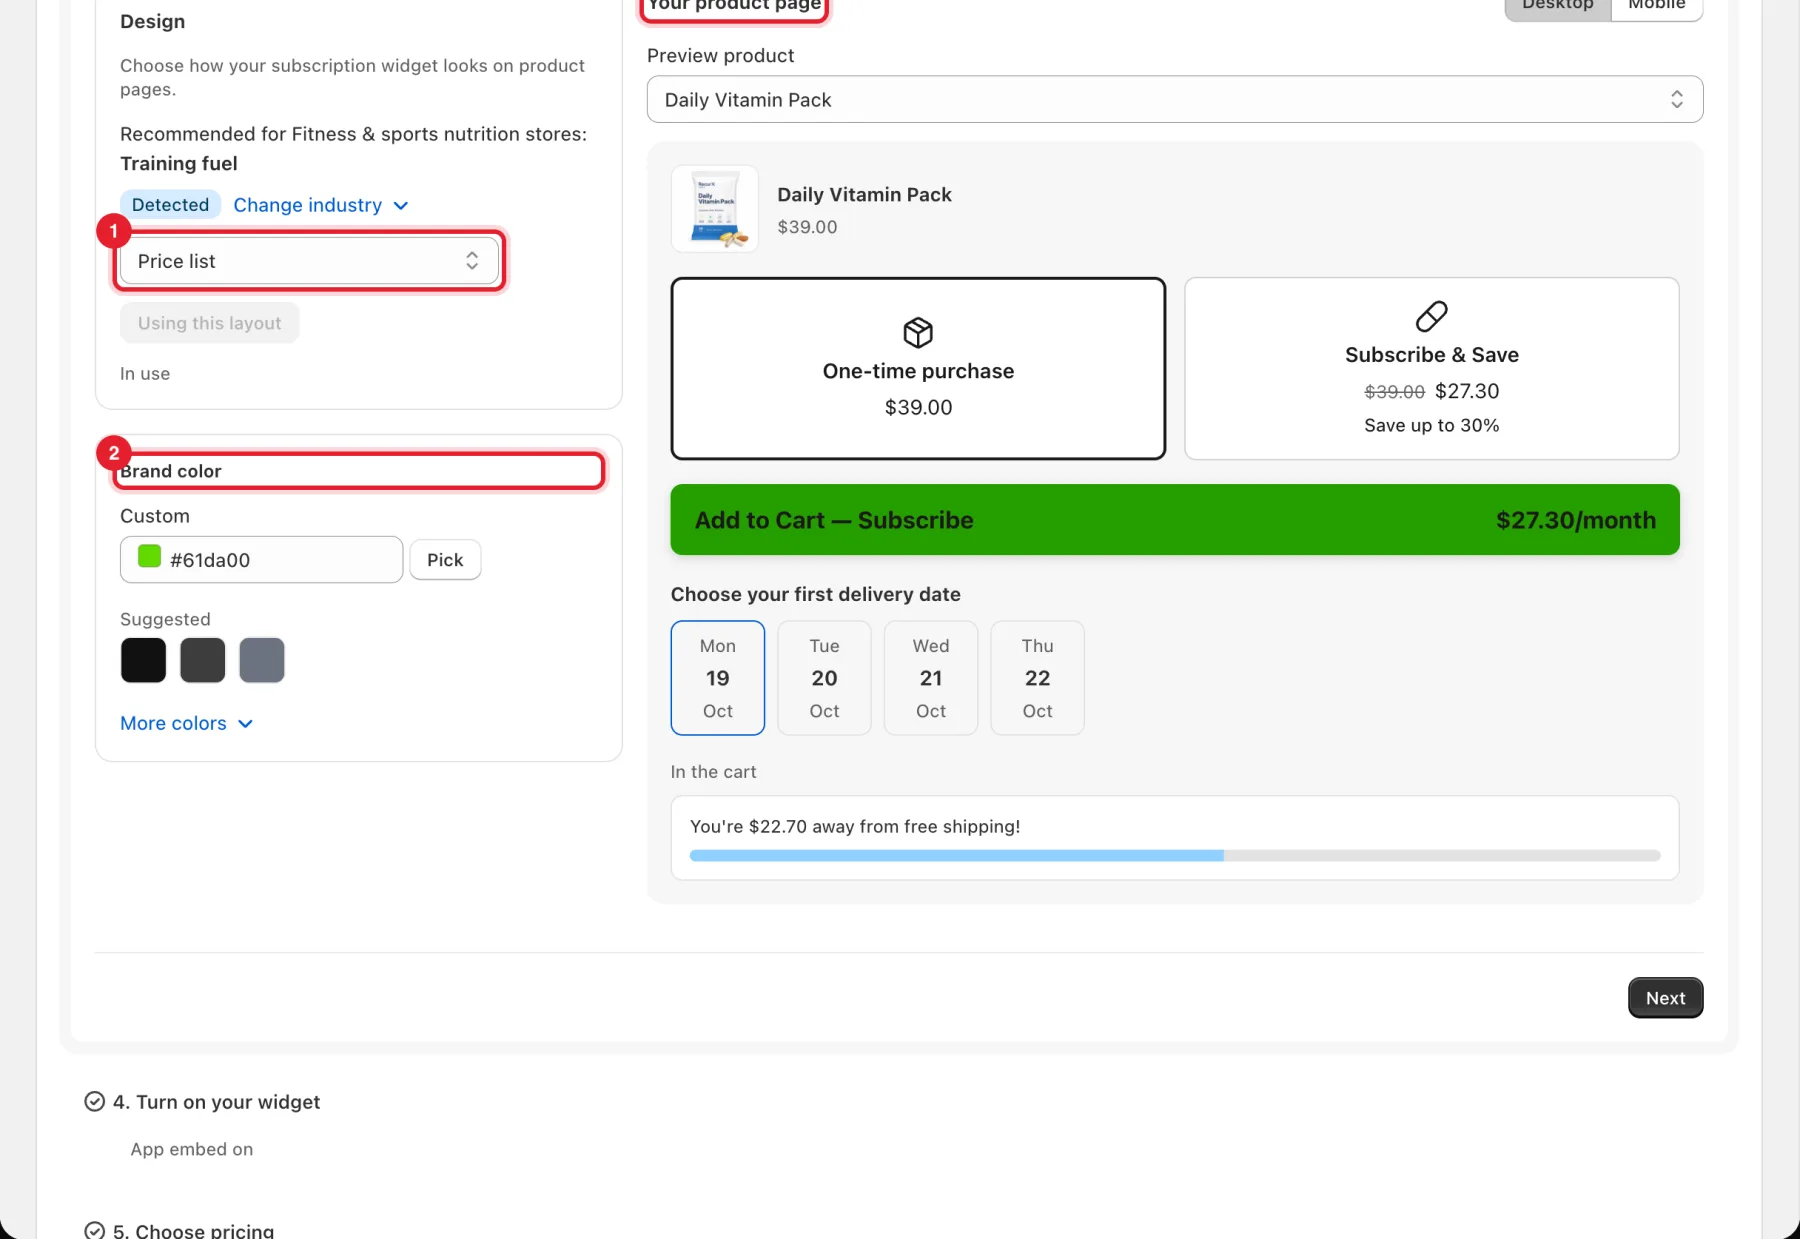
- Design: choose a layout for your subscription widget. The design recommended for your industry is marked.
- Brand color: keep your current color, pick a suggested one, or enter your own.
- Your product page previews the widget on one of your products. Switch between Desktop and Mobile, and pick another Preview product.
Click Use this design to keep a layout, then Next.
Step 5: Turn on your widget
- 1. Turn on the app embed: click Turn on app embed. Your theme editor opens with the RecurX embed already switched on. Click Save there, then come back. Once it's on, the button reads Open theme editor.
- Click Check again if the badge doesn't show On yet.
- 2. Place the widget on your product page: with the app embed on, the widget appears above the Add to cart button. To choose the exact spot, click Place the widget block. View on online store opens a product page.
- 3. Checkout and customer accounts lists the other blocks, such as the thank-you page and the customer account subscriptions page, with Show me how for each.
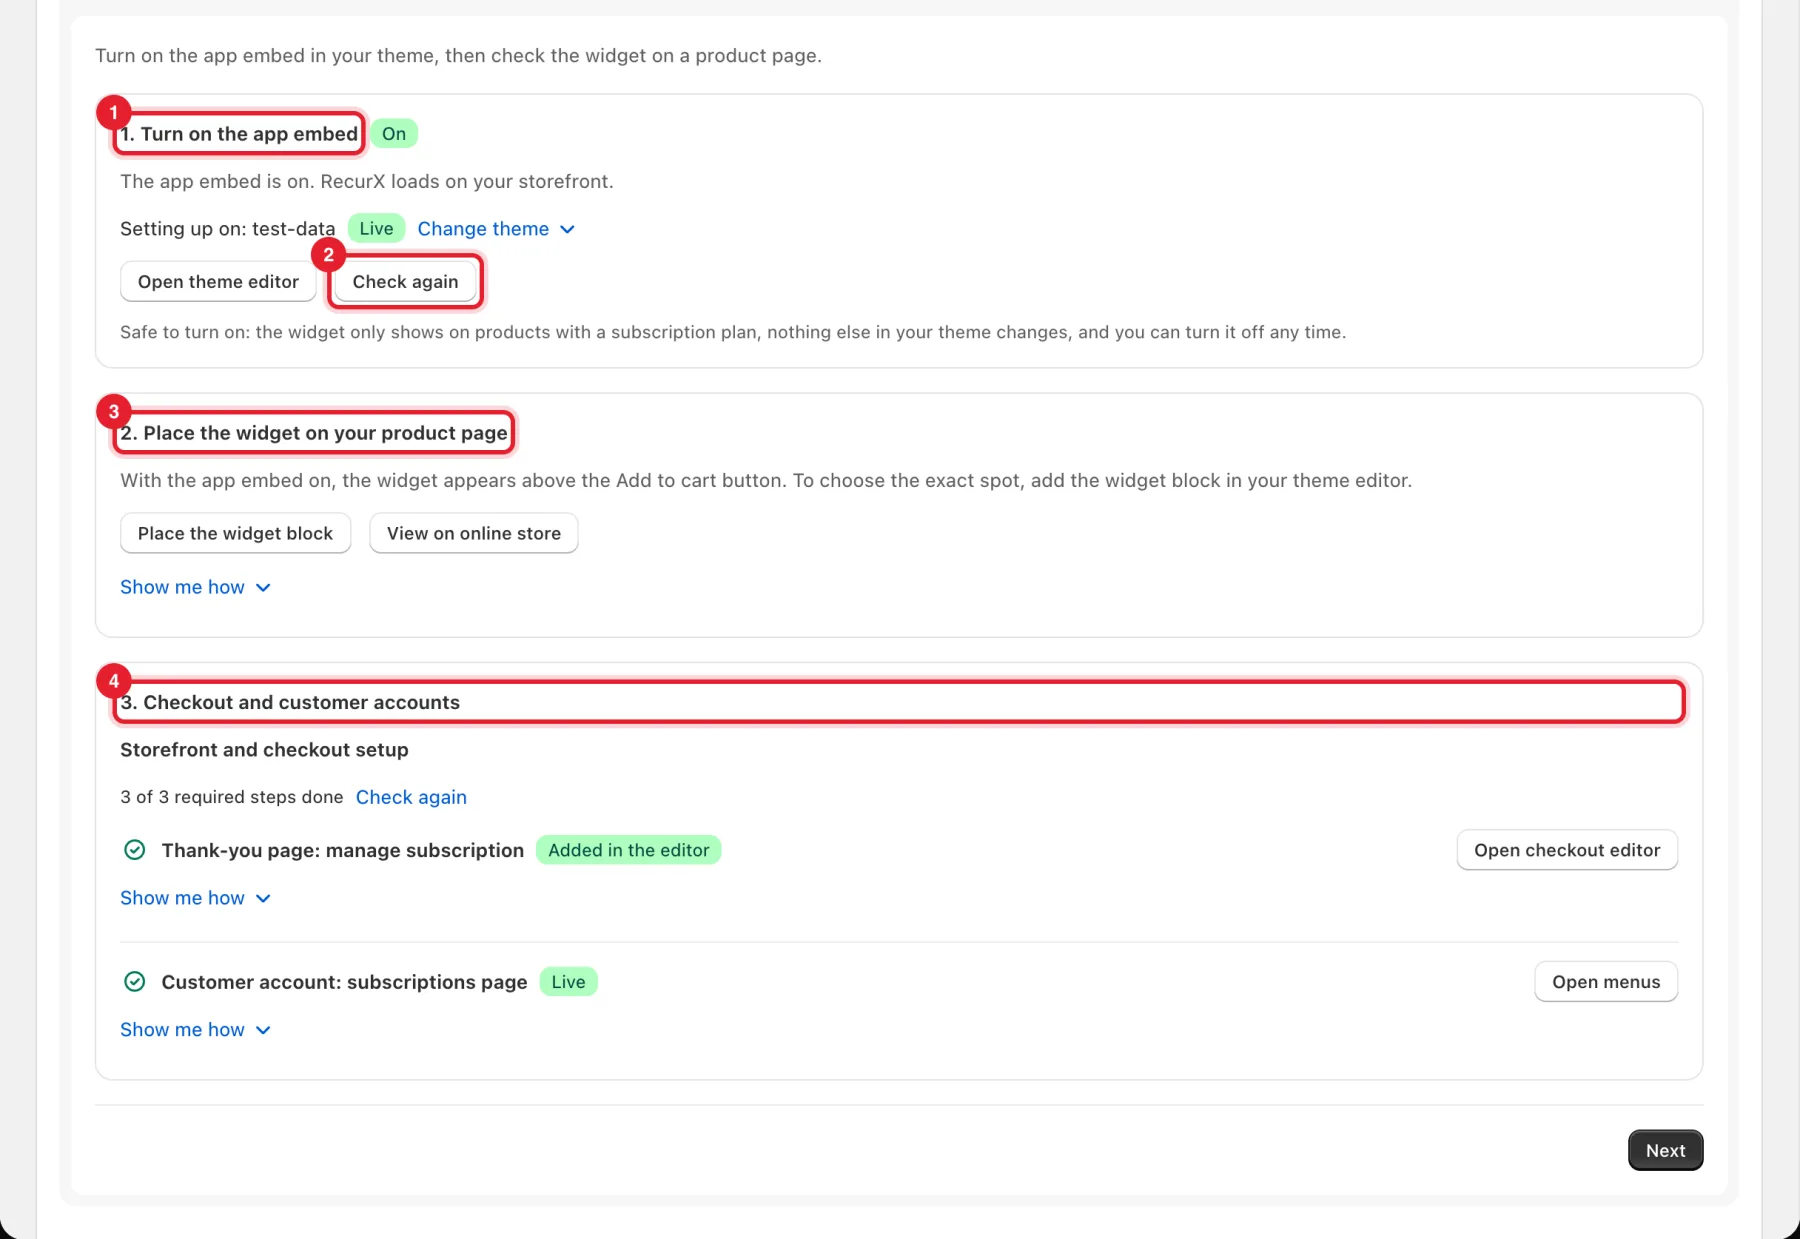
Note: It's safe to turn on. The widget only shows on products with a subscription plan, nothing else in your theme changes, and you can turn it off any time. More detail: Onboarding checklist.
Step 6: Choose pricing
- Pick Monthly or Yearly.
- Click the button on Basic ($29/month).
- Or click the button on Pro ($49/month).
Shopify's plan page opens. Review the price, any free trial and your first charge date, then approve it there.
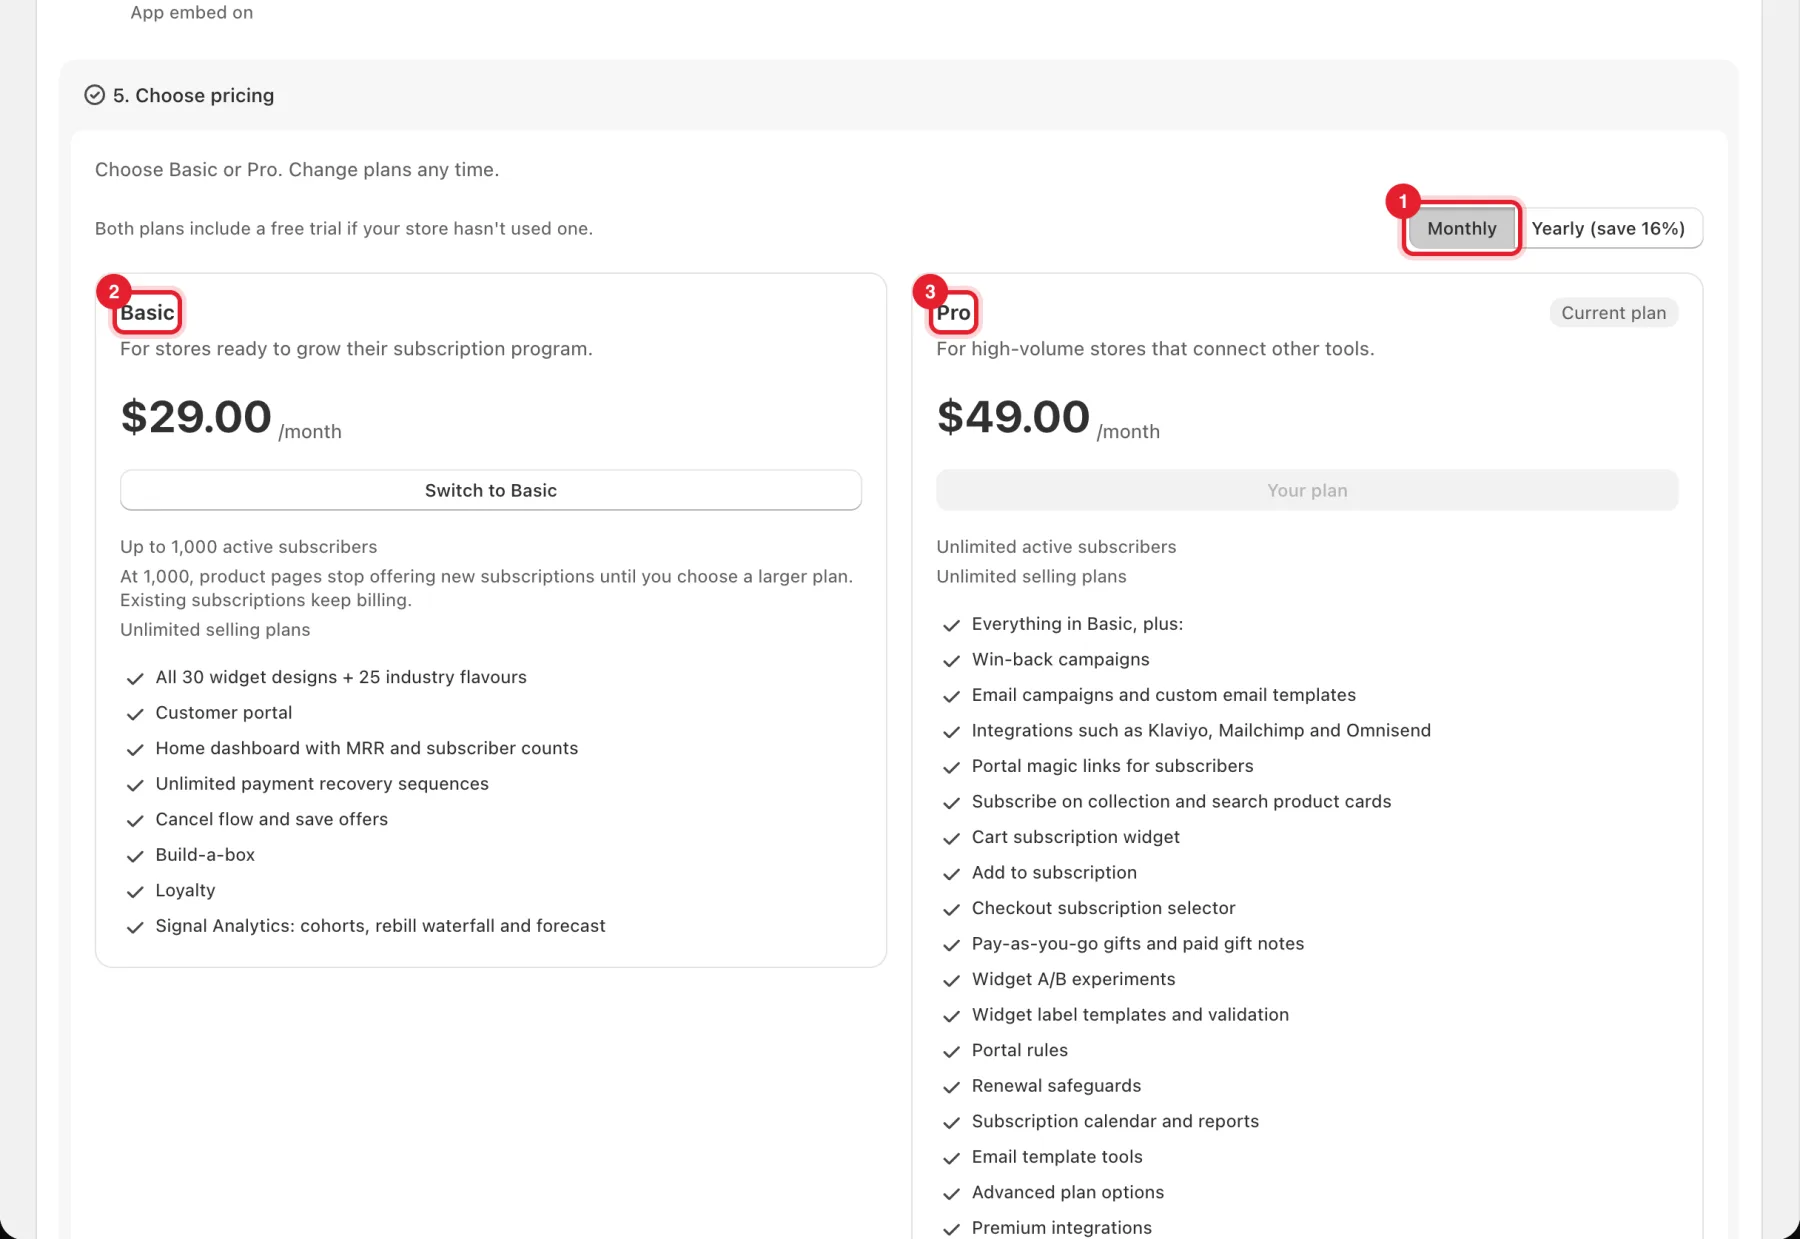
Note: Both plans include a free trial if your store hasn't used one. Once you're on a plan, its card says Current plan. Plan details: RecurX billing & plan management.
Click Go to Home when every task is done (if some are still open, the button reads Back to Home).
Step 7: Get help or finish later
- The Assistant at the top answers questions about the task you're on. Tap a suggested question or type in Ask about this task.
- Remind me later (on every task except the last) closes the guide and takes you to Home. Reopen it any time from App settings → Setup guide.
- Next moves to the next task. On a task you haven't finished, the button reads Skip for now. You can also click any task title to jump to it.
Good to know
- Can I skip the guide? Yes. Click Remind me later. Everything in it can be done from the rest of the app.
- Your plan is live on the products you chose. The widget shows it on those product pages once the app embed is on.
- Test the full customer path: Quick start: launch your first subscription.
- For a tour of each area of the app, see What is RecurX and how does it work?