
Every email RecurX sends to your subscribers has a template you can edit: confirmations, renewal reminders, payment recovery, win-back, loyalty and referral emails. This guide shows how to find a template, change its wording, check the preview, send yourself a test and set your branding. Editing one template takes about 5 minutes.
Who it's for: stores that want subscription emails in their own words and brand. Custom email templates are part of Whisper Campaigns on the Pro plan ($49/month), and so are the template tools (copy to me, test sends, CSV import and export). See RecurX billing. To send from your own address, also connect your email provider.
Step 1: Open Templates
- In your Shopify admin, open Apps → RecurX Subscriptions and click Campaigns in the sidebar.
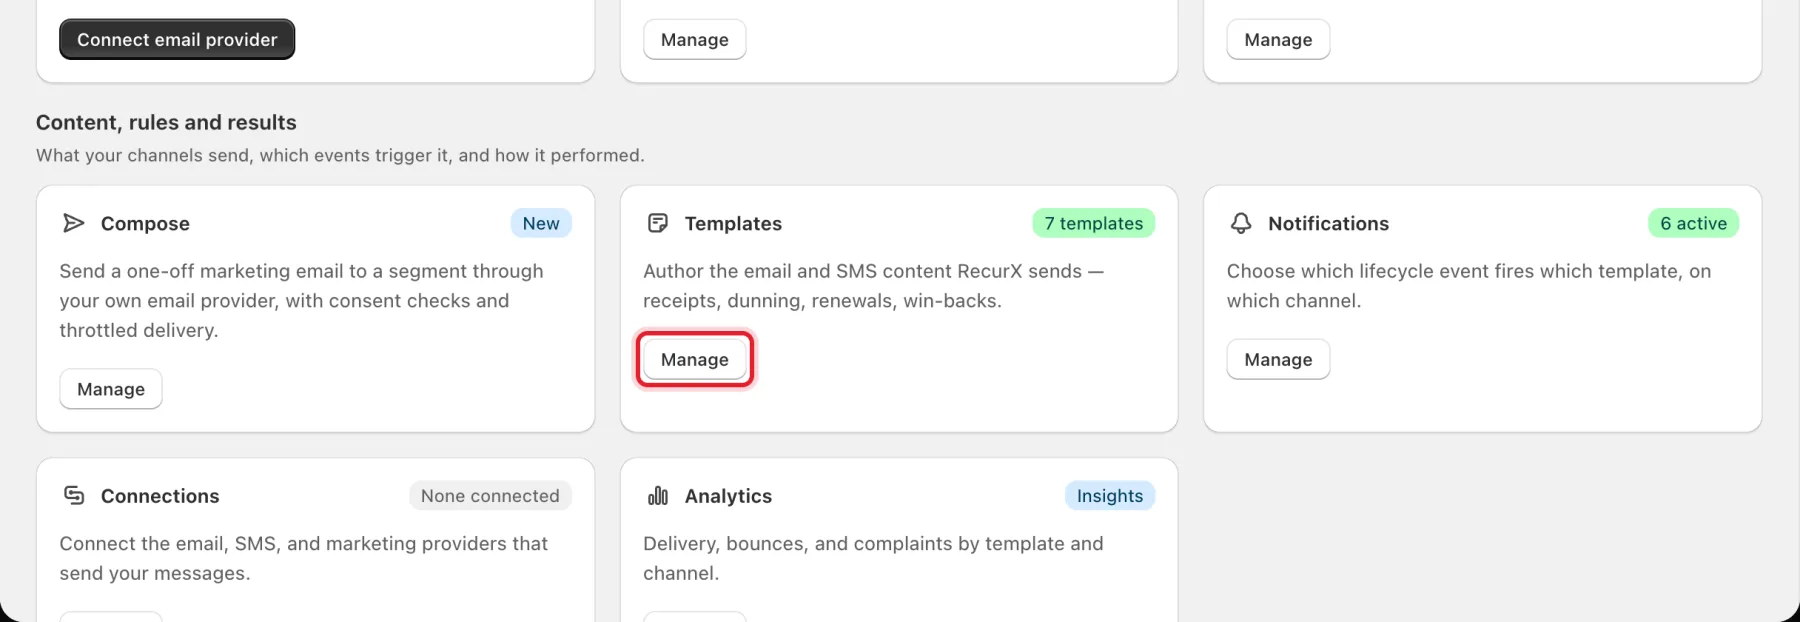
- On the Templates card, click Manage.
Step 2: Find the template
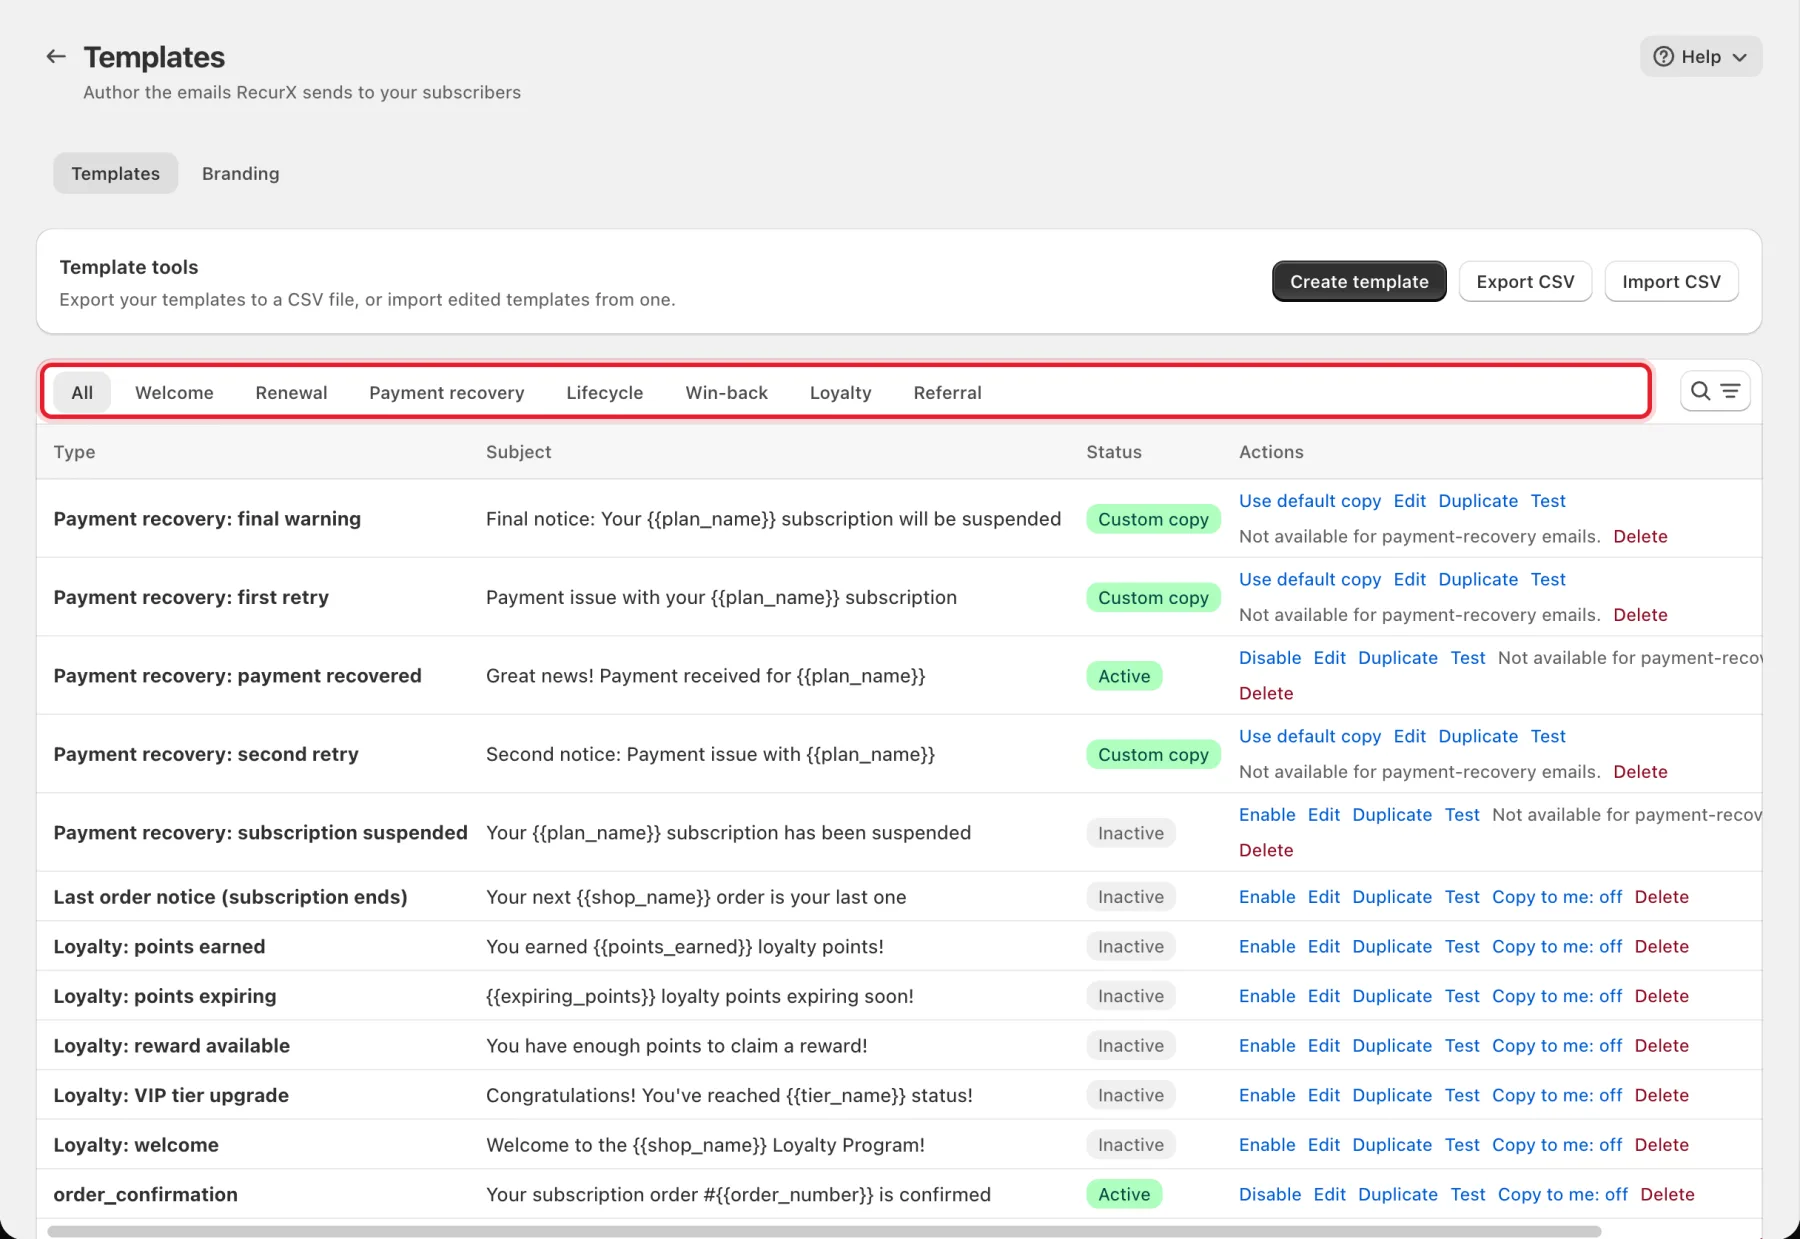
The Templates tab lists your templates with their Type, Subject and Status. Use the tabs to filter by group: All, Welcome, Renewal, Payment recovery, Lifecycle, Win-back, Loyalty and Referral. Or use the search icon to search by name or subject.
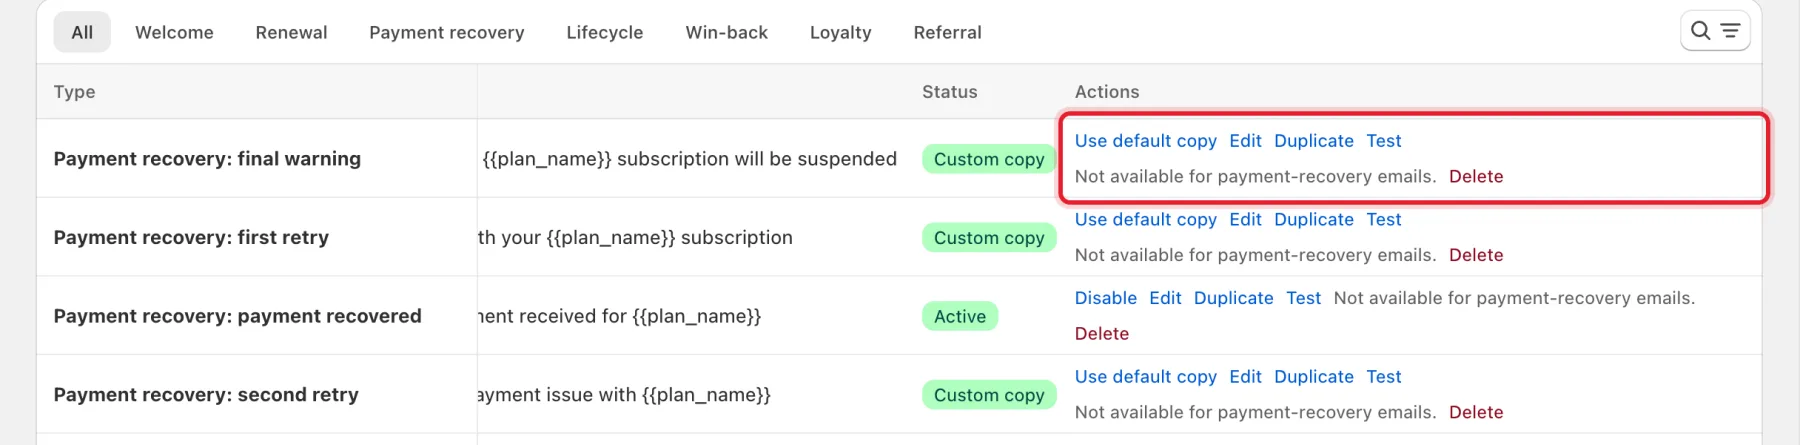
The Status column tells you what happens today:
- Custom copy / Default copy: a required email, for example a payment retry. It is always sent. The status says whether customers get your wording or RecurX's built-in wording.
- Active / Inactive: an optional email. Inactive means it isn't sent.
Step 3: Know the row actions
Each row has these actions:
- Use default copy / Use custom copy (required emails), or Enable / Disable (optional emails): switch the template without opening it.
- Edit: open the editor.
- Duplicate: make a copy to work on.
- Test: send a test version (Step 7).
- Copy to me: off / Copy to me: on: send yourself a copy of every email this template sends. It's not available on emails that carry the customer's private links, or on payment-recovery emails.
- Delete: delete the template after confirming.
Step 4: Edit the subject and body
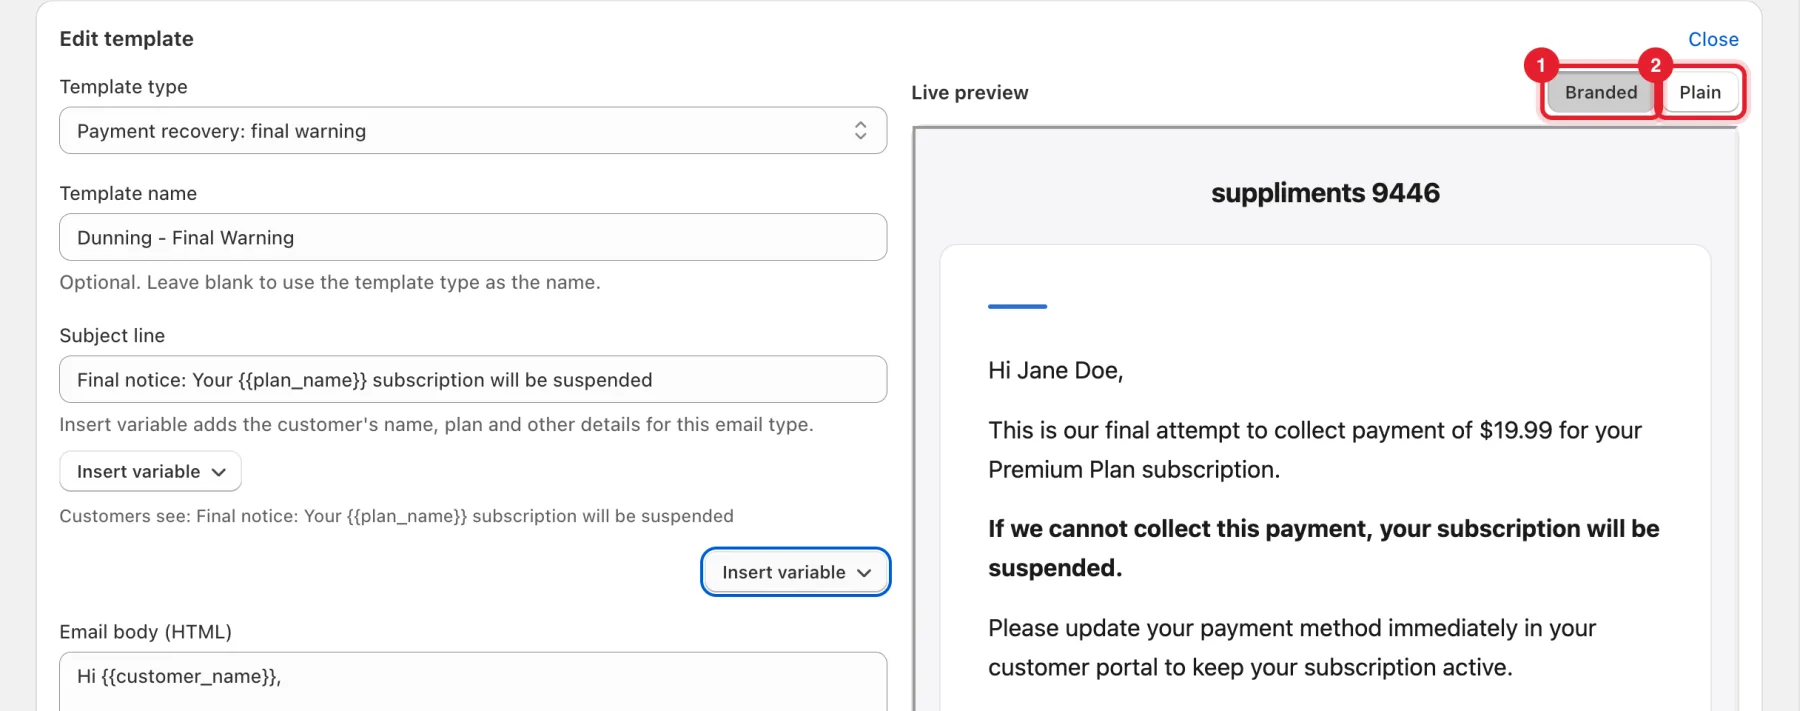
Click Edit. The Edit template card opens above the list, with the Live preview on the right.
- Subject line: what customers see in their inbox. It's required. The line under it shows Customers see: with your subject.
- Email body (HTML): the body of the email in HTML.
Template type sets which email this is. Template name is optional, and defaults to the template type.
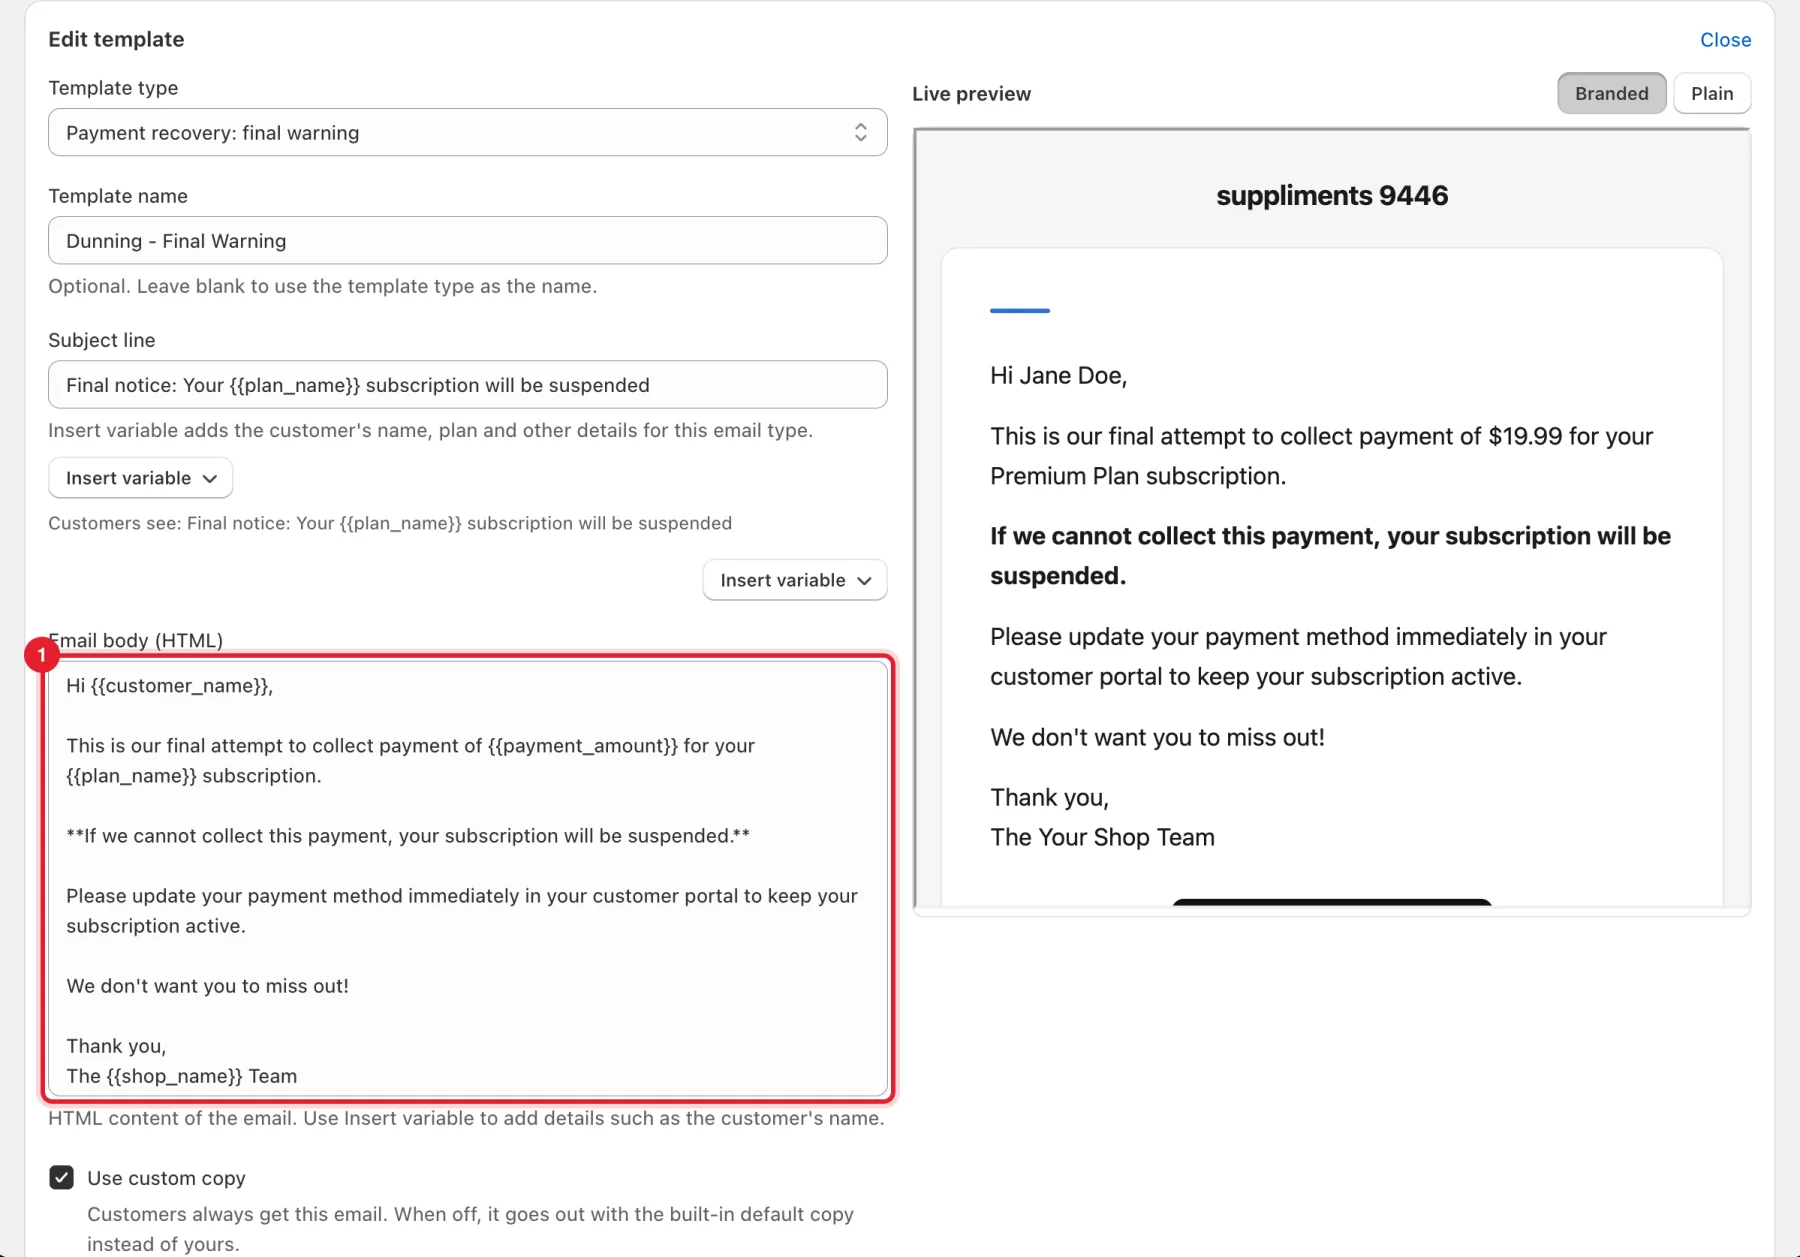
Note: The editor is a plain HTML field, not a drag-and-drop builder. Your logo, colors and button style come from the Branding tab (Step 8), so you only write the message itself.
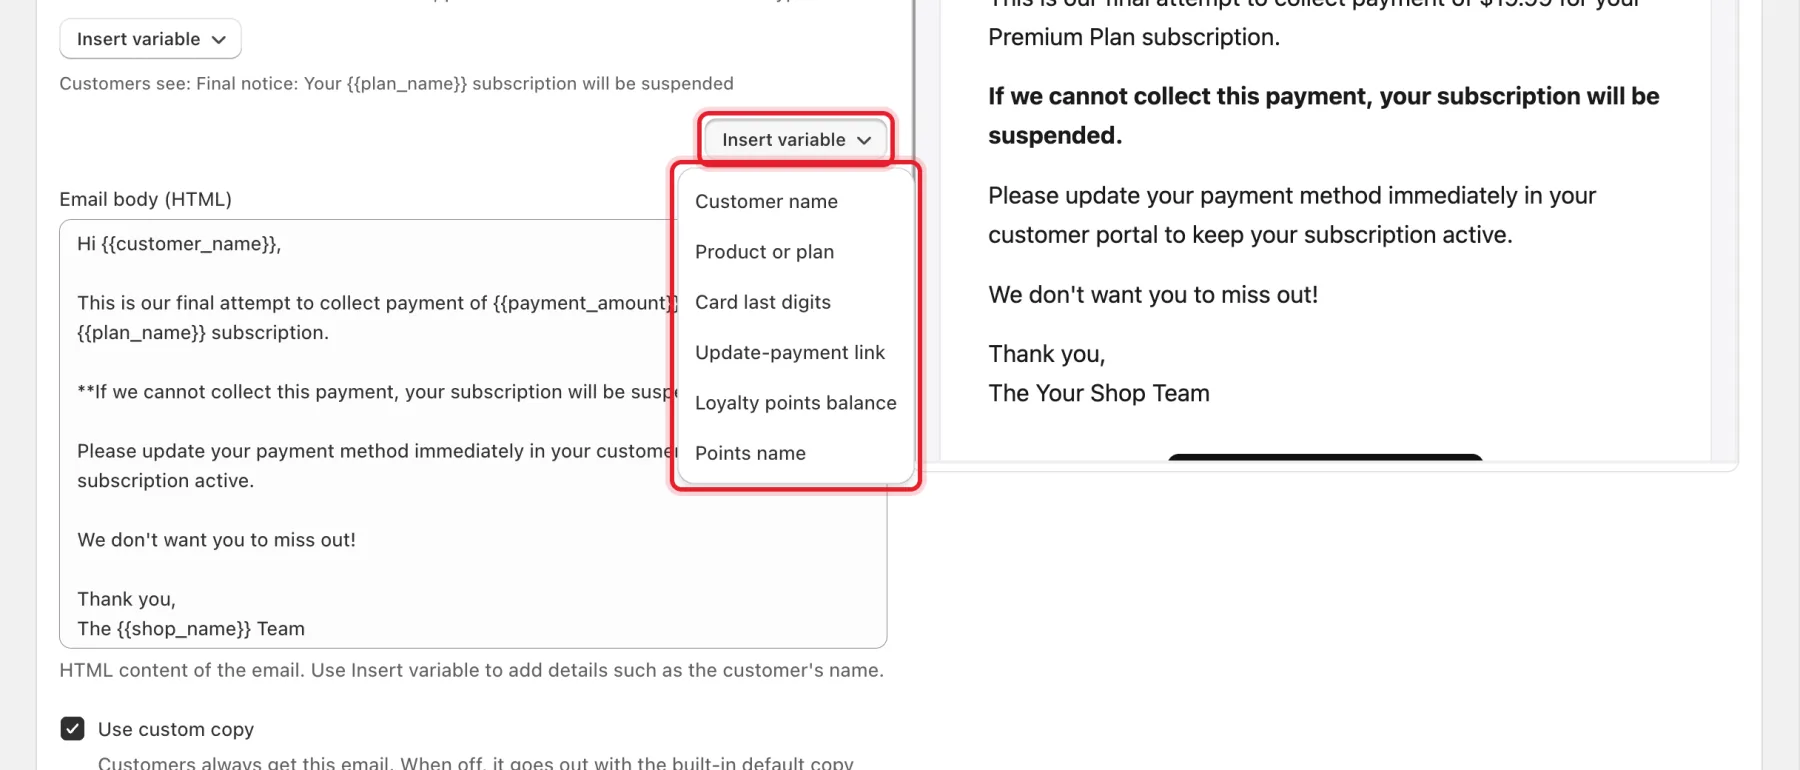
Step 5: Insert variables
Click Insert variable to add a detail such as the customer's name, plan or update-payment link at the cursor, for example {{customer_name}}. The subject line and the body each have their own Insert variable button. The list only shows the variables that work for this template type.
Step 6: Check the preview and save
- The Live preview updates as you type. Click Branded to see the full email with your logo and colors.
- Click Plain to see just your HTML with sample data.
Below the body, the checkbox depends on the email:
- Use custom copy (required emails): when it's off, customers still get this email, with the built-in default copy instead of yours.
- Send this email (optional emails): when it's off, customers don't get this email.
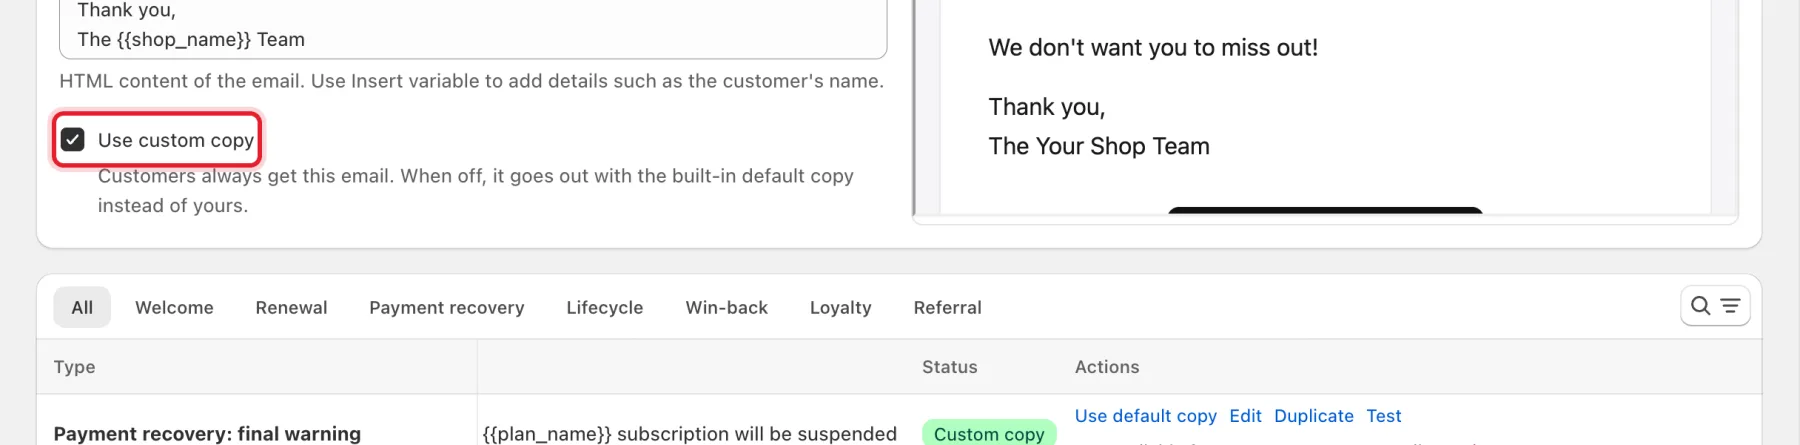
Click Save in the bar at the top of the page. To leave without saving, click Discard.
Step 7: Send yourself a test
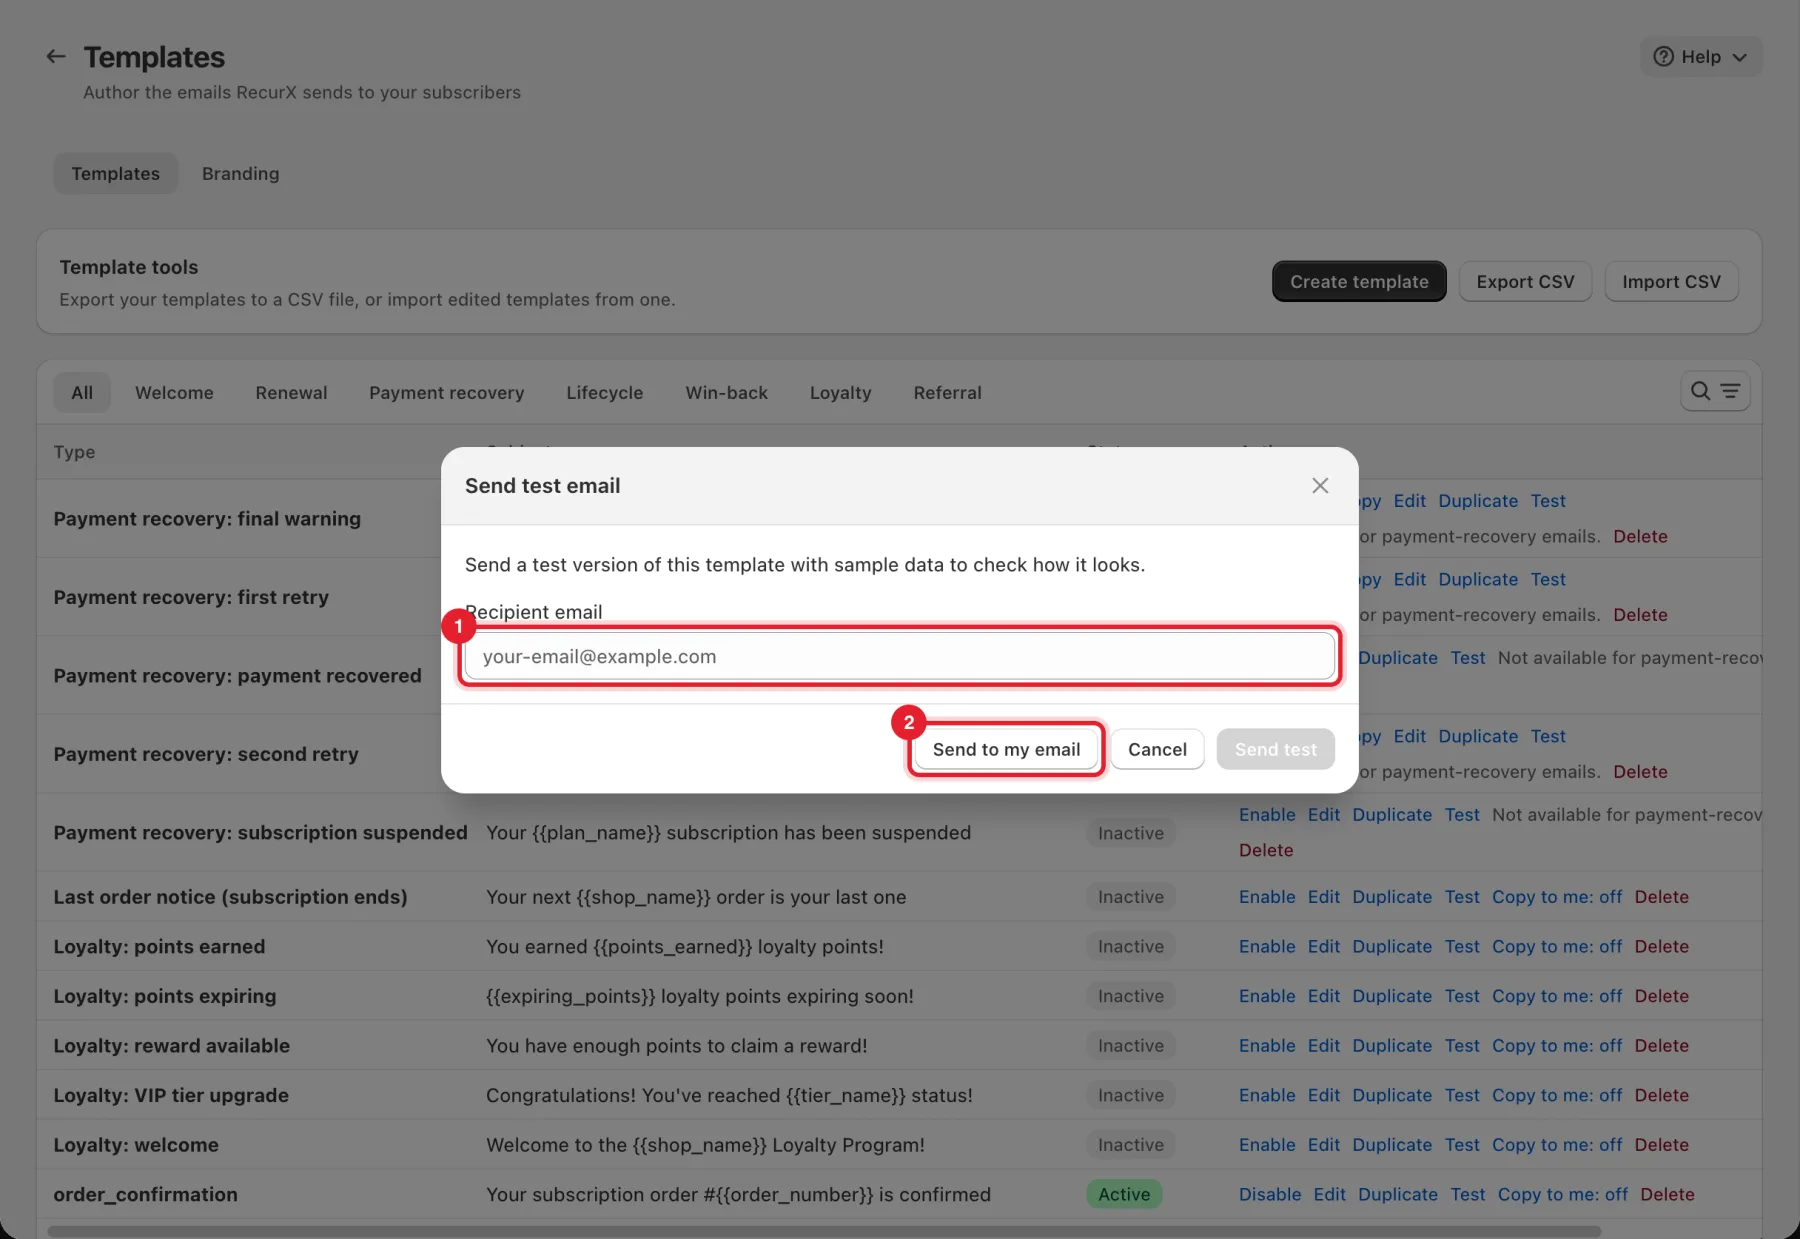
On the template's row, click Test. In Send test email:
- Enter an address in Recipient email and click Send test.
- Or click Send to my email to send it to your Notification email (set under Campaigns → Notification rules). If that's empty, it goes to your Shopify store contact email.
The test uses sample data.
Step 8: Set your branding
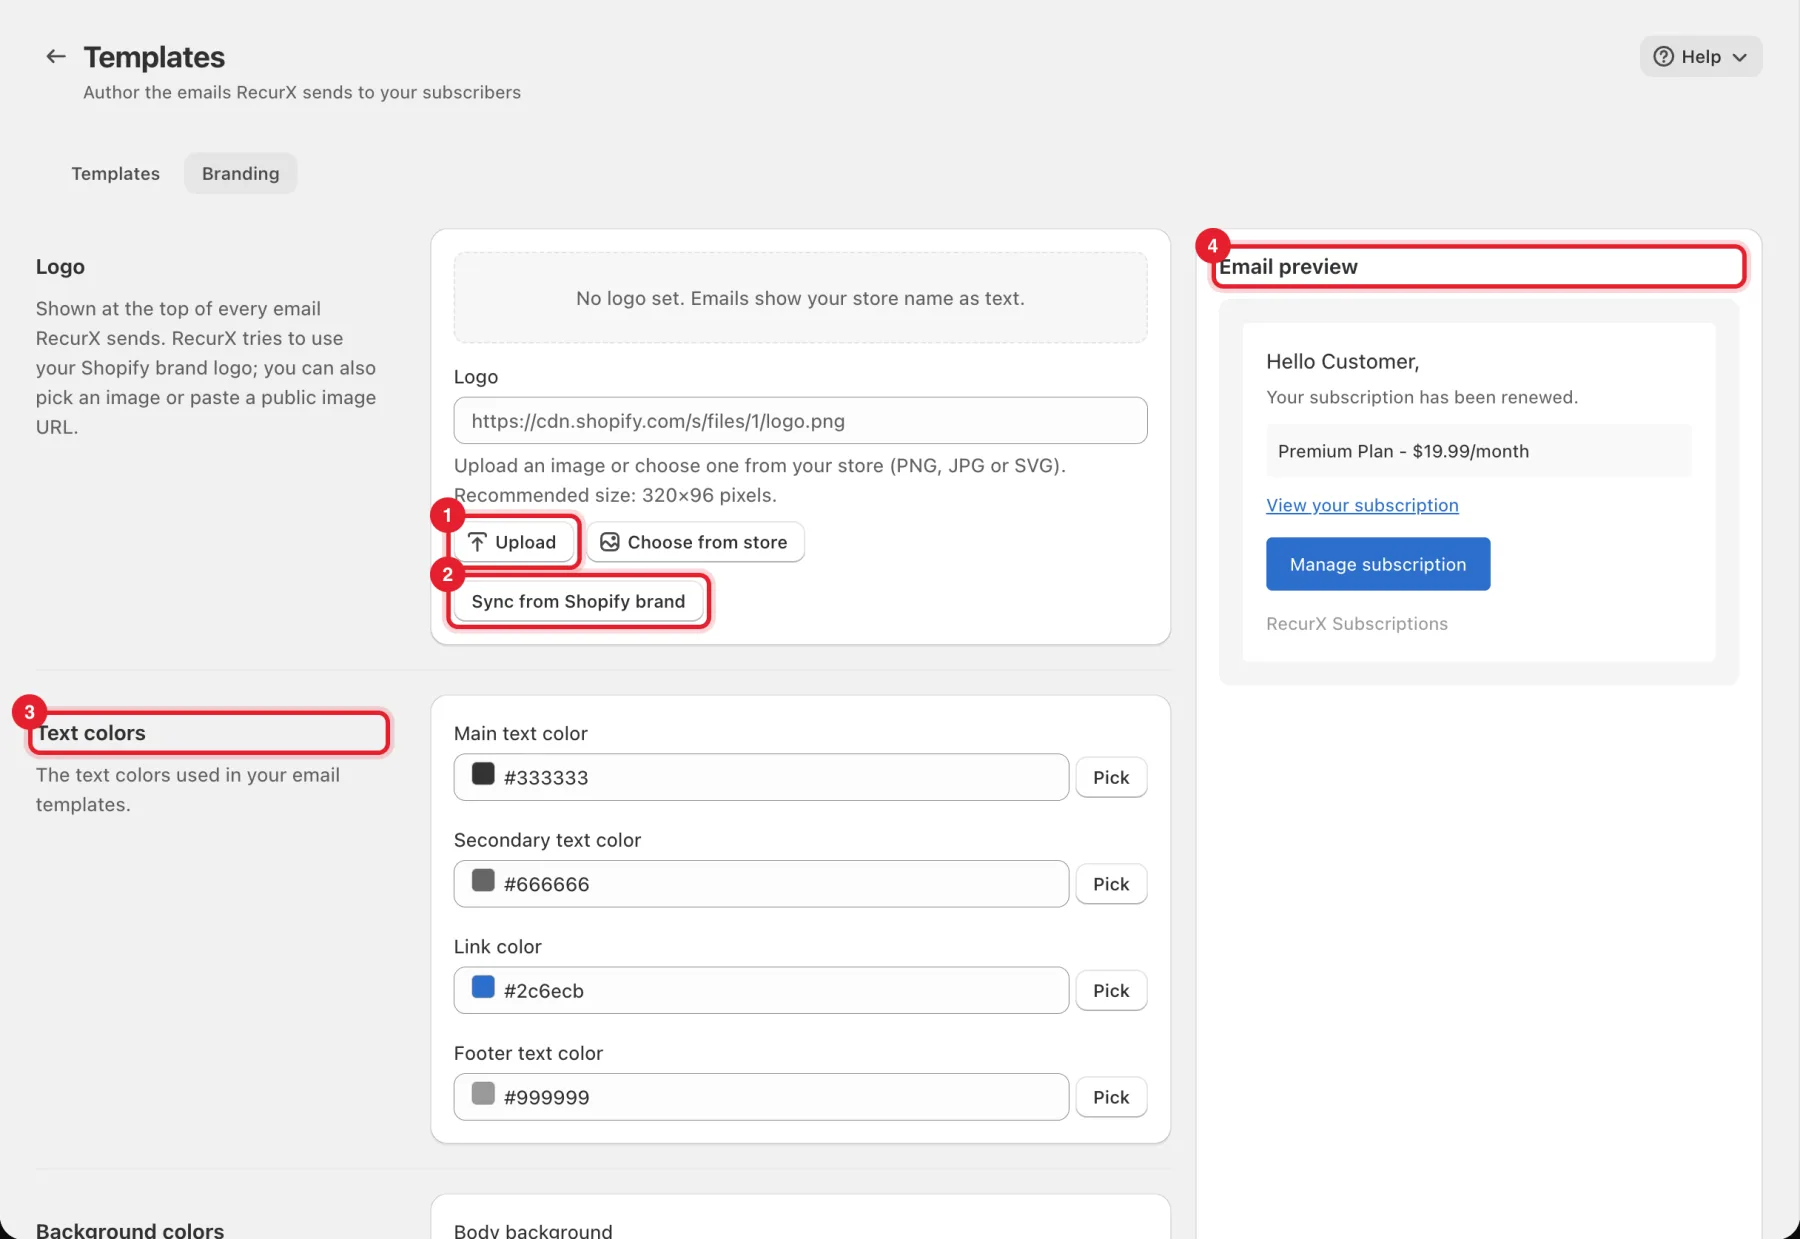
Open the Branding tab. Every template uses these settings, and the Email preview on the right shows the result.
- Logo: click Upload, or Choose from store, to pick an image (PNG, JPG or SVG; 320×96 pixels recommended). You can also paste a public image URL in Logo.
- Or click Sync from Shopify brand to use your Shopify brand logo. With no logo, emails show your store name as text.
- Text colors: Main text color, Secondary text color, Link color and Footer text color.
- Email preview shows the result.
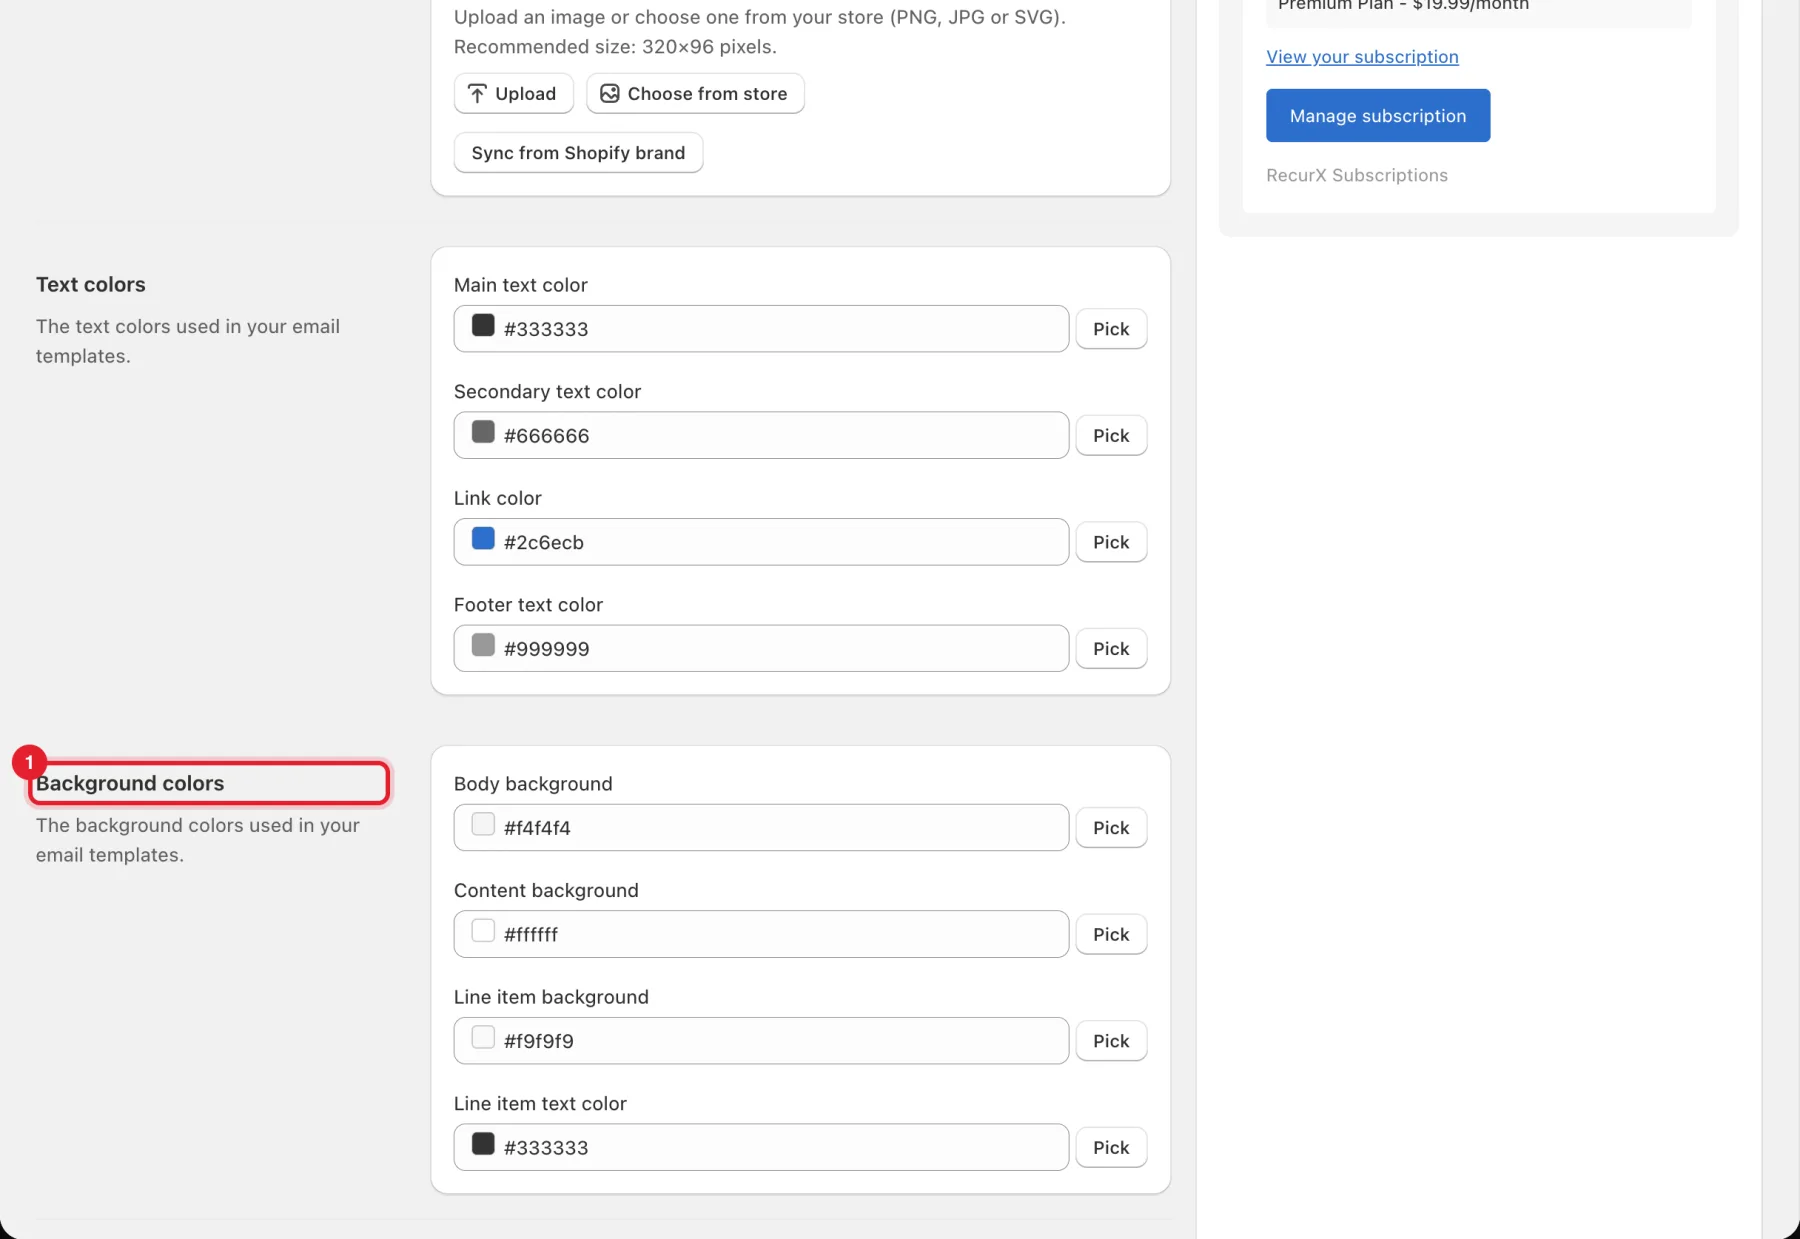
Further down:
- Background colors: Body background, Content background, Line item background and Line item text color.
- Button style: Button background and Button text color.
Type a color code or click Pick. Then click Save in the bar at the top of the page.
Step 9: Create, export or import templates (optional)
Under Template tools at the top of the Templates tab:
- Create template adds a template for a type you don't have yet.
- Export CSV downloads all your templates.
- Import CSV uploads a CSV exported from this page (up to 1 MB and 200 templates). Templates are matched by type and replaced. Payment-retry (dunning) templates are never changed by an import.

Good to know
- The Templates page is for email only. SMS and WhatsApp wording is set on the Rescue Sequences rule and the win-back campaign. See Send SMS and WhatsApp messages to subscribers.
- To send templates in other languages, add translated copy on the Translations page. See Translations.
Troubleshooting
- "Add your email under Campaigns › Notification rules to receive test emails.": set a Notification email first, or type a recipient.
- "You've sent several tests. Try again in … seconds.": wait, then send again.
- "This file can't be imported. Nothing was changed.": the CSV has errors. Each one is listed by row and column.